EasyManua.ls Logo

Atlantic Furniture NANTUCKET END TABLE CHARGING STATION User Manual

Atlantic Furniture NANTUCKET END TABLE CHARGING STATION
3 pages
To Next Page IconTo Next Page
Page #1 background imageLoading...
Page #1 background image
Page 1 of 3
ASSEMBLY INSTRUCTIONS
Before assembling your end table, please read through these
instructions carefully and familiarize yourself with the different parts.
NANTUCKET END TABLE CHARGING STATION
A E
D
B
F
C
Flat washer - 4 pcs Wooden dowel 3/8 X 1 1/4” - 4 pcs
Wooden dowel 1/4” X 1 1/4” - 4 pcs
Spare - 1 pc
Spare - 1 pc
JCB M8 - 4 pcs Wood screw - 8 pcs
Spare - 1 pc
Spare - 2 pcs
Allen wrench - 1 pc
PARTS LIST
01
02
03
04
TOP PANEL 1 PC
4 PCS
2 PCS
1 PC
LEG
SIDE PANEL
LOWER SHELF
01
02
04
03
03
ATTENTION! If you receive a damaged or defective item,
please contact Atlantic Furniture at customerservice@atlanticfurniture.com or 1-800-955-3726
READY
ASSEMBLE
TO
Adult assemblyAdult assembly
NOTE: WE INCLUDE SPARE HARDWARE IN CASE DAMAGE OCCURS DURING ASSEMBLY.
Question and Answer IconNeed help?

Do you have a question about the Atlantic Furniture NANTUCKET END TABLE CHARGING STATION and is the answer not in the manual?

Atlantic Furniture NANTUCKET END TABLE CHARGING STATION Specifications

General IconGeneral
BrandAtlantic Furniture
ModelNANTUCKET END TABLE CHARGING STATION
CategoryIndoor Furnishing
LanguageEnglish

Summary

Nantucket End Table Parts Identification

Parts List Overview

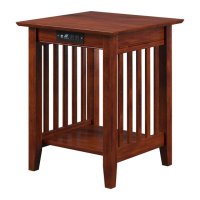
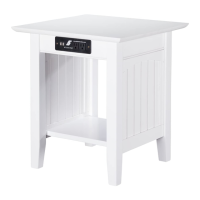
Lists all required furniture pieces including top panel, legs, side panels, and lower shelf for assembly.

Hardware Identification

Details the specific hardware components like washers, screws, and dowels required for assembly.

Nantucket End Table Assembly Process

Step 1: Attach Legs to Top Panel

Secure the legs to the top panel using provided washers and screws.

Step 2: Install Dowels

Insert wooden dowels into the designated holes on side panels and lower shelf.

Step 3: Attach First Side Panel

Connect the initial side panel to the table frame, ensuring alignment.

Step 4: Attach Second Side Panel and Lower Shelf

Attach the second side panel and position the lower shelf into place.

Step 5: Secure Lower Shelf

Fasten the lower shelf to the side panels for structural integrity.

Related product manuals