CIRCUIT DIAGRAM
ELEKTRISCH SCHEMA
SCHEMA DE CIRCUIT
VERDRAHTUNGSPLAN
DIAGRAMA DE CIRCUITOS
KOPPLINGSSCHEMA
DIAGRAMMA DEL CIRCUITO
KRETSSKJEMA
STRØMDIAGRAM
mylyy<°yt
DIAGRAMMA DOS CIRCUÍTOS
SÄHKÖKAAVIO
366
a6
12
219
a0
111
a0
112
a0
113
a0
114
a3
103
a3
103
a3
102
a6
12
to Engine Circuit Diagram
to Engine
Circuit Diagram
a2
1
a0
440
a3
5
51
912
N12
see note
x0 x0 x0 x6
Z54
60Hz
237
238
239
G3
U1
V1
W1
N1
F2
F3
P4
4
6
8
3
5
7
c2
c1
1
2
3
4
>>
>>
>>
>>
EA
52b
23
24
11
7
6
5
4
1
2
11 12
12
a0
a0
b54
b54
a6
N1
a6
124
a0
127
a0
126
a0
125
x54
W1
V1
F1
21
a0
U1
N
X6 Z54
L3
X0
L2
X0
L1
X0
450
a2
12
a6
X2
2L1
d0
2L2
d0
2L3
d0
N
d6
d54
(0) : OPTIONAL EQUIPMENT
LEGEND :
aa = 0.5 mm
2
a = 1 mm
2
b = 1.5 mm
2
c = 2.5 mm
2
d = 4 mm
2
e = 6 mm
2
f = 10 mm
2
g = 16 mm
2
h = 25 mm
2
i = 35 mm
2
j = 50 mm
2
1 = brown
2 = red
3 = orange
4 = yellow
5 = green
6 = blue
7 = purple
8 = grey
9 = white
54 = green/yellow
Wire size:
Colour code:
0 = black
(0)(0)
(0)
REMOTE START
1
2
3
4
X25 X25 X25 X25
a3 a3 a0 a0
330
331
332
333
from
Remote Start module
see
Engine Circuit Diagram
OUTLET SOCKETS
Customer’s installation
Sx: min. 12V dc, 4A
Kx: to be wired between Generator
and Load
coil: max. 240VAC
3A AC11
(0)
Kx
A1
A2
Sx
13
14
AUTOMATIC MAINS FAILURE
6
7
8
X25 X25 X25
a0 a0
446
447
a6
124
a0
127
from AMF module see Engine Circuit Diagram
Customer’s installation
see Circuit Diagram Interconnection Generator-Mains Supply
PC
A1
A2
MC
Fx
A1
A2
REMOTE START
MAINS SUPPLY 3 phase + N + PE
L3L2L1N
PE
N13
U1
9
10
TESTAUTO
PLPNPCMCML3ML2ML1MN
X25
X16X15X15X15X15 X16
X25
a3 a3
448
449
Customer’s install.
Sx: min. 12V dc, 4A
(0)
Sx
S14
13
14
Q1
X1
T13
237
239
238
R11
1
1
1
1
B11
233234
N11
12
79.
3
6. 8
4
5
10
11
(+) (-)
233234
Y11
1210
9
211
211216
212
213
213
212
5
5
12
12
to Engine
Wire harness
DUAL FREQUENCY
205
205206
206
42
1
L3 N
L2
32A
L1
1
2
8
7
5
6
12
11
10
9
4
3
2
4
3
12
11
6
5
8
7
9
10
1
S13
S11
+
-
L1 L2 L3 N PE
5
26A
1
X25
a0
445
X15
X3
X4
3L1
c0
3L2
c0
3L3
c0
4L3
c0
4N
c6 c54
N
c6
c54
L3 N
L3 N
L2
16A
16A
L1
>>
>> >>
Q3
16A
>>
>> >>
Q2
32A
Q4
16A
30mA
>>
Fx
4
26A
1
X25
a0
444
X15
Fx
3
26A
1
X25
a0
443
X15
Fx
2
26A
1
X25
a0
442
1
X25
a6
441
X15
L
B+B-
R5
N
R
QAS 28
QAS 38
40A
50A
60/5A
60/5A
f
f
Q1 T1-3 Wire size
X
QAS 28LV
QAS 38LV
32A
40A
0/50A
0/50A
0-60A
0-60A
T1-3
0-100A
0-100A
g
h
Z
g
g
Note:
The actuator replaces the Fuel stop solenoid valve (mentioned
on the Engine Conrol Circuit diagram).
n
G
R16
1K
3K3
R18
b54
b54
see note
237238
R11
1
1
1
1
B11
233234
N11
ACT
MPU
(+) (-)
233234
Y11
5
5
12
12
to Engine
Wire harness
SINGLE FREQUENCY
205
205206
206
S4
a0
129
a0
128
1
2
6
10
4
8
12
11
9
7
5
3
A
V
P5
Hz
a0
127
a6
124
A
A
P3
P2
P1
141
142
143
153
152
151
a8
a8
a8
a8
a8
a8
Note 1:
3ph higher voltage : connect 2-3 ; 6-7 ; 10-11 ; 4-8-12(N)
3ph lower voltage : connect 1-3 ; 5-7 ; 9-11 ; 2-4-6-8-10-12(N)
n n
T1
T2 T3
9822 0888 21
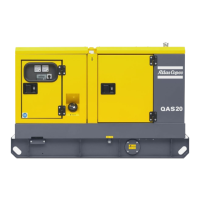
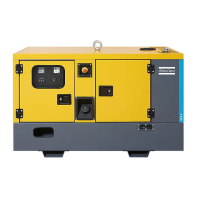
Applicable for QAS28 Yd(S), Yd(S) RS, Yd(S) SF, Yd DF, Yd AMF
 Loading...