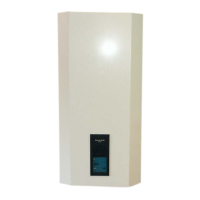
Picture for wall frame and
pipework assembly kit
Assembly instructions for
wall frame and pipework
assembly kit
Assembly instructions
using loose components
10. Central heating system cold fill valve
A ½” filler valve is supplied, which fits
between the cold supply and the safety
discharge pipe on the heating flow. Fit this
as shown, with the flow arrow from right
to left, and the small discharge orifice
pointing down. Connect each end to the
flat face tap washers provided, not
forgetting the sealing washers.
Take the silicone tube and push over the
discharge orifice. Push the other end into
the back entry opening of the tundish.
Cold fill valve - This valve may be left
permanently connected. However, the
lever operated fill valve must be turned off
once the system is up to pressure.
Autofill valve – If this option is used, fit
this valve on the cold feed side to the filler
valve (inlet side). The filler valve can then
be left open.
Use the filler loop provided with the
Robokit expansion vessel. Connect as
instructions between the cold supply
and the heating system. Ensure that
the double check valve is connected to
the heating side.
The flexible hose must be
disconnected at one end once the
system is filled.
11. Expansion vessels
Fit the expansion vessel mounting plate
(EVMP) to the frame (not shown in this
picture). To do this, remove the lower two
bolts holding the valve plate. Insert
mounting plate and refit the two bolts to
hold both the valve plate and EVPM in
position.
Sit the red expansion vessel in the left
hole and connect to the ¾” tap connector,
not forgetting to insert the sealing washer.
Sit the white expansion vessel in the right
hand hole and connect to the ¾” tap
connector, not forgetting to fit the sealing
washer.
The red heating system expansion
vessel is supplied as a Robokit. This
includes a wall mounting bracket, a
filler loop, safety discharge valve and a
system connection. Assemble as per
instructions given with the Kit.
The white hot water expansion vessel
is also supplied with a wall mounting
bracket. This must be connected to the
secondary pipework as described in
section 4 above. Under no
circumstances must an isolating valve
be fitted between the expansion vessel
and the circuit which it serves.
12. Combined condensate waste and safety valve discharge system
(Optional extra kit)
Fit the 32mm grey condensate trap to the
boiler outlet, ensuring that the trap is
pushed fully home (some lubricant will
assist) The outlet should face forward.
Take the white 32mm compression
connector and remove the nut, ring and
olive from one end. Discard the olive and
ring. Fit the white ring over the female
end of the black elbow supplied with the
trap. Push the elbow on to the trap outlet.
Then screw the white compression
connector on to the elbow.
Connect the HepVO trap to the tundish
using the 1” brass nipple and 1.25” bush,
and screw together tightly. Assemble the
grey push fit pipe, elbows and tee as
illustrated. The discharge pipe should be
in polypropylene with push fit fittings, and
can be taken to a soil pipe or other drain.
The outlet must be protected.
Condensate waste only
Fit the 32mm grey condensate trap to
the boiler outlet, ensuring that the trap
is pushed fully home (some lubricant
will assist) The outlet should face
forward.
Take the white 32mm compression
connector and remove the nut, ring
and olive from one end. Throw away
the olive and ring. Fit the white ring
over the female end of the black elbow
supplied with the trap. Push the elbow
on to the trap outlet. Then screw the
white compression connector on to the
elbow. The 32mm waste pipe can then
be connected and run to the selected
drainage outlet. (Note: the trap
connection is a different size to a
standard UK 32mm pipe)
13. Finally
Tighten all joints, check over, fill system with water, and test for water tightness. Test for gas tightness.
ATMOS MULTI Mk 2 version 2004
Page 26