8
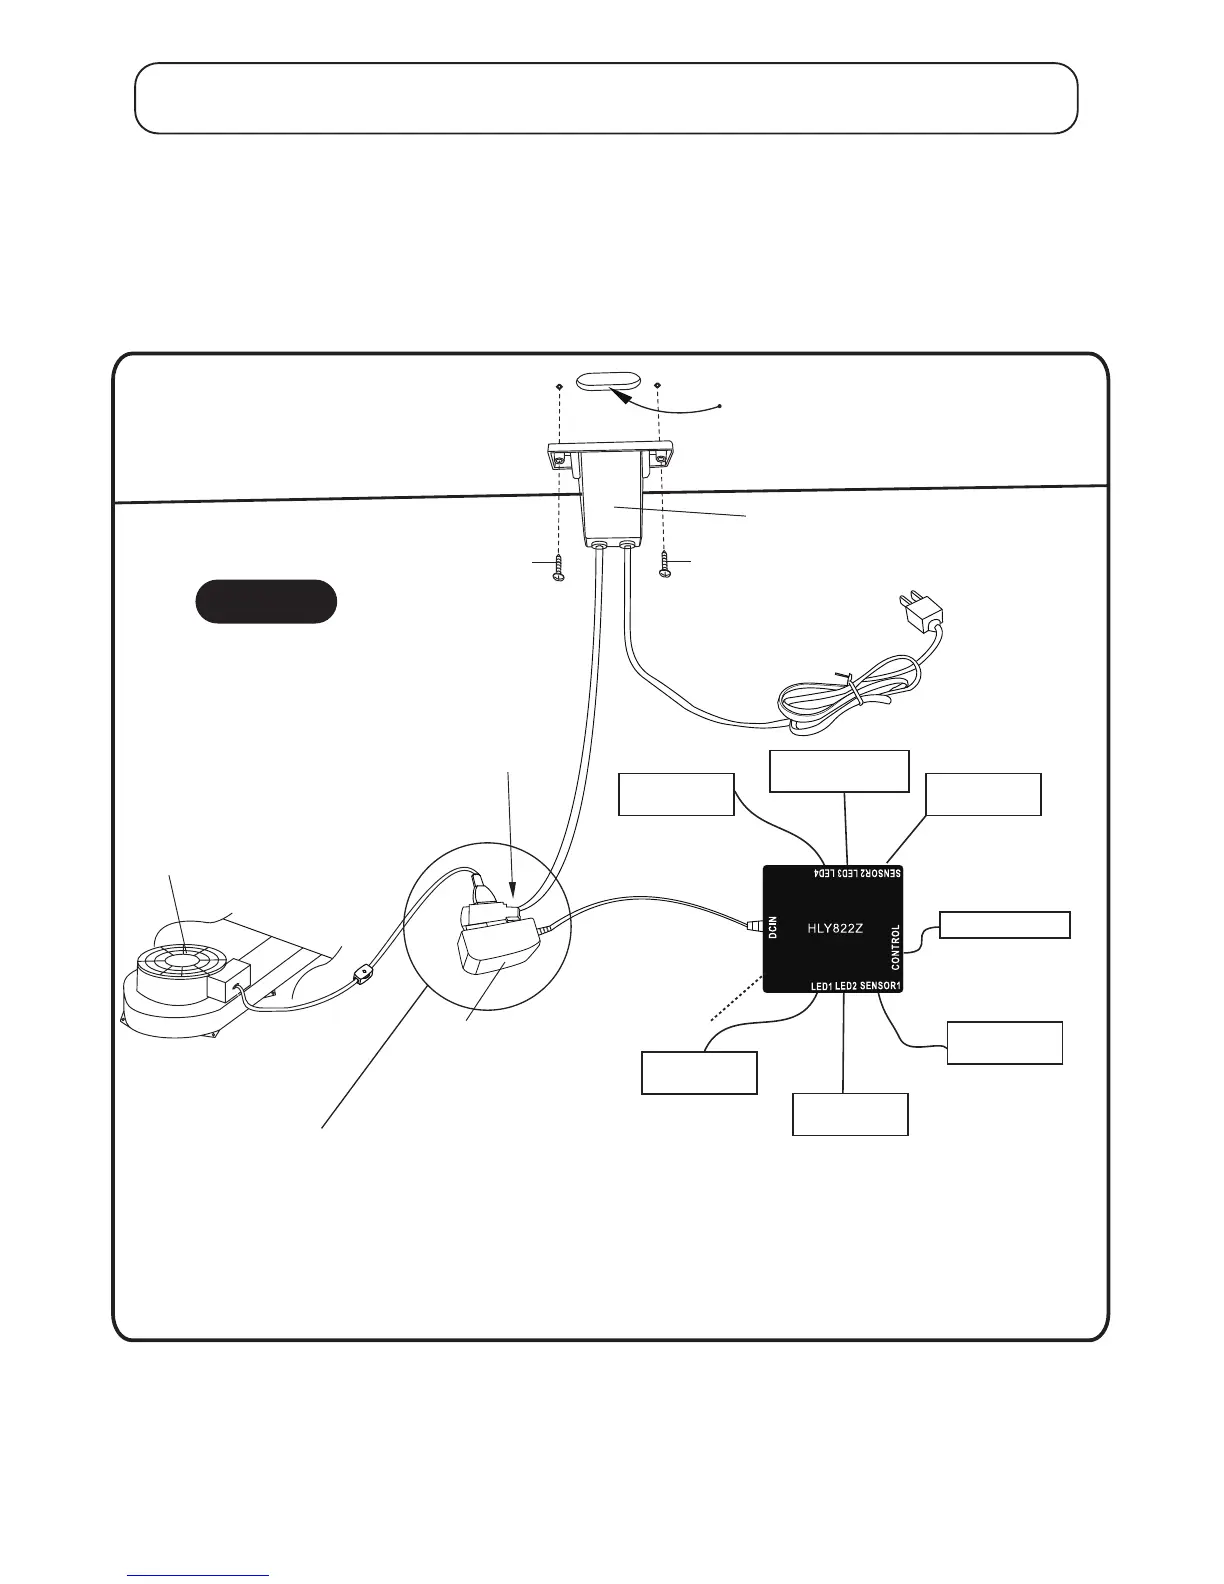
NOTE:Double check that
these connections are tight.
NOTE: lightly push in
on all connections to
insure good connections.
H6
H6
P6 Side Apron
with ON/OFF Slot
(non laminated side)
C1- ON/OFF Switch
C2- A/C
Adapter
C3- Junction Box
Air Blower
Female Socket
Plug into wall outlet
Left LED Goal
Left LED Lights
Left Sensor
Electronic Scorer
Right LED Goal
Right LED Lights
Right Sensor
STEP:4
Install ON/OFF Switch (C1) onto inside of Side Apron with ON/OFF Slot (P6) using pre-drilled
holes with Philips Flat Head Screws (H6) as shown in FIGURE 4.
Tighten, but do not strip out Screws (H6).
PARTS REQUIRED:
H6 3.5 x 14mm Philips Flat Head Screw 2 pcs - C1 ON/OFF Switch1 pc -
FIGURE 4