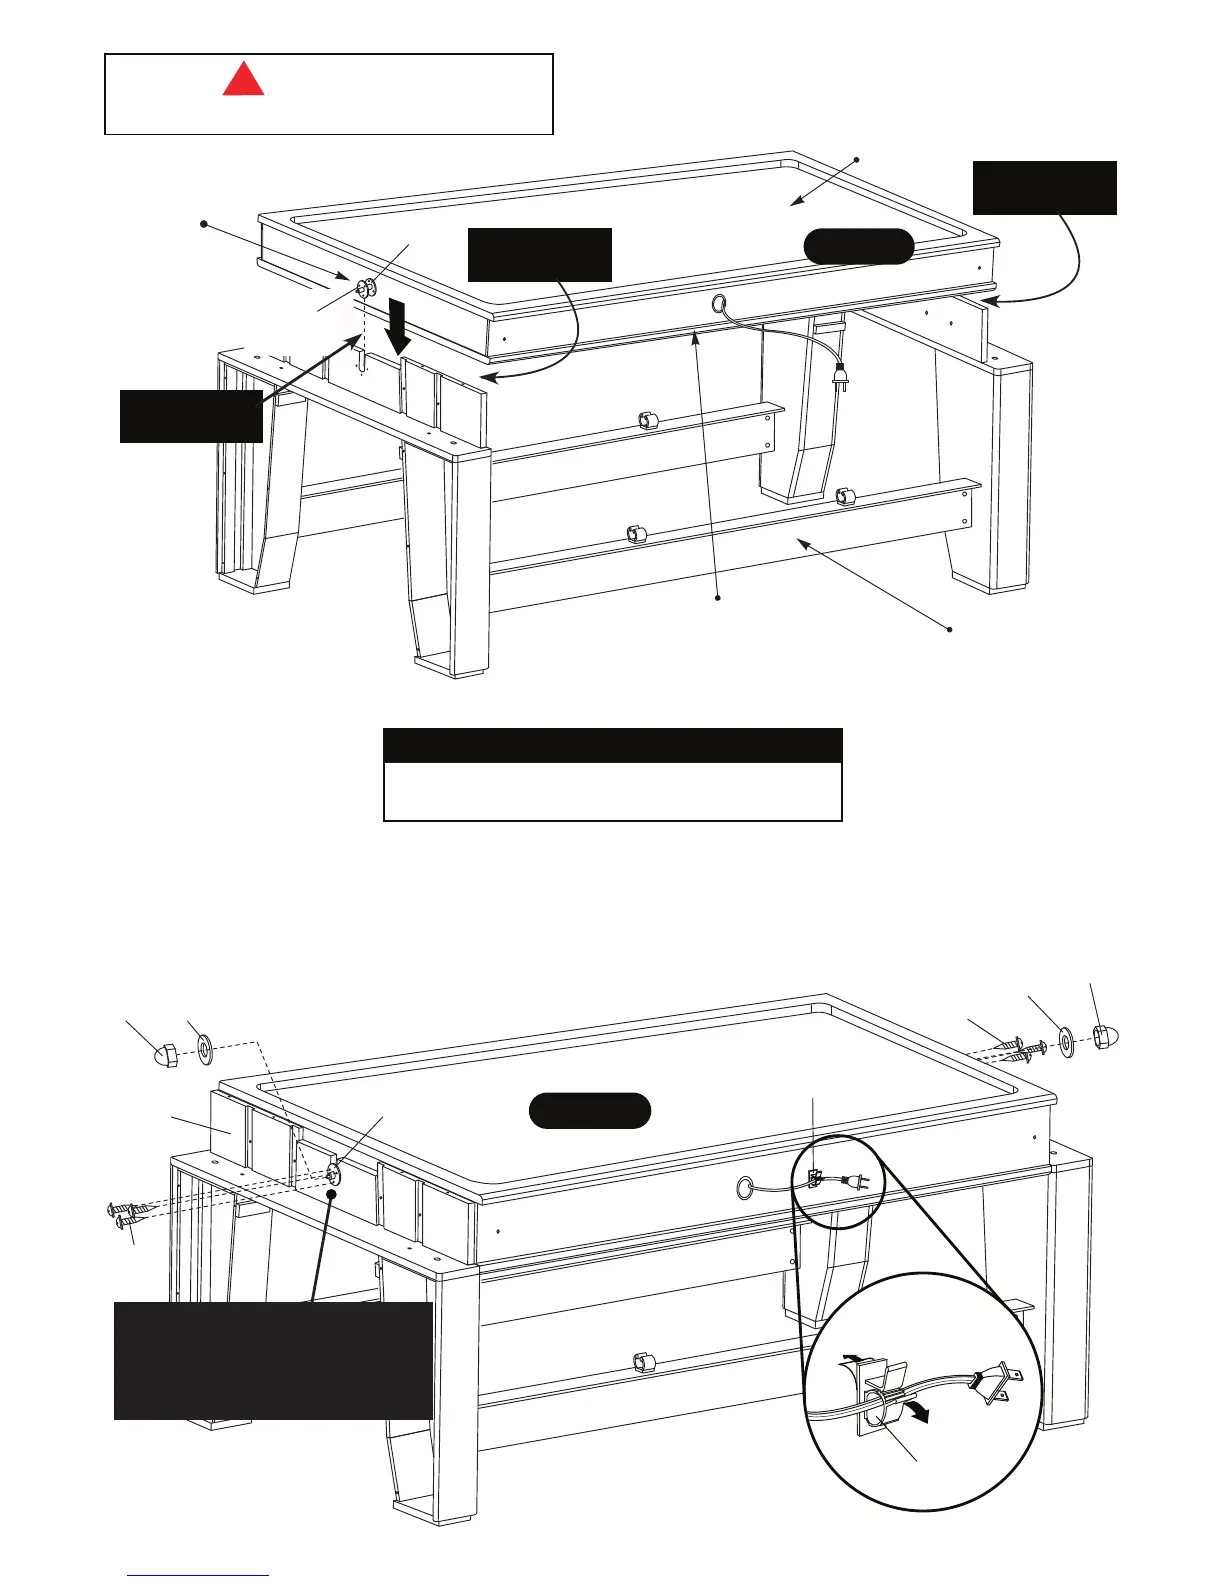
STEP 9:
With the help of another adult, carefully lift the assembly from
STEP 8 (FIGURE 8B) to the assembly from STEP 4 (FIGURE 4)
as shown in FIGURE 9.
PARTS REQUIRED
2 pcs - H11 Acorn Nut 6 pc - H16 Screw
2 pcs - H12 Flat Washer 1 pc - P24 Cord Clip
!
WARNING:
THIS STEP REQUIRES THREE OR MORE ADULTS.
Assembly from
STEP 8.
Assembly from
STEP 4.
9
© 2013 Escalade Sports
For Customer Service Call 1-886-996-2729
All Right Reserved.
STEP 10:
Secure the assembly from STEP 8 (FIGURE 8B) and the assembly from STEP 4 (FIGURE 4) using H16 Screws as shown
in FIGURE 10. IMPORTANT NOTE: Secure P25 Female Pivot Bushing with H16 Screws using Pre-Drilled holes
shown on P9 End Frame Panel. All H16 Screws must be tight - but not stripped.
Secure assembly using H12 Washer with H11 Acorn Nuts as shown in FIGURE 10. Use T1 Wrench to tighten H11
Acorn Nuts.
Peel the backing off P24 Cord Clip and attach to a side of the table as shown in FIGURE 10.
H11
H12
FIGURE 10
H12
H11
3rd adult helps
to insure P25 Female Pivot Bushing
/ H10 Male Pivot
Assembly
slides down
into slot on
each end of
table correctly.
H10
CAUTION:
PINCH POINT!
CAUTION:
PINCH POINT!
Two (2) adults lift
from each side to
install.
FIGURE 9
P24
PEEL & ATTACH
P24
H16
P25P9
H16
IMPORTANT NOTE:
Secure P25 Female Pivot Bushing
with H16 Screws using Pre-Drilled
holes shown on P9 End Frame
Panel.
P25
CAUTION:
PINCH POINT!