4
ATOMIKRC.COM 18010
Charging Instructions
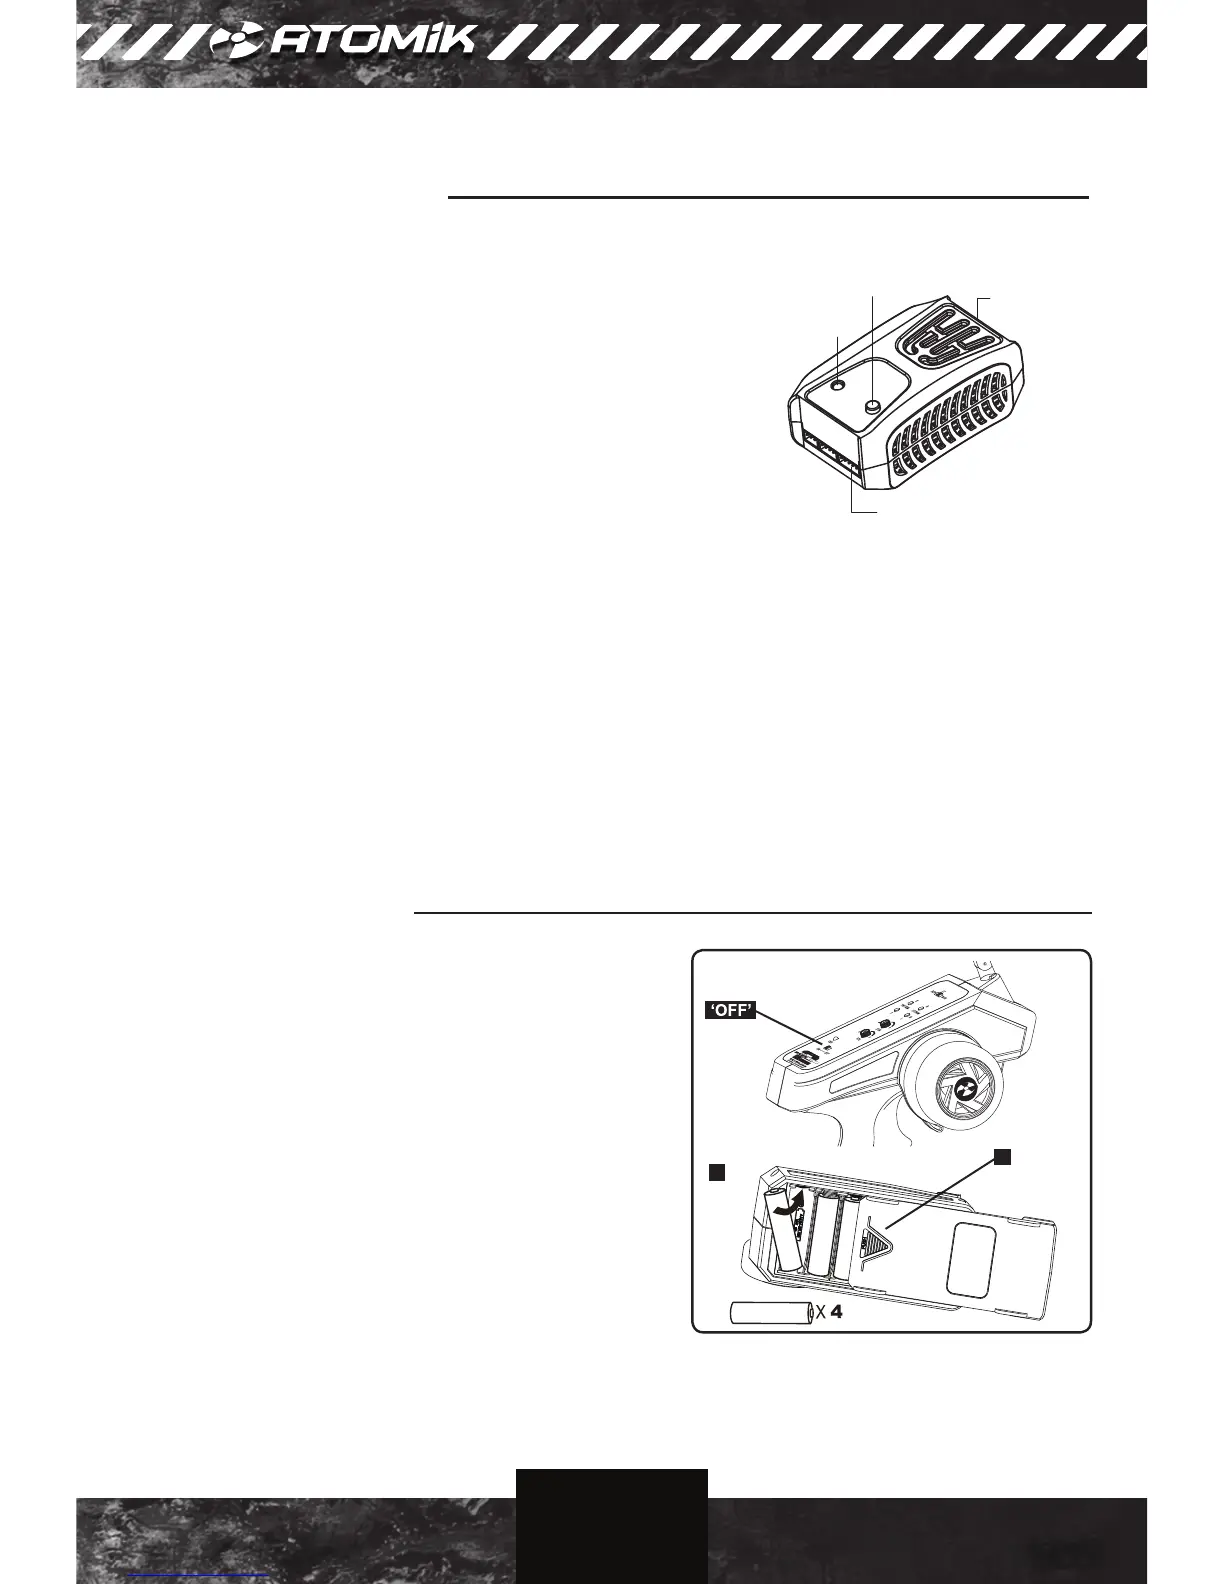
CHARGER INTERFACE
2S- 4S Balance Port
AC Input
(110-240V)
Charge Status LED
Start/Stop Button
1. Connect the charger to an AC (110V-240V) power source using
the included power cord.
2. Once the charger is connected to a power source the Charge
Status LED will illuminate solid red and the charger is in standby
mode.
3. Connect the JST-XH (white) balance lead of the LiPo battery to
the appropriate balance port of the charger.
4. Press and hold the Start/Stop button for 3 seconds to initiate the
charge process. Press the Start/Stop button again at any time to
stop the charge.
NOTE: The included battery arrives with a partial charge and
must be charged fully prior to the rst use.
5. The Charge Status LED will change to ashing green indicating the battery is charging.
6. Once the Charge Status LED changes to solid green the charge process is complete.
1. A ashing red Charge Status LED indicates there is an error. Check the connection between the battery
and charger. This may also indicate that there is a fault with the battery.
2. DO NOT CONNECT MORE THAN ONE BATTERY AT A TIME.
3. THIS CHARGER IS NOT RECOMMENDED FOR USE WITH BATTERIES EXCEEDING 5000mAh.
IMPORTANT NOTES
Battery Installation
Installing the AA Batteries in Your Controller
1. Make sure the controller ON/OFF switch is in the “OFF”
position.
2. Remove battery cover by pressing down on the
embossed arrow and sliding the cover as indicated.
3. Insert 4 AA batteries, playing close attention to the + and
- polarity.
4. Slide the battery cover back into place.
NOTE: Remove all AA batteries from the controller if you
do not intend to use it for an extended period of time.
2
3