16 17
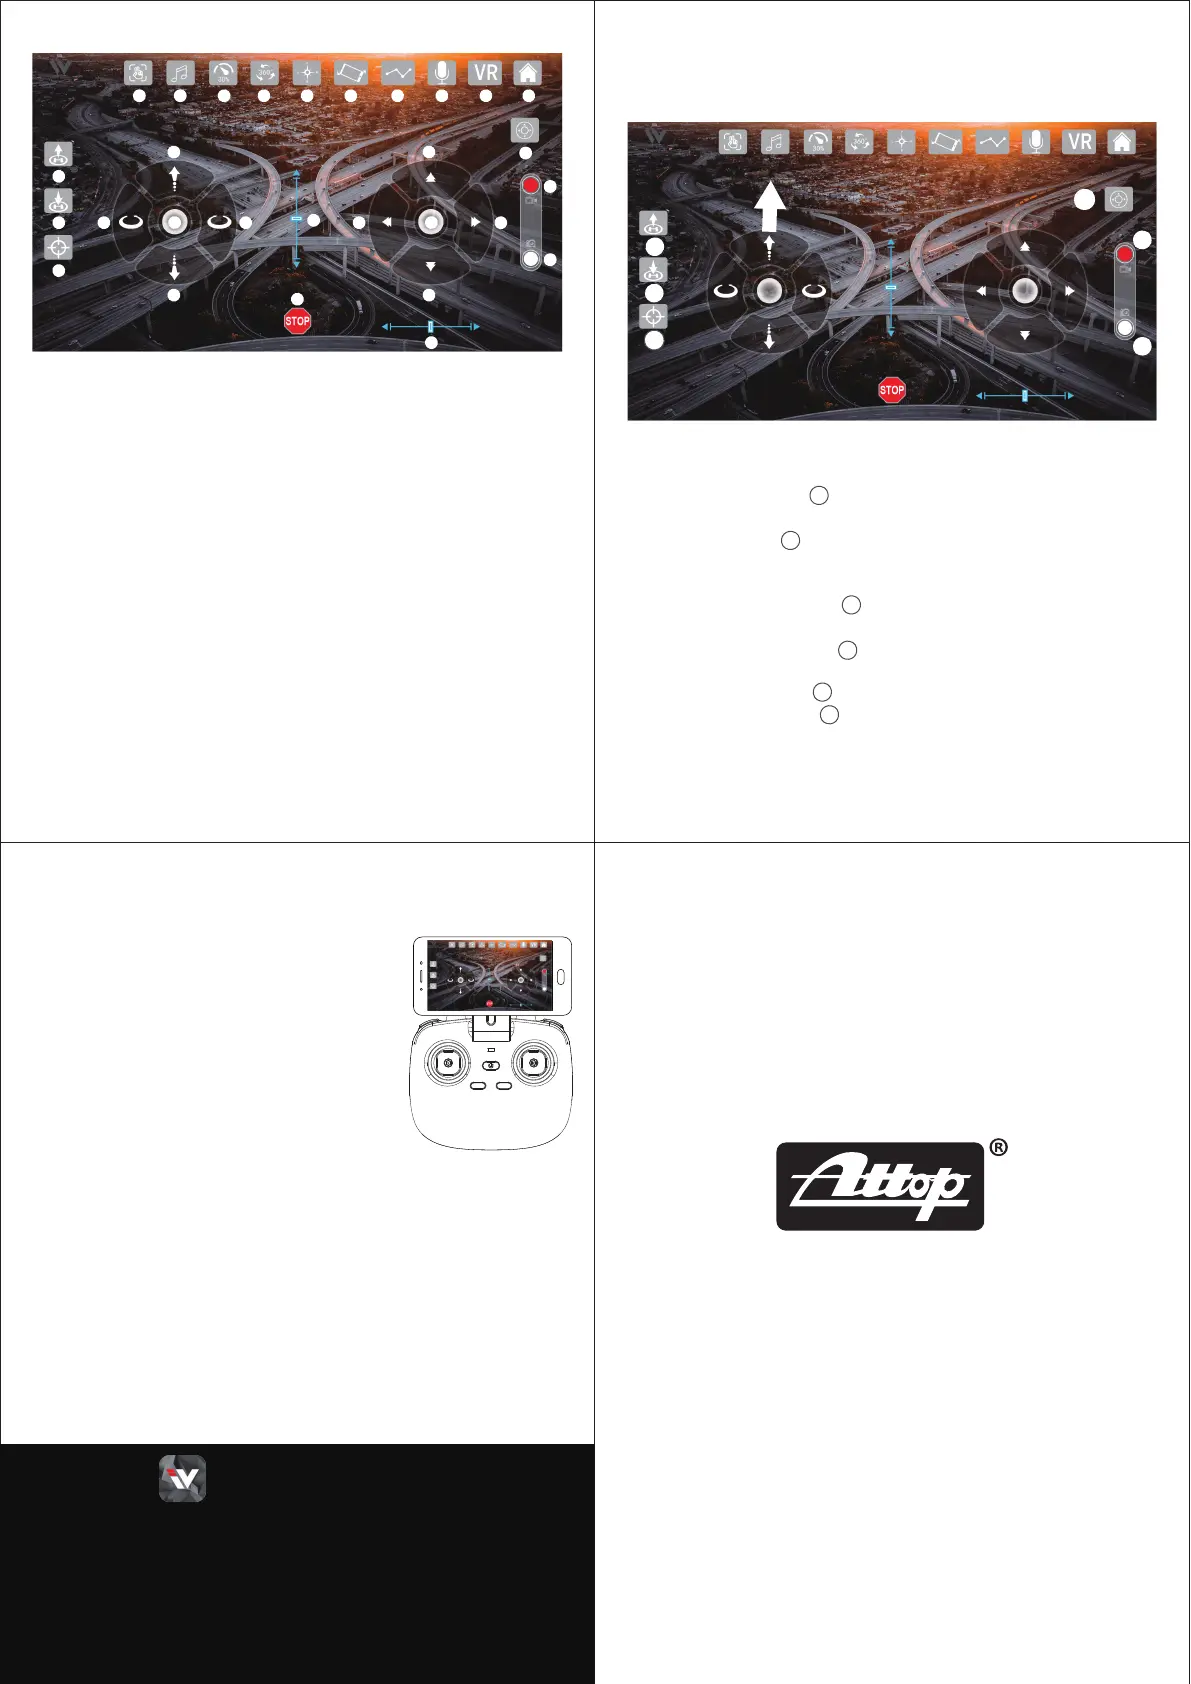
1.Gestureto take pictures
2.Background Music
3.Speed mode: 30%,60%,100%
4.360° Stunt
5.Headless mode
6.Gravity Control
7.Path Plan
8.Voice Control
9.VR Mode
10.Home page
11.On/Off for interface
12.Take video
13.Take picture
14.One key take off
15.One key landing
16.Calibration
17.Ascend
18.Descend
19.Turn Left
20.Turn Right
21.Left Joystick
22.Forward/Backward trimming
23.Forward
24.Backward
25.Left sideward
26.Right sideward
27.Right Joystick
28.Sideward trimming
29.Emergency Stop
1 2 3 4 5 6 7 8 9
10
11
12
13
14
17
18
19
21 27
20
23
24
25
22
28
29
2615
16
(PIC. 2)
Name of App: W FPV
11
16
14
13
12
15
Apply to IOS \ Android system (Note: Apply to Android 2.3 or above
such as SAMSUNG, SONY, HUAWEI and etc.
But cannot guarantee the phone of other brands with Android system
could operate stably.)
11
12
13
15
14
16
Operation way
Control with your device.
1. After connecting the WIFI signal and entering into the app interface,
press the “on/off button” to open it.
2. Wait 2 seconds then lights of drone stop flashing, then press the
“Calibration button” to calibrate the drone if first time play.
3. Push the left throttle up to top, and then the rotors of the drone start rotating,
that unlock the motors. (see Pic 2).
4. Press the “One key take off” to fly up the drone (or push up the throttle
directly), then play.
Press the “One key landing” (or keep pushing down the throttle directly)
to land the drone.
5. Press the “Video” button on interface, to take video.
Press the “Picture”button on interface, to take picture.
After taking you can review the files from the “Gallery” in Home page,
or from your album file of your device.
Control with the remote controller
1. Power on the drone and power on the controller,
after pairing between the controller and drone
(the lights of the drone and controller are turning
solid), then connect the WIFI signal between
your device and the drone.
2. Put the device to the clamp of the controller,
then click “Connecting devices”.
3. Press the “Picture”button on interface or on
controller, to take picture.
Press the “Video” button on interface or on controller,
to take video.
After taking you can review the files from the “Gallery” in Home page,
or from your album file of your device.
18
30-Day Whole Unit Warranty For Quality-Related Issue
For 30 days after the date of purchase, we take care of all quality-related
issues with a REPLACEMENT.
Reminder : Be sure to operate your drone as directed.
90-Day Accessories Warranty For Any Reason
For 90 days after the date of purchase, we take care of all accessories
quality-related issues with an ACCESSORY REPLACEMENT.
Reminder: Be sure to maintain your drone as directed.
Customer Service Email : attop@afterservice.vip
www.attoptoys.com
 Loading...