EasyManua.ls Logo

Attop X-PACK 18 - User Manual

Attop X-PACK 18
6 pages
Print Icon
To Next Page IconTo Next Page
Loading...
1
2 3
Drone X1 Backup Propellers X4
Screw driver X1Battery X2
Remote X1
USB cable X1
1
2
1
2
(1) Open Up all 4 blades for the drone
1
2
1. Package Contents
2.Charging
4. Remote Controller
3.Install
(Suitable for wide indoor environments operation and
wind power less than Force 2 outdoor environments)
CHA
(2) Battery Installing
Insert the battery into specified
position.
Insert 3xAAA battery into specified
position.
Remote Controller:
To disassembly, press the battery
buckle button, and pull back to take
it out.
(3) Mobile Device Holder Using
Pull up the position of controller.
Adjust the Mobile Device Holder up and
place the moblie onto the holder.
This aircraft is folding structure, please do open up all four propellers before taking off.
1
1. Speed switch
2. Left stick (Altitude Control / Turn L/R)
3. Power switch
4. One key take off
5. Circle fly
6. One key landing
7. One key return
8. Headless function
9. Right stick (Movement control)
10. Gyro calibration
11. Forward trimming
12. Right trimming
13. Backward trimming
14. Left trimming
15. Filming
16. Take Photo
13
3
1
2
2
5V
1
2
14
2
9
10
11
12
3
4
5
6
7
16
13
15
8
┐╠╚
25.400
AAA 1.5V
AAA 1.5V
AAA 1.5V
battery
case
X-PACK 18 Operation Manual
Suitable for 14 years old and above
Customer Service Email : support@attoptoys.com
www.attoptoys.com
Charging Guide for battery
1. Connect the USB cable with power supply, the USB LED solid on, indicate the
USB cable is power on.
2. Connect the battery with USB cable. If the USB LED solid on, the charging is
completed. Otherwise, it means charging. Please use the drone when fully charged.
NoteUse an power supply with standard output voltage 5V and current greater than or
equal to 2A, otherwise there is a risk of overloading the USB cable and Battery.
The flight time is about 9-10 minutes and the charging time is about 120 minutes.
Low battery warning
When the drone is flying, the indicator lights on the drone are flashing, and the remote
control handle emits a "beep" alarm sound, indicating that the drone power is too low.
At this time, the drone needs to return and charge.
Get 24/7 assistance at
Use camera or QR scanner to scan
Or Visit: https://attop.afterservice.vip
Question and Answer IconNeed help?

Do you have a question about the Attop X-PACK 18 and is the answer not in the manual?

Summary

Package Contents

Included Components

Lists all items included in the drone package, such as the drone, remote, propellers, batteries, and tools.

Battery Charging Guide

Charging Procedure

Detailed instructions for charging the drone battery using the provided USB cable and power supply.

Low Battery Warning

Indicators and sounds signifying a low battery state on the drone, requiring return and recharge.

Drone Installation and Setup

Unfolding Propellers

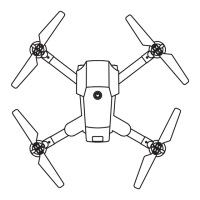
Instructions to unfold all four propellers of the drone before taking off.

Remote Controller Battery Installation

Guide for inserting the correct AAA batteries into the remote controller.

Mobile Device Holder Usage

Steps to set up and position the mobile device holder on the remote controller.

Remote Controller Functions

Button and Stick Layout

Detailed explanation of each button and control stick on the remote controller and their functions.

How to Fly the Drone

Powering On and Pairing

Steps to power on the drone and remote, and successfully pair them.

Gyroscope Calibration

Procedure to calibrate the drone's gyroscope for stable flight operations.

Activating Motors and Takeoff

Instructions for activating the drone's motors and initiating takeoff.

Landing and Emergency Stop

Guidance on how to land the drone and perform an emergency stop.

Remote Controller Flight Operations

Stick Control Functions

Explanation of how the left and right control sticks manage drone movement and altitude.

Advanced Aircraft Functions

Flight Trimming Adjustments

How to adjust drone trim for stable flight when it drifts forward, backward, or sideways.

360° Flip Functionality

Instructions for performing 360-degree flips in different directions.

Headless Mode Operation

Understanding Headless Mode

Explanation of headless mode and how it affects drone control direction relative to the user.

One Key Return Function

Using One Key Return

How to activate and cancel the automatic return-to-home function for the drone.

Aircraft and Component Specifications

Technical Specifications

Lists dimensions, weight, battery, charging, and flight times for the drone, camera, and remote.

Flight Speed and Camera Controls

Speed Adjustment

How to change the drone's flight speed settings (low, medium, high) during operation.

Photo and Video Capture

Instructions for taking photos and recording videos using the drone's camera.

FAQ and Troubleshooting

Common Issues and Solutions

Addresses frequent problems like no response, flashing lights, or blades spinning without lift.

Battery Usage and Safety

Battery Charging Attention

Important notes regarding charging, safety, and potential damage to batteries.

Battery Maintenance

Guidelines for maintaining battery pack health, including storage and charging practices.

General Safety Precautions

Operational Safety

Warnings about operating the drone safely, avoiding barriers, and general environmental hazards.

Lithium Battery Safety

Precautions for safe handling, charging, and disposal of lithium batteries to prevent accidents.

Environmental and Heat Safety

Advice to keep the drone away from moisture, heat sources, and sunlight.

User Age and Supervision

Recommendation for users over 14 years old and the importance of adult guidance.

Disclaimer and Product Usage

Product Disclaimer

States user responsibility and age recommendation for drone operation.

WIFI Connection and App Usage

Connecting to WIFI Signal

Steps to download the app and connect the drone's WIFI signal to a mobile device.

App Operation Interface

Overview of the app interface for controlling the drone and accessing media.

Ready to Fly Instructions

Initiating Flight

Steps to turn on controls, calibrate, activate motors, and take off using the app.

App Operation Methods

Flight Controls via App

Detailed explanation of app functions for ascent, descent, movement, speed, and special modes.

Advanced App Features

Covers gesture control, voice control, VR mode, flight path drawing, and emergency stop in the app.

Remote Controller Flight Operation (App)

Connecting and Controlling

Steps to connect the device to the controller, use the app for FPV flying, and capture photos/videos.

Overview

This document describes the X-PACK 18 drone, suitable for indoor environments and outdoor environments with wind power less than Force 2, recommended for users 14 years and older.

Function Description

The X-PACK 18 is a remote-controlled drone with a folding structure, equipped with a WIFI Live Stream Camera (1080P). It offers various flight modes and control options, including remote control and an APP-based interface.

Package Contents:

  • Drone (X1)
  • Remote (X1)
  • Backup Propellers (X4)
  • USB cable (X1)
  • Battery (X2)
  • Screw driver (X1)

Charging: The drone battery is charged via a USB cable connected to a 5V power supply. The USB LED indicates charging status (solid on for power, off when charging is complete). A low battery warning is indicated by flashing drone lights and a "beep" sound from the remote control.

Installation:

  1. Drone Setup: Unfold all four propellers before flight.
  2. Battery Installation: Insert the battery into the specified position in the drone. To remove, press the battery buckle button and pull back.
  3. Mobile Device Holder: The remote control has a holder for mobile devices. Pull up the holder, adjust it, and place the mobile device onto it.
  4. Remote Controller Functions:
    • Speed switch
    • Left stick (Altitude Control / Turn L/R)
    • Power switch
    • One key take off
    • Circle fly
    • One key landing
    • One key return
    • Headless function
    • Right stick (Movement control)
    • Gyro calibration
    • Forward trimming
    • Right trimming
    • Backward trimming
    • Left trimming
    • Filming
    • Take Photo

How to Fly:

  1. Power On: First, power on the drone (press for 2 seconds and place on a flat surface), then power on the remote.
  2. Frequency Pairing: After powering on, both drone and controller indicator lights will flash. Push the Left stick to the top, then down to the lowest. After 2 seconds, indicators will become steady, indicating successful pairing.
  3. Gyroscope Calibration: Press the Calibration button for gyro calibration. This step should be performed before activating motors for more stable flight.
  4. Activate Motors: Push the Left stick to the lowest left corner and the Right stick to the lowest right corner simultaneously (or just push the Left stick to the top) to start the motors.
  5. Take Off / Landing: After motors are activated, press "One key take off" (or push up the Left stick directly) to fly. Press "One key landing" (or keep pushing down the Left stick directly) to land.
  6. Emergency Stop: In an emergency, push the Left stick to the right corner and the Right stick to the left corner simultaneously to stop the drone immediately.

Aircraft Functions:

  • Trimming: Adjust trimming controls (forward/backward, sideward) to correct deviated flight.
  • 360° Flip: Short press the Right Stick and push it in a desired direction (right, top, left, bottom) to perform a 360° flip in that direction.
  • Speed Adjustment: The drone defaults to low speed. Press the Speed button to cycle through three speed gears, each indicated by "beep" sounds. Beginners are advised to use the default low speed.
  • Take Photo / Filming: Press the Filming button to start/stop video recording and the Take Photo button to capture images. These functions are available only for the WiFi version.
  • Headless Mode: Press the Headless function button to activate (slowly flashing lights) or deactivate (lights stop flashing) Headless Mode. In this mode, the forward direction is relative to the drone's orientation when it took off, making control easier. Users are advised to maintain the same orientation as the drone's head when it takes off.
  • One Key Return: With the remote pointed towards the drone's tail, press the "One key return" button. The drone will fly back along a path parallel to the remote's direction, with flashing LEDs. This function can be canceled by pressing the button again or moving the Right Control Stick forward. Headless function should be deactivated before activating Return function.

APP Operation (WIFI Version):

  1. Download App: Download "ATTOP CLUB" from App Store or Google Play.
  2. Connect WIFI: Power on the drone. Go to phone's WIFI settings, select the drone's WIFI signal (X-PACK 18+No.), and connect.
  3. Launch App: Open the app, select "X-PACK 18" to start. (Note: Low battery may prevent successful connection).
  4. Interface: After connecting and opening the app, the main interface allows control and access to media.
  5. Media Folder: Review photos and videos taken from this folder.
  6. Control Interface:
    • Sticks: "ON/OFF button" to open the sticks.
    • Calibration: Wait 2 seconds for drone lights to stop flashing, then press "Calibration button" for first-time play.
    • Motor Activation: Push Left Control Stick to the top and release to start rotors.
    • Take Off/Landing: Press "One Key Take Off" (or push Left Control Stick slowly) to fly up. Press "One Key Landing" (or push Left Control Stick directly) to land.
    • Flight Controls: Ascend/Descend, Turn left/right, Go forward/backward, Left/Right side flying.
    • Gesture Control: Wave mobile phone to control drone movement (after switching "Gravity Sense Mode").
    • Music: Play music.
    • Speed Mode: 30%, 60%, 100%.
    • 360° Flip: Perform flips.
    • Headless Mode: Activate/deactivate.
    • Gravity Control: Press to activate, control by shaking device.
    • Flight Path Mode: Draw a route on screen, drone will follow.
    • Voice Control: Unlock motors, then press microphone icon and use voice commands ("Take off," "Landing," "Forward," "Backward," "Left side," "Right side"). (Requires microphone access).
    • VR Mode: Suitable for VR glasses.
    • Return Home Page: Navigate back to the main app screen.
    • On/Off Control Interface: Toggle control interface visibility.
    • Switch to Take Video/Photo: Toggle between video and photo capture. (Requires phone album access).
    • Trimmers: Go Forward/Backward trimmer, Left/Right side flying trimmer.
    • EMERGENCY STOP: Press STOP button to immediately stop functions.
    • One Key Take Off/Landing: Dedicated buttons.
    • Calibration: Calibrate drone.

Important Technical Specifications

Aircraft Parameters:

  • Length of main wing: 152mm
  • Aircraft dimensions: 190X226X73mm
  • Total weight: 148g±2g
  • Battery: 3.7V 1100mAh
  • Charging time: About 120 minutes
  • Flight time: 9-10 minutes
  • Gyroscope: Built-in
  • Working temperature: -10°C to 40°C
  • Remote controller: 2.4G
  • Motor: 85X20 4pcs

Camera Parameters:

  • TF card support: NO
  • Camera Lens: 1080P

Remote Controller Parameters:

  • Wifi Transmission Range: 60-80 meters (in a wide open area with no electromagnetic interference)
  • Working frequency: 2.4G
  • Battery: 3xAAA

Usage Features

  • Indoor/Outdoor Use: Suitable for indoor environments and outdoor with light wind (less than Force 2).
  • Age Recommendation: 14 years and above.
  • Folding Structure: Easy for transport and storage.
  • Dual Control: Can be controlled via remote controller or a mobile app (ATTOP CLUB).
  • Real-time FPV: WIFI Live Stream Camera provides First Person View.
  • Automated Functions: One key take off, one key landing, one key return, circle fly.
  • Headless Mode: Simplifies flight orientation for beginners.
  • 360° Flips: Allows for acrobatic maneuvers.
  • Speed Modes: Adjustable flight speed for different skill levels.
  • Gyro Calibration: Ensures stable flight.
  • Trimming Controls: Fine-tune flight stability.
  • Emergency Stop: Immediate shutdown for safety.
  • Mobile App Features: Gesture control, flight path mode, voice control, VR mode, media folder for photos/videos.

Maintenance Features

Battery Using Attention:

  • Removal for Charging: Rechargeable batteries must be removed from the toy before charging.
  • Non-rechargeable: Non-rechargeable batteries are not to be recharged.
  • Adult Supervision: Rechargeable batteries should only be charged under adult supervision.
  • Charger Compatibility: Use only a 2S Li-ion or Li-polymer battery pack charger. Incompatible chargers or batteries may be damaged.
  • Charging Environment: Charge in a dry, ventilated place, away from heat sources and flammable/explosive substances.
  • Cool Down: Do not charge immediately after flight; allow the battery to cool to prevent swelling or fire.
  • Polarity: Ensure correct polarity when connecting to the charger.
  • Physical Damage: Avoid dropping or violence during charging to prevent internal short circuits.
  • Original Equipment: Use original charging equipment and battery packs.
  • Replacement: Replace batteries when flight time shortens due to prolonged use.
  • Overcharging: If left in charger after saturation, battery may automatically discharge and re-charge. Frequent charging/discharging shortens battery life. Disconnect power after saturation.
  • Storage Environment: Store in a dry, ventilated place at 18°C to 25°C.
  • Life Cycle: Avoid frequent charging and excessive discharging to prolong battery life.
  • Long-term Storage: Charge battery to 50-60% saturation before long-term storage.
  • Monthly Check: For storage over 1 month, check battery cell voltage monthly (not less than 3V). Re-charge to 50-60% if needed.
  • Motivation: New battery packs should be motivated (charged and discharged 3-5 times, discharging to no less than 70% saturation) before usage for longer life and stable voltage.

Safety and Precautions:

  • Flight Safety: Remote-control quadcopters are dangerous. Operate away from crowds and pets. User is responsible for accidents due to negligence.
  • Environment: Choose obstacle-free indoor/outdoor sites. Avoid unsafe environments (heat, wires, power supply) to prevent fire, electric shock, collision.
  • Lithium Battery Safety:
    • Read and follow precautions carefully.
    • Use only factory-made chargers.
    • Forbidden actions: impact, dismantling, reverse connection, burning.
    • Avoid metal objects contacting poles to prevent short circuits.
    • Prevent sharp items from piercing battery.
    • Charge within sight, out of reach of children.
    • Do not charge heated batteries after use.
    • Recycle batteries according to local laws.
  • Moist Environments: Keep aircraft away from moisture/water vapor to prevent damage to electronic components.
  • Battery Insertion: Insert batteries with correct polarity. Do not short-circuit terminals. Do not mix different types or new/used batteries. Remove exhausted batteries. Remove batteries for long-term storage to prevent leakage. Dispose of abandoned batteries according to regulations.
  • Heat Source: Keep away from heat sources and direct sunlight to prevent deformation or meltdown.
  • Adult Supervision: Product suitable for users over 14. Beginners should operate under guidance of experienced people.
  • Misuse: Do not disassemble or modify. Use specified parts for upgrades/repairs. Operate within limits, do not overload, and do not use illegally.

Warranty:

  • 30-Day Whole Unit Warranty: Replacement for quality-related issues within 30 days of purchase.
  • 90-Day Accessories Warranty: Accessory replacement for quality-related issues within 90 days of purchase.
  • Disclaimer: Read manual carefully. Not recommended for under 14. User is responsible for conduct and damages. Use product for proper purposes in accordance with regulations.

Attop X-PACK 18 Specifications

General IconGeneral
BrandAttop
ModelX-PACK 18
CategoryDrones
LanguageEnglish

Related product manuals