Quick Start
1. Included with your Otis™ are the following parts and components:
• Otis™ digital audio player
• Quick Start Guide / User Manual
• USB cable
• Software installation CD-ROM
• Two (2) AAA batteries
• Cassette adapter
• Carrying case
• Earphone
2. Quick Setup of the Otis™
Do not try to connect your Otis™ to the computer via the USB cable until
prompted to do so during installation of AudibleManager®.
• Turn on your computer and establish an Internet connection.
• Insert batteries into your Otis™ device; press and hold the “Play” button for 2
seconds to turn the Otis™ on. Insert the CD-ROM into your computer’s CD-
ROM drive.
• At the startup screen, click the first button, “AudibleManager.”
• Follow the on-screen prompts to install the AudibleManager® software allowing
download and transfer of Audible®, MP3 and Windows Media™ Audio to your
Otis™.
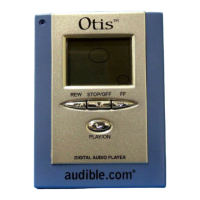
3. Hardware Overview
(Pictures and button layout here From Don)
4. Operating the Otis™:
• Turn Otis™ on: press and hold the “Play” button for 2 seconds.
• Turn Otis™ off: press and hold the “Stop” button for 2 seconds. Note that your
Otis™ is designed to automatically power off if left idle for 5 minutes.
• Skip to next track or Audible® program: press the “Fast-Forward” button one
time.
• Reverse to last track or previous Audible® program: press the “Rewind” button
one time.
• Fast-forward within a music file or Audible® program: press and hold the “Fast-
Forward” button.
• Rewind within a music file or Audible® program: press and hold the “Rewind”
button.