Copyright © 2006 Audio Note (UK)
Limited
Website
www.audionote.co.uk
E-Mail
info@audionote.co.uk
Telephone +44 (0) 1273 731498
Page 7
Section 3: Assembly
It is assumed from here that your cabinets have been fully assembled including the fitting of the bass port and t-nuts.
Fitting the Crossover/rear speaker connection panel
Our first job is to fit the rear panel that also contains the crossover.
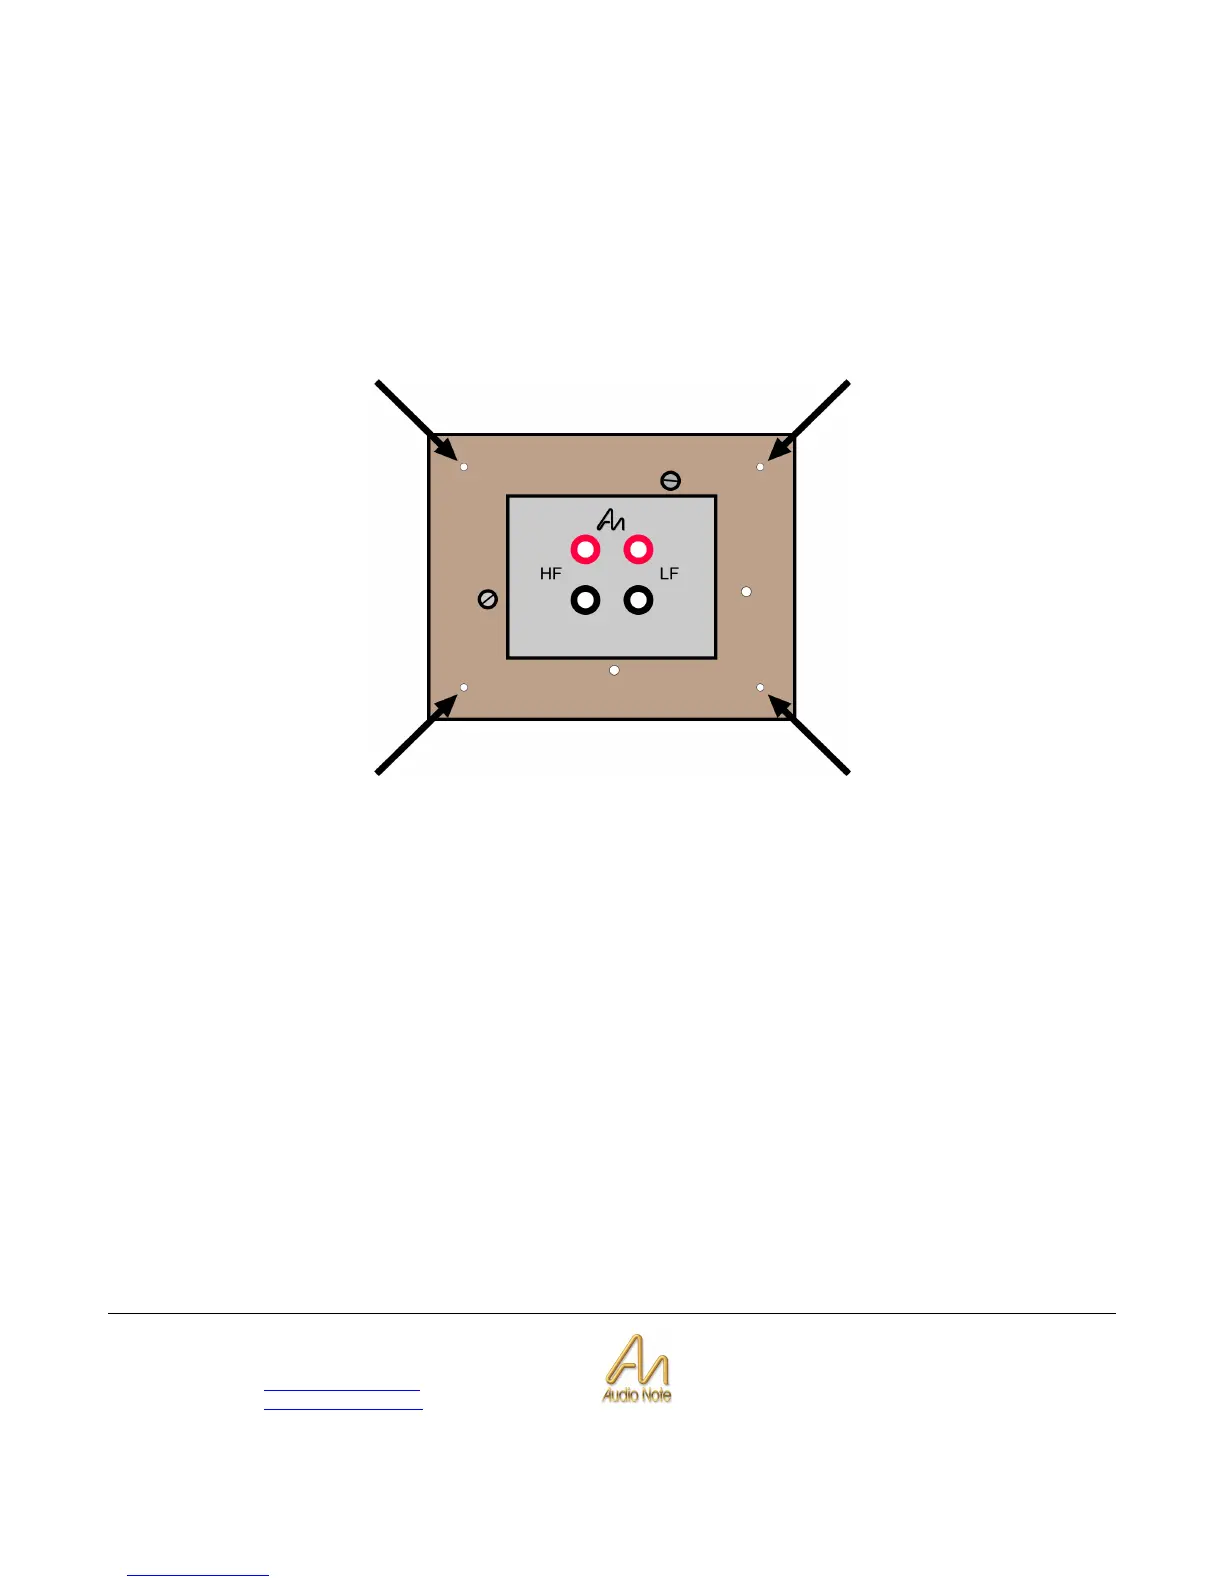
The above diagram shows the rear panel. The arrows point to the fixing holes where you will insert the self-tapping
screws to fix the panel into place (these will be tightened from inside the cabinet). Make sure that the area at the back of
the speaker cabinet, where the panel will come into contact, is free from dirt or dried glue so that you have a nice flat
surface to mate with.
This panel should be located centrally in the panel cutout on the back of the cabinet. This must be sealed and airtight!
If you have finished off your cabinets with a good finish, please make sure that when you insert a rear panel through the
hole made for the woofer that you don't accidentally scratch your cabinets (i.e. with the cables coming from the
crossover).
Note that once fitted, the panel should not be resting on the brace that lies across the rear of the cabinet.
To ensure a good seal, you will use some of the supplied Blu-Tack. You will note that there are some other holes in the
panel apart from the screw holes. You must ensure that these do not allow air to pass once the panel is fitted.
How you lay the Blu-Tack is up to you and is open to experimentation, but the idea is to create an airtight seal with it so
that once the screws are in place, no pressurized air will be able to pass by it.
When you fit the securing screws, rotate the tightening process, tightening each screw by say half a turn each, so that
pressure is evenly distributed around the panel. This will provide an even pressure distribution on the sealant.
Although the seal has to be tight, make sure that you don't over-tighten - use just enough pressure to hold the panel in
place so it can stand up to its job as a binding post and, at the same time, provide a good, reliable seal.