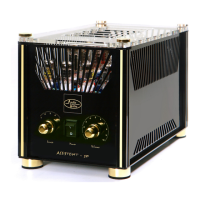
Assistent 30 integrated tube amplifier__________________________________
Please notice that you never exceed the mains voltage in the prescribed value shown at the lable of
the serial number on the rear side. If you can`t provide the amplifier with the exact shown main
voltage, please use a voltage stabilizer - particulare for the US ( 115 VAC ) market and Mainland
China
The amplifier needs a certain time to form the brand new components (capacitors) otherwise they
can be destroyed.
Use the Stand - By mode for warm hold periodes ( tube heating ) when you aren`t listening. Please
switch OFF the amp while leaving the house or sleeping !
Please only do use your amplifier while listening to music.
UNPACKING & SET UP
Ideally your dealer will carry out this process for you. If you wish to unpack
and set-up the amp yourself please follow the following steps carefully.
Each ASSISTENT 30 comes in its own stable carton and weighs 15kg
unpacke.
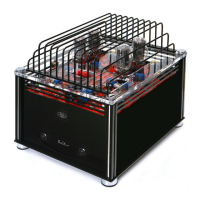
To remove the ASSISTENT 30 from its crate first undo the plastic wrapping. Each
person should then grab the outer rim of the Perspex top and lift the amplifier
until it can be rested on the edge of the crate. Any further lifting should be
carried out holding the bottom of the amplifier chassis. Do not lift the
amplifier using the protective grille!
We suggest you leave all packaging in the crate and re-fix the top so you
can use it again in the unlikely event that you need to return the unit under
warranty (see warranty conditions at the end of the manual) or place the
unit in storage.
It is possible that the driver valves already on the circuit board may have
been vibrated loose in transit, so first check that they are securely in place - if
not, push them firmly home. Once you have done this, remove the power
valves from their packing one at a time and fit them into the vacant sockets.
Take care to align the pins correctly before pushing them fully into position
otherwise the socket may be damaged requiring a return of the unit to the
factory for repair.
Once all 8 power valves have been installed, clean any finger marks off
them and the driver valves with a tissue or lint-free cloth and replace the top
plate assembly. This assembly is decoupled from the amplifier`s chassis by
plastic washers. When you re-fit the cover do not over-tighten the knurled
nuts or the decoupling will be reduced. It is sufficient to tighten the nuts until
they touch the top plate and then tighten one half-turn more only.
The amplifier is now ready for connecting into your audio system. Experience
has shown that these amplifiers benefit from resting on a solid surface rather
than carpet. Your AudioValve dealer will be able to recommend a suitable
support that ensures adequate airflow around and through the amplifier. Do
not place this amplifier in a position where liquids or any hard objects may
accidentally enter it.