EasyManua.ls Logo

AudioCodes MP-252 User Manual

AudioCodes MP-252
2 pages
To Next Page IconTo Next Page
Page #1 background imageLoading...
Page #1 background image
1. Before Installing
Ensure that you have received the following items:
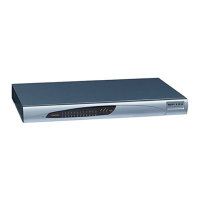
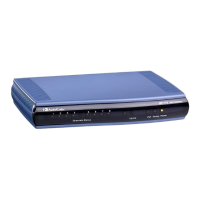
9 AudioCodes’ MP-252 Multimedia Home Gateway
9 1 x RJ-11 telephone cable
9 1 x RJ-45 Ethernet cable
9 12V AC/DC power adaptor (use only supplied)
You’ll also need (not supplied by AudioCodes) the following:
9 A broadband Internet connection
9 ADSL cable (if required)
9 Analog telephones
9 An additional RJ-11 telephone cable (if required)
9 Additional RJ-45 Ethernet cables (if required)
2. Cabling
1. Connect MP-252-BW to the Internet by cabling the ADSL port to
the telephone socket, using an RJ-11 telephone cable.
Wi-Fi
Power
110/220 VAC
LAN
Computers
POTS Phone
3
2
LAN
ADSL
4
1
2. Connect the MP-252-BW 10/100Base-T Ethernet ports labeled LAN
(1 to 4) to your LAN computers, using CAT 5 Ethernet cables.
3. Connect the MP-252-BW FXS telephone ports labeled Phone (1 to
2) to analog telephones, using RJ-11 telephone cables.
4. Connect MP-252-BW to a standard 110/220 VAC electrical wall
outlet using the supplied AC/DC power adapter; the MP-252-BW
Status LED turns on and when initialization completes (~ 2 min.),
the Status LED changes from red to green. If MP-252-BW is off,
press the Power button located on the rear panel to switch it on.
Before connecting MP-252-BW to power, ensure that the VAC
ratings match, and that you have read the Compliance and
Regulatory Information at www.audiocodes.com/library.
For wall mounting MP-252, refer to the supplied documentation.
3. Configuring Network Parameters
To initially authenticate your MP-252-BW Wi-Fi network, open a
Web browser and then log in with the case-sensitive, default
username (“admin”) and password (“admin”).
1. Verify that your PC’s LAN status displays “Connected” in the ‘Local
Area Connection Status’ window (Start menu > Settings > Network
Connections > Local Area Connection).
2. If the LAN status displays “Disconnected”, click Properties, select
‘Internet Protocol (TCP/IP)’, and then click Properties. Ensure that
the option ‘Obtain an IP address automatically’ is selected.
3. Open your Web browser, and then enter the following URL address:
http://mp252.home.
The MP-252-BW embedded Web server’s ‘Welcome’ screen is
displayed. Click OK, and then define a new login password.
4. In the ‘Quick Setup’ page, choose the Internet connection method.
Consult with your ISP for the required connection type, and then
click OK. The Network map displays devices connected to MP-252-
BW. Your PC is now connected to the Internet and you can now
configure VoIP parameters.
If there is no Internet connection, MP-252-BW Web server’s Map
View page (Home) displays a red icon after the globe icon.
Consult your ISP for valid connection parameters.
Question and Answer IconNeed help?

Do you have a question about the AudioCodes MP-252 and is the answer not in the manual?

AudioCodes MP-252 Specifications

General IconGeneral
ModelMP-252
TypeGateway
Number of FXS Ports2
Network InterfaceEthernet
Ethernet Ports2
Fax SupportT.38
Humidity10% to 90% non-condensing
Ports2 FXS
ProtocolsSIP
Voice CodecsG.711, G.723.1, G.726, G.729
Weight0.5 kg
Operating Temperature0°C to 40°C

Summary

Before Installing MP-252 Multimedia Home Gateway

Received Items Checklist

Lists the items included with the AudioCodes MP-252 Multimedia Home Gateway package.

Required Additional Setup Items

Lists items not supplied by AudioCodes but necessary for MP-252 installation and operation.

Cabling the MP-252-BW

ADSL Internet Connection Setup

Connect the MP-252-BW's ADSL port to the telephone socket using an RJ-11 cable.

Connecting Analog Telephones

Connect analog telephones to the MP-252-BW FXS ports using RJ-11 telephone cables.

Powering On the Device

Connect the MP-252-BW to a standard AC/DC electrical outlet using the supplied power adapter.

Connecting to Local Area Network (LAN)

Connect MP-252-BW Ethernet ports (LAN 1-4) to computers using CAT 5 Ethernet cables.

Configuring Network Parameters

Initial Wi-Fi Network Authentication

Log in to the MP-252-BW Wi-Fi network using default username 'admin' and password 'admin'.

Verify PC Local Area Connection

Check PC's LAN status for 'Connected' and ensure IP address is obtained automatically.

Accessing the MP-252 Web Interface

Open a web browser and navigate to http://mp252.home to access the gateway's interface.

Quick Setup and Internet Connection Method

Configure a new login password and select the Internet connection method via Quick Setup.

Configuring VoIP Parameters

ISP Registration for VoIP Calls

Register with an Internet Service Provider and obtain necessary account and SIP Proxy information.

Configuring FXS Line Settings

Select connected telephone lines and configure parameters provided by your ISP for FXS lines.

Setting Up SIP Proxy

Enter your ISP's Proxy server IP address or host name to enable SIP Proxy functionality.

Verifying SIP Registration Status

Confirm successful SIP registration by checking the Phone LED or the 'SIP Registration' status.

Making Outgoing VoIP Calls

Pick up the phone receiver to obtain a dial tone, indicating readiness for VoIP calls.

Related product manuals