Do you have a question about the August DVB482 and is the answer not in the manual?
Lists all items included in the product packaging, such as the set-top box, cables, and adapters.
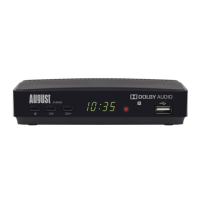
Confirms that all necessary components, including the set-top box, HDMI cable, manual, remote, and batteries, are present.
Connect the power adapter to a mains outlet and the rear of the DVB482 set-top box for power supply.
Connect the DVB482 to your TV using either an HDMI cable or a SCART cable for video and audio output.
Connect an aerial cable to the RF IN port on the DVB482 to receive TV signals.
Insert batteries into the remote control and power on the set-top box to begin the setup process.
Ensure 'Aerial Power' is ON during the initial scan and wait for the channel search to complete.
Utilize the 'EPG' button on the remote to browse and view available TV channels and their schedules.
Insert a USB drive into the box and navigate to 'Media Player' to access recording setup.
Select 'USB Device Information' to view details about the connected USB storage.
Format the USB drive using the remote's yellow button, selecting NTFS, to prepare it for recording.
Highlight a desired show in the EPG and press the Red button to schedule it for recording.
Press the Blue 'Timer' button, select the recording, set 'Timer Mode' to 'Off', and save to remove.
Use the Blue 'Timer' button to manually schedule recordings by setting date, time, and type.
| Brand | August |
|---|---|
| Model | DVB482 |
| Category | Set-top boxes |
| Language | English |