19
EN
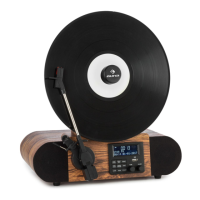
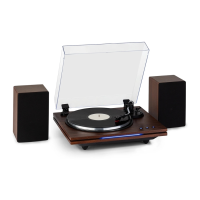
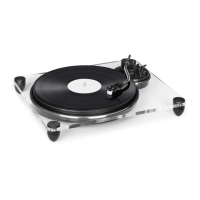
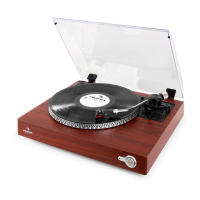
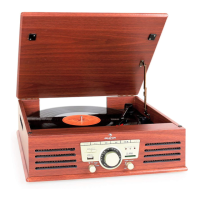
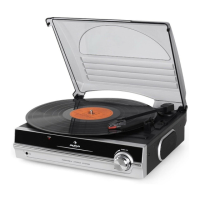
1 Cartridge and Stylus 13 USB socket
2 Turntable 14 Magnetic Adapter
3 Tone Arm 15 LCD Screen
4 Speakers 16 MENU/INFO Button
5 Cue Level 17 ENTER/SNOOZE Button
6 PLAY/PAUSE Button 18 PRESET Button
7 PAIR/SCAN Button 19 MODE Button
8 ALARM Button 20 Speed Control Knob
9 SLEEP Button 21 AUX IN Jack
10 STANDBY Button 22 EARPHONE Jack
11 TUNE Knob 23 Power Jack
12 VOLUME Knob 24 Power Switch
COMMISSIONING AND OPERATION
Before start-up
• Carefully remove the device from its packaging and completely remove
the packaging material.
• Unwind the power cord completely.
• Place the product on a stable, at surface near a wall outlet and away
from strong magnetic elds.
Start-up
• Connect the mains plug of the device to the socket.
• Remove the white plastic cover from the turntable pin by pulling it in
the direction of the arrow.
• When using the unit, be careful not to damage the turntable pin.
• This product is designed to work with an AC adapter (12 V 1 A). Using this
product with any other AC adapter may cause damage.
NOTE: The device is equipped with a standard mains plug. If this power plug
does not t into your outlet, do not attempt to le it. If this plug does not
t into your outlet, your outlet is probably obsolete and not polarized. You
should have your outlet replaced by a qualied electrician.
 Loading...