Attention: In order to mount the Aureo bed lamp
onto the Auping K2/Match mesh base 11 (flat),
the short screws will have to be replaced by the
long screws. In this case both the clamp strip A
and the vertical adjustment of the lamp are not
required.
Preparing your Aureo for
automatic adjustment
except models 11 (flat) and (3)22 (manually
adjustable)*
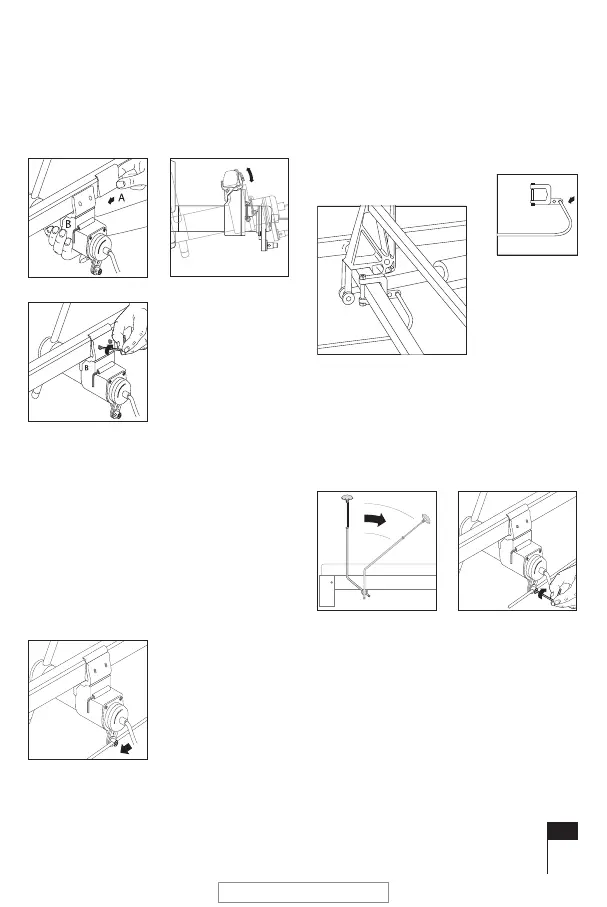
Placing the rod in the lever (fig. 4)
• Place the head end in the highest position.
• Slide the rod through the hole in the lever.
• Do not tighten the screw yet.
* If you own a different model K2/Match mesh
base, you can convert the Aureo to manual ad-
justment (see fig. 7).
Attaching the bracket to the cross tube
(fig. 5)
• Tighten the bracket with the nut and bolt.
Attaching the rod to the lever
• Push the lamp stem towards the foot end to
the stopping point (fig. 6a).
• Tighten the screw (fig. 6b).
• Insert the Allen key into the base of the lamp.
Put the plug in the socket; your Aureo bed lamp
is ready for use.
Conversion to manual adjustment (fig. 7)
• If your bed combination does not have the au-
tomatic adjustment feature, remove the cen-
tre screw from the base of the lamp.
• Turn the lever downwards until it is above the
screw aperture.
GB7
fig. 3
fig. 2
fig. 1
fig. 4
fig. 5
fig. 6b
fig. 6a
2112 BinnenW.pdf - pag.7 May 30, 2006
LET OP !!! Lage resolutie!