11
1. WARNING! TURN OFF THE POWER AND
DISCONNECT THE HEATER FROM THE MAIN
POWER SUPPLY. FAILURE TO DISCONNECT
HEATER BEFORE REPLACING THE EMITTER
COULD CAUSE ELECTRIC SHOCK OR DEATH!
2. Turn OFF the power and disconnect from main
power supply.
3. Be sure the heater and the emitter are cool:
burns can result from touching hot
components.
4. Remove screws from the left side of the heater
fixture and remove the aluminum end cap.
(keep these parts).
5. Carefully slide the protective grille out of the
heater body to expose the emitter and the
white sealing connectors.
6. Carefully unscrew the protective white cap and
carefully slide the cap back cap to expose the
wire/ metal connector system.
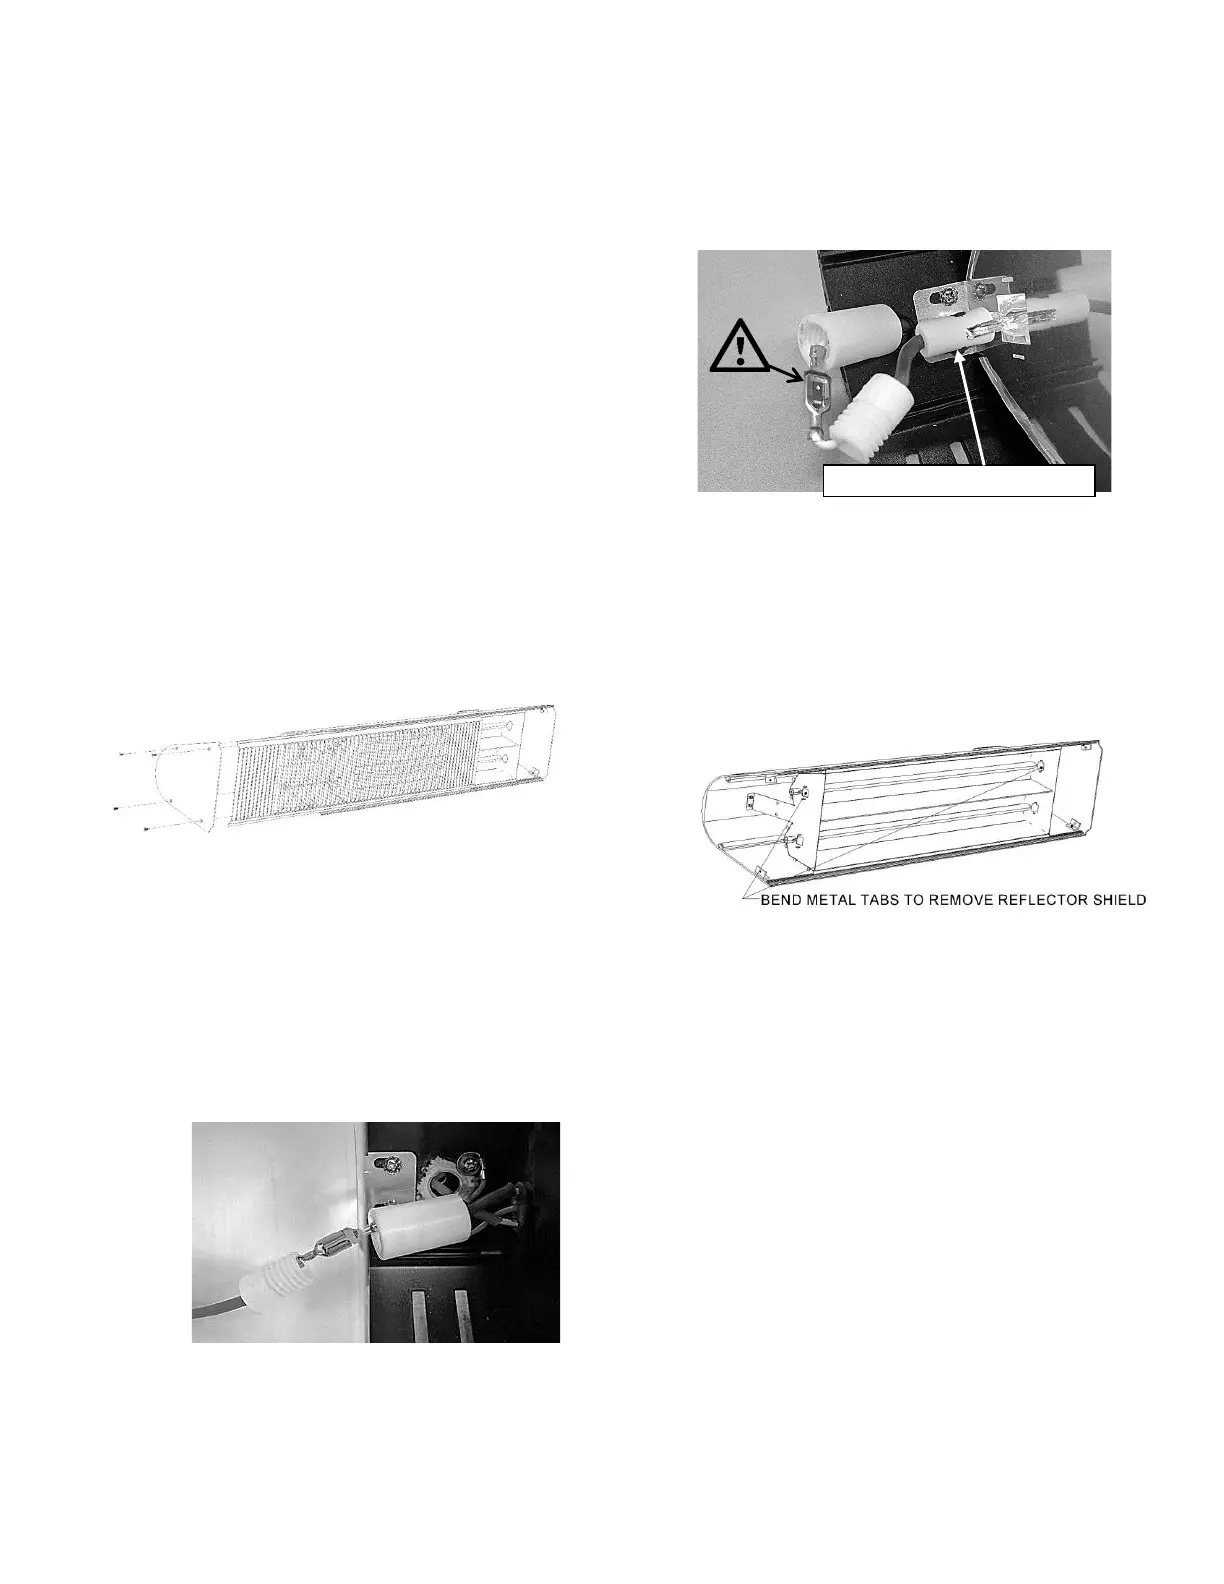
Caution! Disconnect the metal locking
connectors by squeezing the metal tab.
7. Bend the metal tabs to remove the small
reflector shield sheet metal parts. Hold on to
these pieces. This will allow you to slide the
emitter into a bigger cavity to remove it from
the reflector and heater body. Properly dispose
of the broken emitter at your local recycling
center.
8. Hold the new emitter by the ceramic ends or
wear clean dry gloves to prevent and position
the new lamp inside the unit.
9. Insert the new emitter through the reflector
openings. Insert the Reflector Shields and bend
the tabs back into place. The Reflector Shields
hold the emitter in the correct position during
operation. It is important that they are re-
installed during emitter replacement.
10. Connect the new emitter to the terminals of
the heater; screw in the white plastic caps
Ceramic Infrared Emitter End