13
4.2 REPLACING THE EMITTER
Contact your distributor for the correct replacement emitter, providing the model number and rating from the
rating label. Using an incorrect replacement emitter can cause the heater to fail.
Notice: Read through the Emitter replacement procedure below before beginning the replacement. For easier
replacement, remove the heater from the wall or ceiling.
1. WARNING! TURN OFF THE POWER AND
DISCONNECT THE HEATER FROM THE MAIN
POWER SUPPLY. FAILURE TO DISCONNECT
HEATER BEFORE REPLACING THE EMITTER COULD
CAUSE ELECTRIC SHOCK OR DEATH!
2. Turn OFF the power and disconnect from main
power supply.
3. Be sure the heater and the emitter are cool: burns
can result from touching hot components.
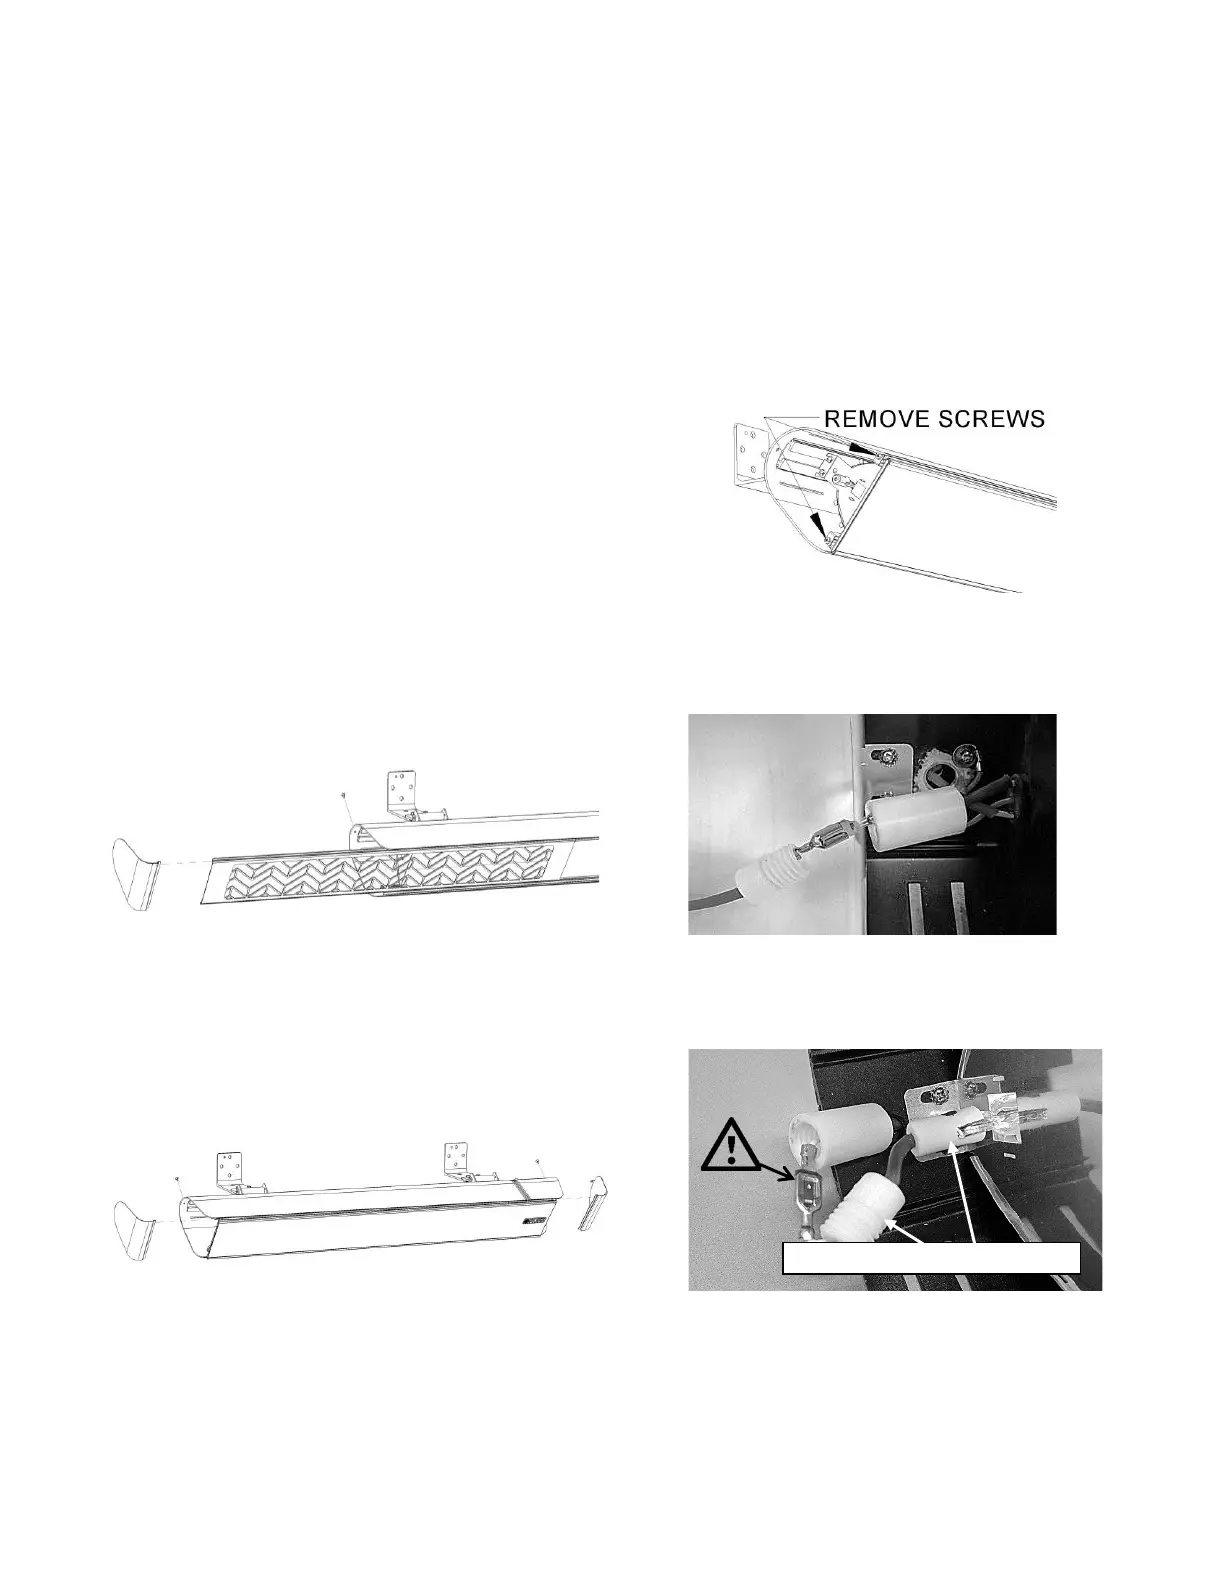
4. For heaters with metal grilles: Remove screw from
the back left side of the heater fixture and remove
the aluminum end cap. (keep these parts).
5. For heaters with metal grilles: Carefully slide the
protective grille out of the heater body to expose
the emitter and the white sealing connectors.
6. For heaters with glass grilles: Remove screw from
the back left and right sides of the heater fixture
and remove the aluminum end cap. (keep these
parts).
7. For heaters with glass grilles: Remove 4 screws
holding the glass grille in place. Gently remove the
glass grille and retain the screws.
8. Carefully unscrew the protective white cap and
slide the cap back cap to expose the wire/ metal
connector system.
Disconnect the metal locking connectors by
squeezing the metal tab.
Sealing connectors/ emitter end