EasyManua.ls Logo

Auto Meter PRO-CYCLE 19304 - User Manual

Default Icon
2 pages
Print Icon
To Next Page IconTo Next Page
Loading...
1
1
22
INSTALLATION INSTRUCTIONS
ELECTRIC TACHOMETERS
2650-600X-10 Rev. B
Important Notes
1. This tachometer has an air core meter. The tach pointer may not always rest at zero. This is normal. When engine is started, pointer will
position on the correct RPM.
2. This tachometer is not waterproof. We strongly recommend that you take precautions to protect your tach during vehicle washings.
3 An under-charged battery may cause incorrect tach operation. Also avoid connecting tach in series with ballast resistor.
4. When charging battery, make sure the tachometer is disconnected from the battery.
5. Use only supplied or recommended mounting options for your tachometer. Others may void your warranty.
6. Solid core ignition wires may cause tachometer interference.
7. Isolate tachometer wires from ignition and ignition wires.
8. Ignition manufacturers recommend that the ignition and coil be matched according to criteria which they establish (often the ignition and coil are
products of the same company). Mismatching coil and ignition types may cause erratic tachometer operation.
9. If you are using a points ignition or your ignition module does not have a tachometer connection, connect the green tach wires to the negative
side of the coil or coils. If you are using a two-coil ignition connect one green wire to the negative side of each coil.
Before wiring your tachometer determine the required pulse per revolution for your application. This tachometer comes from the factory setup to
operate in a 1 pulse per revolution application. If your application is 2 pulse per revolution, follow the instructions below.
Calibration
(Models 19304, 19305, 19324, 19325)
Calibration
(Models 19306, 19307, 19308, 19309)
Mounting
1 Pulse - Both switches down.
2 Pulse - Both switches up.
Switch
If used on a 2 pulse per revolution system, remove the screw at the rear of the cup.
This requires a 3/32" Allen Wrench. Carefully slide the cup back along the wires
to expose the inner case. Remove the snap in light socket assembly to access the
cylinder select switches. The switches are located to the left of the light hole. Use a
small screwdriver or an unwound paper clip to change the switch settings.
Custom mounting brackets are available through Yankee Engineuity. www.yankeeengineuity.com and Cycle Performance
Products. www.motomacchi.com/inventory/cycleperf.html
Unwound
Paper Clip
1 Pulse 2 Pulse
DN DN
UP UP
1
1
2
2
1 Pulse - Both switches left.
2 Pulse - Both switches right.
Switch
Unwound
Paper Clip
1 Pulse 2 Pulse
Left
Left
Right
Right
Question and Answer IconNeed help?

Do you have a question about the Auto Meter PRO-CYCLE 19304 and is the answer not in the manual?

Overview

This document provides installation instructions for the PRO-CYCLE Electric Tachometers, specifically models 2650-600X-10 Rev. B. It covers important notes, calibration procedures, wiring diagrams, and warranty information.

Function Description:

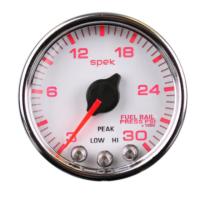
The PRO-CYCLE Electric Tachometer is designed to measure and display the engine's revolutions per minute (RPM). It features an air core meter, which means the tachometer pointer may not always rest at zero when the engine is off; this is considered normal operation, and the pointer will position correctly once the engine starts. The device is intended for use in various vehicle applications, providing crucial engine performance data to the user.

Important Technical Specifications and Usage Features:

General Operation and Installation:

  • Air Core Meter: As noted, the tachometer uses an air core meter, which may result in the pointer not resting at zero when the engine is off. This is normal behavior.
  • Water Resistance: The tachometer is explicitly stated as not waterproof. Users are strongly advised to take precautions to protect the tachometer during vehicle washings to prevent damage.
  • Power Supply and Connections:
    • Battery Condition: An under-charged battery can lead to incorrect tachometer operation.
    • Ballast Resistor: Avoid connecting the tachometer in series with a ballast resistor.
    • Charging: The tachometer must be disconnected from the battery when charging the battery to prevent damage.
    • Fuse Requirement: For safety, the +12V terminal of the tachometer should be fused before connecting it to the 12V ignition switch. A 3 Amp automotive-type fuse is recommended.
    • Wiring to Ignition:
      • Always connect both green wires to the ignition tach terminal if available.
      • Alternatively, for single-coil ignitions, connect both green wires to one of the coil negatives. Older models might have only one coil negative.
      • For two-coil ignitions, connect one green wire to the negative side of each coil.
      • Crucial Warning: Do not connect the red wire to the coil. The red wire should only be connected to the ignition switch or battery, and always through a separate switch.
      • MSD Ignitions: If using MSD ignitions, the warranty will be void if connected to the coil. Attach only to the tach terminal.
  • Mounting: Only use supplied or recommended mounting options for the tachometer. Using other mounting options may void the warranty. Custom mounting brackets are available from third-party vendors like Yankee Engineuity and Cycle Performance Products.
  • Ignition System Compatibility:
    • Ignition Wires: Solid core ignition wires may cause tachometer interference. It is recommended to isolate tachometer wires from ignition wires.
    • Coil Matching: Ignition manufacturers recommend matching the ignition and coil according to their criteria. Mismatching can lead to erratic tachometer operation.
    • Points Ignition/No Tach Connection: If using a points ignition or an ignition module without a tachometer connection, connect the green tach wires to the negative side of the coil(s).

Calibration (Pulse Per Revolution Settings):

The tachometer needs to be calibrated based on the number of pulses per revolution (PPR) generated by the vehicle's ignition system. The device comes factory-set for 1 pulse per revolution.

  • Models 19304, 19305, 19324, 19325 (Internal Switches):

    • To change the setting, remove the screw at the rear of the cup (using a 3/32" Allen wrench), slide the cup back, and remove the snap-in light socket assembly to access the cylinder select switches.
    • 1 Pulse: Both switches should be in the "down" (DN) position.
    • 2 Pulses: Both switches should be in the "up" (UP) position.
    • A small screwdriver or an unwound paper clip can be used to change the switch settings.
  • Models 19306, 19307, 19308, 19309 (External Switches):

    • These models feature external switches for calibration.
    • 1 Pulse: Both switches should be in the "left" position.
    • 2 Pulses: Both switches should be in the "right" position.
    • An unwound paper clip can be used to change the switch settings.

Maintenance Features:

  • Service: For product service, the device should be sent to Auto Meter in a well-packed shipping carton. For warranty adjustments, a copy (or original) of the sales receipt from the place of purchase must be included.
  • Warranty:
    • Duration: Auto Meter Products, Inc. offers a twelve (12) month limited warranty from the date of original purchase, covering defects in material and workmanship.
    • Coverage: The warranty is limited to the repair or replacement of parts at Auto Meter's option. It does not exceed the original purchase price and does not cover special, incidental, or consequential damages.
    • Conditions: Warranty claims must be transportation prepaid and accompanied by dated proof of purchase. The warranty applies only to the original purchaser and is non-transferable.
    • Voiding Conditions: The warranty is voided by breaking the instrument seal, improper use or installation, accidents, water damage, abuse, unauthorized repairs or alterations.
    • MSD Ignition Warning: Connecting the tachometer to the coil on MSD ignitions will void the warranty. It must only be attached to the tach terminal.

Contact Information for Service:

AUTO METER PRODUCTS Inc. 413 W. Elm St., Sycamore, IL 60178 USA Phone: (866)248-6357 Email: service@autometer.com

Auto Meter PRO-CYCLE 19304 Specifications

General IconGeneral
BrandAuto Meter
ModelPRO-CYCLE 19304
CategoryMeasuring Instruments
LanguageEnglish

Related product manuals