This document serves as the user manual for Avantco SS Series Reach-In Refrigerators and Freezers, providing comprehensive instructions for installation, operation, maintenance, and troubleshooting. It emphasizes the importance of reading the manual thoroughly before equipment setup, operation, and maintenance to ensure proper functioning and to avoid voiding the warranty.
Function Description
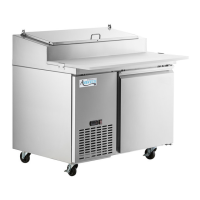
The Avantco SS Series Reach-In Refrigerators and Freezers are designed to maintain optimal temperatures for food safety in commercial settings. These units are intended for use in temperature-controlled environments, specifically where ambient temperatures are less than 75 degrees Fahrenheit and relative humidity is below 60%. Refrigerators are factory-set to cycle between a minimum of 33 degrees Fahrenheit and a maximum of 40 degrees Fahrenheit, ensuring cold products remain cold. Freezers are factory-set to cycle between a minimum of -5 degrees Fahrenheit and a maximum of 2 degrees Fahrenheit. The units feature an automatic defrost system to prevent frost buildup and maintain efficiency. Refrigerators achieve defrosting during compressor downtime as the evaporator fan circulates air, melting accumulated frost, while freezers utilize an electronic defrosting mechanism.
Usage Features
Installation and Placement:
Proper installation is crucial for the unit's performance and longevity. The unit must be placed on a strong, level surface in an indoor, well-ventilated area. A minimum clearance of 6 inches on the back of the unit is recommended for optimal performance. It should be located away from direct sunlight, doors, air ducts, and fans that could disrupt airflow. Installation in high-humidity (above 60%) or dusty areas should be avoided, as these conditions can lead to rust, condensation, decreased efficiency, and condenser coil malfunction, potentially voiding the warranty. The unit should not be installed inside a closet or alcove.
Electrical Requirements:
The unit requires a grounded and properly-sized electrical outlet with appropriate over-current protection, as specified on the unit's nameplate. It must have its own dedicated outlet, and extension cords should not be used. To prevent damage to the compressor, if the unit has been transported on its side, it must stand upright for a minimum of 24 hours before being plugged in. After unplugging, a wait time of at least 10 minutes is required before plugging it back in. Users are warned against plugging or unplugging the unit with wet hands to avoid shock and fire hazards.
Loading Products:
Before loading products, ensure the unit has reached the desired temperature. The unit is designed to keep cold products cold, not to chill warm products. Shelves must be installed correctly, with any raised lip facing up towards the rear of the cabinet to promote proper airflow. All accessories, including shelves, shelf clips, and casters, should be installed before plugging in the unit. A minimum of four inches of clearance from the evaporator is necessary for proper air circulation. Flammable and explosive gases or liquids should not be stored inside the unit.
Temperature Control:
While factory-set for optimal food safety, the digital control units allow for temperature adjustments. To change the minimum temperature, hold the "SET" button for 1 second until the display flashes, use the arrow buttons to adjust, and press "SET" again to save. Users are reminded to account for the temperature differential, as the cabinet temperature will fluctuate up to 7 degrees Fahrenheit from the set minimum. Setting the temperature too high can lead to unsafe maximum temperatures and potential health code violations.
Manual Defrost Cycle:
Although automatic defrost cycles run at preset intervals, users can initiate a manual defrost. For refrigerators, press the defrost button ("DEF" and down arrow symbol) for approximately 5 seconds. For freezers, press the defrost button (snowflake symbol and down arrow symbol) for approximately 3 seconds. Repeating the action will stop the defrost cycle.
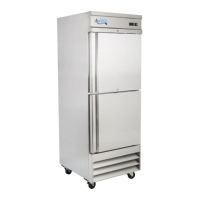
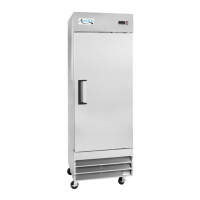
Field Convertible Doors (Solid Door Models):
The Avantco 178SS1RHC and 178SS1FHC models ship with a right-hinged door design. For solid door models, these can be converted to a left-hinged design by purchasing a separate left hinge kit (Avantco item #178SS1KITFR) and following specific instructions. This process involves removing the bottom vent and top panel, detaching the existing hinges and door, replacing the bottom hinge with the new left-hand bracket, adjusting spring tensioners, reattaching the door and top bracket, and finally replacing the small screws, bottom vent, and top panel. Tools required include a socket set, pliers, an adjustable wrench, and a Phillips head screwdriver.
Maintenance Features
General Maintenance:
The manual stresses that any servicing of the unit should be performed by an authorized service technician. Users should not attempt to remove or repair any component unless specifically instructed by the factory. It is also advised not to hang on doors or stand inside the unit.
Cleaning the Exterior:
Regular cleaning of the stainless steel exterior is recommended using soft cloths, microfibers, sponges, or plastic scouring pads. Harsh materials like steel wool, caustic soap, abrasive cleaners, or bleach should be avoided as they can damage the finish. A water-based aerosol cleaner/polish, such as Excel by Noble Chemical (Item #999EXCEL), is suggested for optimal care.
Cleaning the Interior:
The cabinet interior should be cleaned with warm water and mild soap. Similar to the exterior, steel wool, caustic soap, abrasive cleaners, or bleach should not be used. Shelves and pilasters should be periodically removed and cleaned with mild soap and warm water. To remove pilasters, first remove shelves and shelf brackets, then lift the pilaster up and out.
Cleaning Fan Blades and Motor:
If necessary, fan blades and the motor should be cleaned with a soft cloth. If washing the fan blades is required, the fan motor must be covered to prevent moisture damage.
Cleaning the Condenser Coil:
For efficient operation, the condenser coil, located at the bottom behind a panel, must be kept free of dust, dirt, and lint. Monthly cleaning is recommended, as a dusty condenser can lead to high energy consumption, reduced cooling effectiveness, and compressor damage.
The cleaning process involves:
- Disconnecting electrical power.
- Removing the front and base covers with a screwdriver.
- Using a soft brush and/or vacuum to remove dirt and lint from the finned condenser coil in a vertical direction.
- Cleaning the condenser with a commercial condenser coil cleaner (e.g., Noble Chemical Tech Line).
- Straightening any bent condenser fins with a fin comb.
- Reinstalling the front and base covers.
- Reconnecting electrical power.
Door Gasket Maintenance:
Door gaskets should be washed regularly, preferably weekly. To clean, remove the gasket from the door frame, soak it in warm water and soap for 30 minutes, dry with a soft cloth, and then replace. After replacement, check for a proper seal. If gaskets are not sealing properly, they may need to be repaired or replaced to prevent condensation and maintain cabinet temperature.