Customer Instruction Booklet:
StarSet
®
Headset
Maintenance Hint for Optimum Performance
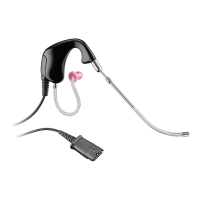
Replace the Versatip every 6 months or sooner if it hardens, shrinks,
tears, cracks or becomes misshapen.
Clean the Versatip daily with a cloth dampened with warm water; do
not use cleaning solvents as they may damage the Versatip or cause
skin irritation.
Adjusting the Voice Tube
With one hand, hold the capsule securely against your head. With
your other hand, pull out or push in the voice tube and rotate the tip so
it is approximately 1/2" away from your face at the corner of your
mouth. (Refer to FIGURE 6)
Maintenance Hint for Optimum Performance
Replace your voice tube every six months.
Attaching StarSet
®
to Glasses
StarSet is designed to fit comfortably with glasses. If you desire a
more secure fit, use the Eyeglass Clip. Attach the clip to the side on
which you wear your headset.
A For plastic frames, slip the clip onto the temple of your glasses with
the grips for the headset facing away from your head.
(Refer to FIGURE 7A)
B For metal or wire frames, pull back the tab on top of the clip. Then,
slip the clip onto the temple of your glasses with the grips for the
headset facing away from your head. The clip should be secure
when the tab is released. (Refer to FIGURE 7B)
Attach the headset by slipping the voice tube balljoint into the clip.
(Refer to FIGURE 7B)
Quick Disconnect
Your headset model is equipped with a Quick Disconnect module.
This feature allows you to temporarily disconnect your headset without
removing your headset, thus freeing you to perform a task away from
the phone. Your conversation is quickly resumed by reconnecting the
Quick Disconnect.
Before attempting to use your headset, be sure that the two Quick
Disconnect halves are connected.
FIGURE 5
FIGURE 6
FIGURE 7
FIGURE 8
1
1
2
A
B
To temporarily disconnect your headset, grasp the Quick Disconnect
as shown and pull straight apart. (Refer to FIGURE 8)
To resume your conversation, reconnect the two halves of the
Quick Disconnect.
Placing and Receiving Calls with the Modular Amplifier
For headset use, depress the middle button (labeled “ON/OFF”) so
that the color indicator is visible. (Refer to FIGURE 9)
To place a call, remove the telephone handset from its cradle. You
should hear your dial tone. Dial normally. To end the call, hang up
the handset.
To receive a call, remove the handset from its cradle. You can now
hear and be heard by the calling party. To end the call, hang up
the handset.
For handset use, depress the “ON/OFF” button again so that the
color indicator does not appear. Pick up your handset as you
would normally.
Setting the Volume Control
To set the volume control to the hearing level most comfortable for
you, start with the wheel turned to number 3, the lowest level. To
increase the volume, rotate the wheel to a higher number. (Refer to
FIGURE 10 or 11, as appropriate)
Using the Mute Button on the Modular Amplifier
To mute your voice while still hearing the caller, depress the “MUTE”
button so that the color indicator is visible. (Refer to FIGURE 12)
To resume speaking to your caller, depress the “MUTE” button again
so that the color indicator does not appear.
IF YOU HAVE ANY QUESTIONS, PLEASE CONTACT YOUR
AVAYA REPRESENTATIVE AT 800-628-2888
49346-01 (10•00)
FIGURE 9
FIGURE 10
FIGURE 11
FIGURE 12
1
2
2
3
1
2
3
4
3 4