English-5
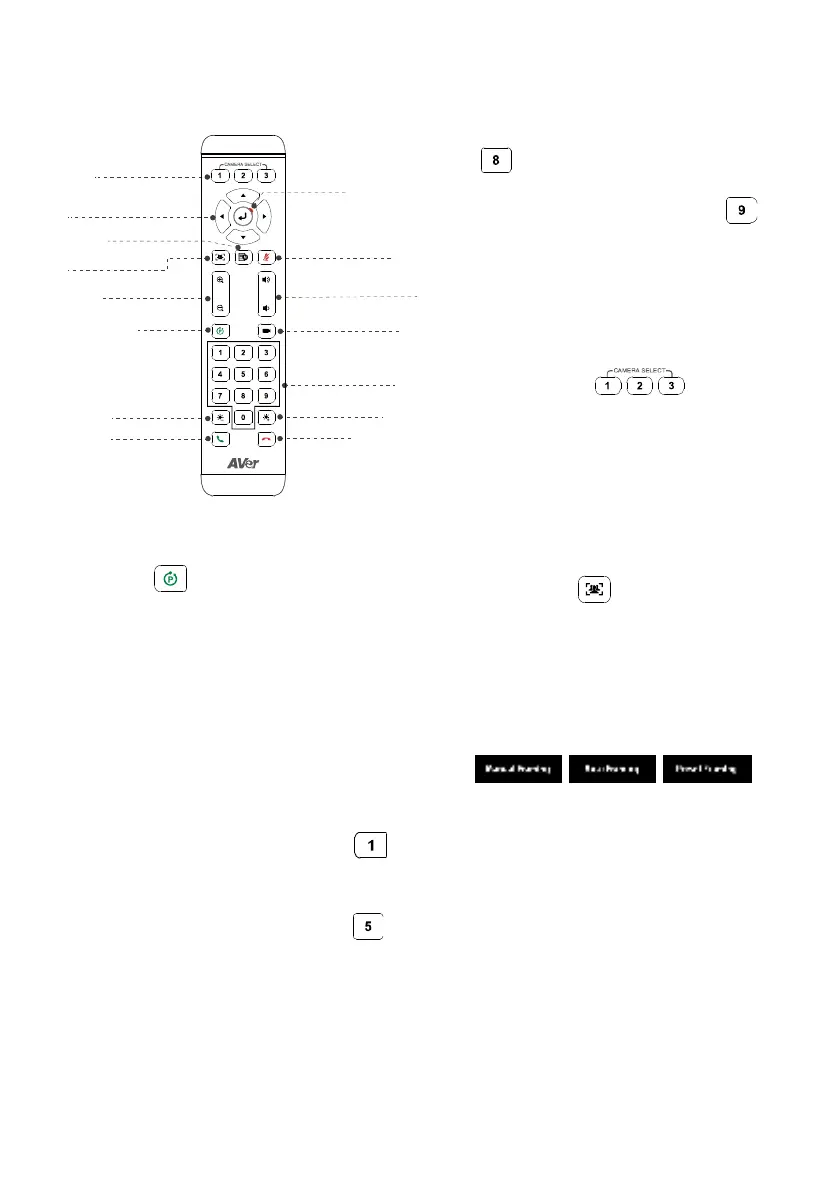
Remote Control
Camera Select
Camera Directional
Control
OSD Menu*
SmartFrame
Zoom In/Out
Preset
Call/Answer
Brightness -
Enter*
M
u
t
e
/
U
n
-
m
u
t
e
V
o
l
u
m
e
U
p
/
D
o
w
n
P
r
e
s
e
t
H
o
t
K
e
y
P
r
e
s
e
t
P
o
s
i
t
i
o
n
H
a
n
g
u
p
B
r
i
g
h
t
n
e
s
s
+
*Not support for VC520 Pro2
AAA Batteries (required)
Preset (
):
The Preset button on the
remote serves 2 functions.
To Save a Preset
- Move camera to desired
position. Press and hold the preset button
until you receive the save message on the
screen. Select preset position button 0-9 to
store the current camera position. Repeat
steps if needed.
To Load a Preset
- Press the preset button
and preset position button 0-9 to load a saved
camera position. Repeat steps if needed.
Press and hold the number button “
”
for 1 second to turn on or off the WDR
function.
Press and hold the number button “
” for
1 second to turn on or off the SmartFrame
function.
Press and hold the number button
“
” for 1 second to enable or disable
RTMP streaming function.
Press and hold the number button “
”
for 1 second to force camera to enter
sleep mode. It will cut all the video
streaming off. To wake it up, press the
button for 1 second again or press
direction button. It’s not workable while
USB streaming is on.
Camera Select (
):
If you
only have one camera and don’t need to
do custom settings, the default is
camera 1. If you press camera 2 or 3 on
the remote control, you will find your
remote can’t control your camera. In this
case, please press camera 1 on your
remote again.
SmartFrame (
):
Press for 1 second
to switch the SmartFrame function
among Manual Framing/Auto Framing/
Preset Framing modes. A message (as
figures shown) will display on the screen
to indicate the mode.
[Note]
SmartFrame deploys face and
body defection technology. People
wearing masks or in side facial profiles
still can be detected. The maximum
detection distance is 7-10 meters.
Set up preset points in advance (Only for
Preset point 1-9. Preset 0 is for home
position).

 Loading...