11
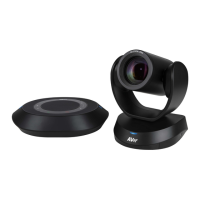
Use VC520+
Make a Video Call
1. Make sure all devices (camera, speakerphone, and laptop/PC) are well connected and camera is
powered on.
2. Run your video application (Skype
TM
, Microsoft
®
Lync
TM
, Google Hangout, Cisco WebEx
®
,
GoToMeeting
TM
, WebRTC, and etc.) on your laptop/PC.
3. Set the VC520+ camera as the primary camera for your video application (refer to your video
application user guide). You can now make your call.
4. The VC520+ is a plug-and-play conference camera. The system requires no special drivers, but we
do recommend installing the AVer PTZApp for a better user experience. For information on how to
install and use the AVer PTZApp, refer to the AVer PTZApp section in this user manual.
Phone in
To connect the VC520+ speakerphone to your mobile phone as a hands free call device.
1. Use the included 3.5mm AUX cable to connect your mobile device to the “Phone In” jack on the
speakerphone.
2. Once the VC520+ detects the proper connection to your mobile phone. When connection is
successful, the “Cellphone” indicator will light up.
Line in
To connect another VC520+ speakerphone to extend the distance of speakerphone coverage to cover a
room that has a diameter larger than 30’ and increase the volume:
1. Connect one side of the daisy chain cable (not included) to the speakerphone port (daisy chain).
2. Connect the other side of the cable to the speakerphone port on the other VC520+ speakerphone.
LED Indicator
Camera
Flashing blue and camera head is rotating
Camera is not being used
by the computer
Solid orange and camera head is down.