The provided document is an Owner's Manual & Installation Instructions for "The Dallas Retro® Style Awning" manufactured by Awntech Corporation. This manual details the assembly, installation, maintenance, and warranty information for a fixed-frame awning designed for residential and commercial use.
Function Description
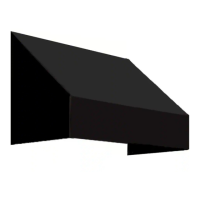
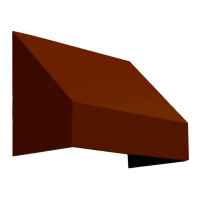
The Dallas Retro® Style Awning is a fixed-frame awning designed to provide shade and aesthetic enhancement to windows and doors. Its primary function is to offer protection from sun and weather elements, contributing to energy efficiency by reducing solar heat gain. The awning is designed to be installed directly onto a wall, as there is no connecting part between the Projection Bar (BP) and Top Bar (TB). The manual emphasizes that the awning's frame must be securely anchored to the wall.
Important Technical Specifications
Dimensions and Sizing:
The awnings are designed to be 4.5 inches wider than standard window/door openings to allow for anchoring to studs around the opening. The manual provides a detailed table for awning sizes in feet and their corresponding widths in inches, ranging from 3 ft (40.5 inches) to 20 ft (244.5 inches).
Models:
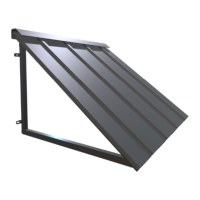
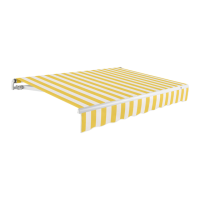
The Dallas Retro® awning is available in models with and without a valance.
- Models with Valance: RR12, RR22, ER23, CR32, CR34, CR43, CR44, ER2442, ER12, ER1836, ER1230, ER1030, ER24, CR33.
- Models without Valance: RR12-NV, RR22-NV, ER23-NV, CR32-NV, CR34-NV, CR43-NV, CR44-NV, ER2442-NV, ER12-NV, ER1836-NV, ER1230-NV, ER1030-NV, ER24-NV, CR33-NV.
Component Breakdown:
The awning frame consists of several key parts:
- TB (Top Bar - C Channel): The main horizontal bar that attaches to the wall.
- FB (Front Bar): The horizontal bar at the front of the awning.
- NC (Hypotenuse/Cove Support): Diagonal supports connecting the Top Bar to the Front Bar.
- BP (Black Projection Bar): Bars that define the projection depth of the awning.
- Z-Brackets: Used to mount the Top Bar to the surface.
- Self-tapping screws: For securing components.
The number of these components varies with the awning size. For instance, a 3 ft awning uses 1 TB, 1 FB, 2 NC, and 2 BP, while a 20 ft awning uses 3 TB, 3 FB, 7 NC, and 7 BP. Awnings over 6 ft wide come in multiple sections (e.g., a 6 ft Top Bar consists of TB1 & TB2).
Height and Projection (with and without Valance):
A detailed chart provides "Space between TB and BP in inches," "Height incl. Valance," and "Projection" for various models. For example:
- RR22 (with valance): 24 inches space between TB and BP, 31 inches height (incl. valance), 24 inches projection.
- RR22-NV (without valance): 24 inches space between TB and BP, 24 inches height, 24 inches projection.
- CR44 (with valance): 48 inches space between TB and BP, 56 inches height (incl. valance), 48 inches projection.
- CR44-NV (without valance): 48 inches space between TB and BP, 48 inches height, 48 inches projection.
The example RR22-5 is specified as 64.5 inches wide, 31 inches tall (24 inches plus 7 inches valance), and 24 inches deep (projection).
Installation Hardware (Not Supplied):
The manual explicitly states that Awntech does not supply installation hardware. Customers need to purchase these locally, with recommendations based on wall type:
- Concrete Block Walls: 1½" masonry bit (3/8" shank), (4-5) 5/16"x3" Masonry anchor bolts, 9/16" socket.
- Metal Buildings: (1) 2X6X8 #2YP Cut into 12" blocks, (4-5) 5/16"x4" lag bolts, (4-5) 5/16" washer, 3/8" drill bit.
- Any Type of Siding: (4-5) ¼"x4" toggle bolts, (4-5) ¼" washers, (1) Flat head screwdriver, (1) ½” drill bit (or if hit a stud); (5-8) 5/16"X4" lag bolts, (4-5) 5/16" washers, (1) 3/16" drill bit, 9/16" socket.
- Concrete, Brick or Stone: (1) 1½" Masonry bit (3/8" shank), (4-5) 5/16"x3" masonry anchor bolts, (4) 5/16"X4" bushings, 9/16" sockets, and weather stripping.
- Stucco: (4-5) ¼"X4" toggle bolts, (4-5) ¼” washers, (1) flat head screwdriver, (1) ½” drill bit (or if hit a stud); (4) 5/16"X4" lag bolts, (4-5) 5/16" washers, (1) 3/16" drill bit, 9/16" socket.
Tools Required:
Electric Drill, ¼" Nut Driver Bit, Full Socket Set, Full set of Steel and Masonry Bits, Tape Measure, Safety Glasses, 4' Level, a Safe Ladder, and #2 Pencil. An assistant may be needed for larger awnings.
Usage Features
Assembly and Installation Process:
The manual outlines a clear, step-by-step installation process:
- Separate Parts: Organize all components for easy assembly.
- Install Top Bar (TB): Mount Z-Brackets to the surface and insert the TB into them, ensuring the C-Channel is close to the wall. Sufficient space below the TB is required for the Projection Bar (BP).
- Assemble Front Bar (FB) and Projection Bar (BP) Structure: Insert the L-shaped plastic ends of the FB into the Left and Right BP, securing them with self-tapping screws. The Velcro on the FB should face towards the installer (or on top for earlier models).
- Install BP & FB Structure: Attach the assembled BP & FB structure to the mounting surface. The manual refers to a chart for the space between the top of the TB and the bottom of the BP.
- Install NC (Hypotenuse/Cove Support): Install the NCs (left and right) with arrows facing upwards, securing them with self-tapping screws into pre-drilled holes on the FB and TB. Ensure the Velcro on NCs faces inwards. For awnings larger than 4 ft (52.5 inches) wide, additional NCs and BPs must be installed.
- Install Fabric Cover (Step 6-8):
- Slide the tubing at the top of the fabric cover into the C-Channel on the top of the TB.
- Pull the remainder of the fabric over the frame, with the valance hanging down below the NC and FB bars.
- Once satisfied with the cover's position, pull the tabs snugly and attach them to the pre-installed Velcro tape on the bars.
Pre-assembled Fittings:
The manual notes that fittings are pre-installed and inspected at the factory, simplifying the assembly process for the customer.
Maintenance Features
Cleaning and Care:
- Frequency: Awnings should be cleaned at least once a year in low maintenance areas, or twice a year in high maintenance areas (e.g., FL, TX, NM, AZ, NV, or high altitude areas).
- Process: Brush off debris with a broom, then brush on a non-detergent cleaning compound (e.g., a solution of 1 part vinegar to 1 part water). Allow it to sit for 20 minutes, then rinse.
- Purpose: Regular cleaning preserves the awning's beauty and extends its life.
Cleaning Chart for Typical Awning Stains:
The manual provides a comprehensive chart for removing various stains:
- Charcoal: Vacuum, then liquid detergent.
- Chewing Gum: Acetone.
- Soda: Liquid detergent.
- Car Grease: Acetone.
- Iron Rust: Oxalic or citrus acids, water.
- Mildew: 1 cup of bleach and ¼ mild soap per gallon of water.
- Oil: Acetone.
- Paint (Latex) Wet: Liquid detergent, water.
- Paint (Latex) Dried: Paint, oil or grease remover.
- Paint (Oil or Lacquer): Paint, oil or grease remover.
- Suntan Lotion: Pine Power® or pine oil detergent.
- Tree Sap: Turpentine, liquid detergent.
Normal Wear & Tear:
The manual acknowledges that weather conditions in certain regions can cause wear and tear. This "normal wear and tear" is not covered under warranty. Damages from improper anchoring, strong winds, snow, or ice are also not considered defects. Replacement fabric is offered at affordable prices.
Warranty (5-Year Manufacturer's Limited Warranty - Prorated by the month):
- Coverage: Applies only to the original purchaser and products installed in the United States. Covers defects in design, manufacture, or assembly.
- Components Covered: Structural supports and acrylic fabric are warranted for five years prorated.
- Acrylic Fabric Warranty: Against excessive fading under normal conditions (if maintained as per manual) and mildew (mildew will not form on the fabric itself, but on dirt/dust that has not been removed).
- Replacement: Within one year, defective components are replaced at no charge. After one year but within five years, replacement requires payment of 1/60th of the full retail cost per month of use.
- Exclusions:
- Intentional or negligent damage.
- Failure to securely fasten the awning to structural members.
- Labor charges for replacement parts.
- Freight expenses for warranty claims.
- Stretching of fabric or damage from wind/water pooling (except for limited acrylic fabric warranty).
- Purchaser Responsibilities:
- Promptly notify Awntech Corporation of claims.
- Provide photos/videos of defective parts if requested.
- May be required to pay a deposit until defective parts are returned for inspection.
- Obtain a return authorization form.
- Ensure proper installation, maintenance, operation, use, and storage as per the manual; failure to do so nullifies the warranty.
- Full payment for the product must be made for the warranty to be valid.
Returns & Damages:
- Return Qualification: Products can only be returned if defective upon arrival. If a customer dislikes the product or measured incorrectly, they qualify for a merchandise credit and must pay for return shipping and a 25% restock fee.
- Non-Returnable Items: Awnings 10 ft or larger, or customized awnings, are non-returnable for refund or exchange.
- Damaged Material: Damage during shipping (scrapes, dents, rips in packaging) should be described to the carrier at the time of delivery. If damage is apparent, the shipment should be refused.
- Fabric Dye-Lot and Lighting Variation: Slight variations in fabric dye-lots and appearance under different lighting conditions are normal and unavoidable.