Page | 9
Use the brackets as a template (the top of the bracket has a ridge on it), mark the hole. Place the bottom of the bracket on
the chalk line.
Use a 1/2” masonry bit to go through the brick or stone.
Install (2) ½”X5-1/2” aluminum tubing into the holes (these can be purchased at your local home center as 3’-section of
1/2” aluminum tubing. Use a hack saw to cut it into 5-1/2” sections.) Using a ratchet, install (2) 3/8”x8” lag screws (1/2”
socket) and (4) 3/8” washer (one washer on the front and back of the bracket, per screw) to secure the bracket to the wall.
Repeat the process for the remaining brackets.
IF YOU KNOW THE BRICK AND THE MORTAR OF YOUR HOME/BUILDING IS STRONG AND CAN HANDLE THE LOAD OF THE AWNING
WITHOUT INSTALLIUNG THE BRACKETS TO THE STUDS THEN YOU MAY DO THE FOLLING (AWNTECH DOES NOT TAKE ANY
RESPONSIBILITY FOR ANY DAMASGES TO THE PROPERTY AND ANY INJURIES TO THE PEOPLE IF THE AWNING IS PULLED OFF FROM
THE WALL) For brick surfaces: use a 5/16” masonry bit to drill 3” deep holes into the surface. Insert two 5/16” x3” wedge anchors
into the hole. Install a washer on each anchor. Place the bracket so the anchors come through the mounting holes. Install another
washer and fully tighten the nuts.
APPLICATION E – Installing wall mounting brackets to metal buildings
Place a ladder safely on a flat, dry, stable surface at both ends of where the awning will be installed.
Using a chalk-line and string level (or a laser level) mark a horizontal line, with the exterior wall surface at least 6” from the
wall.
Mark both ends of where the awning will be installed on the line.
Identify the location of the structural supports. Typically surface screws make them easy to locate.
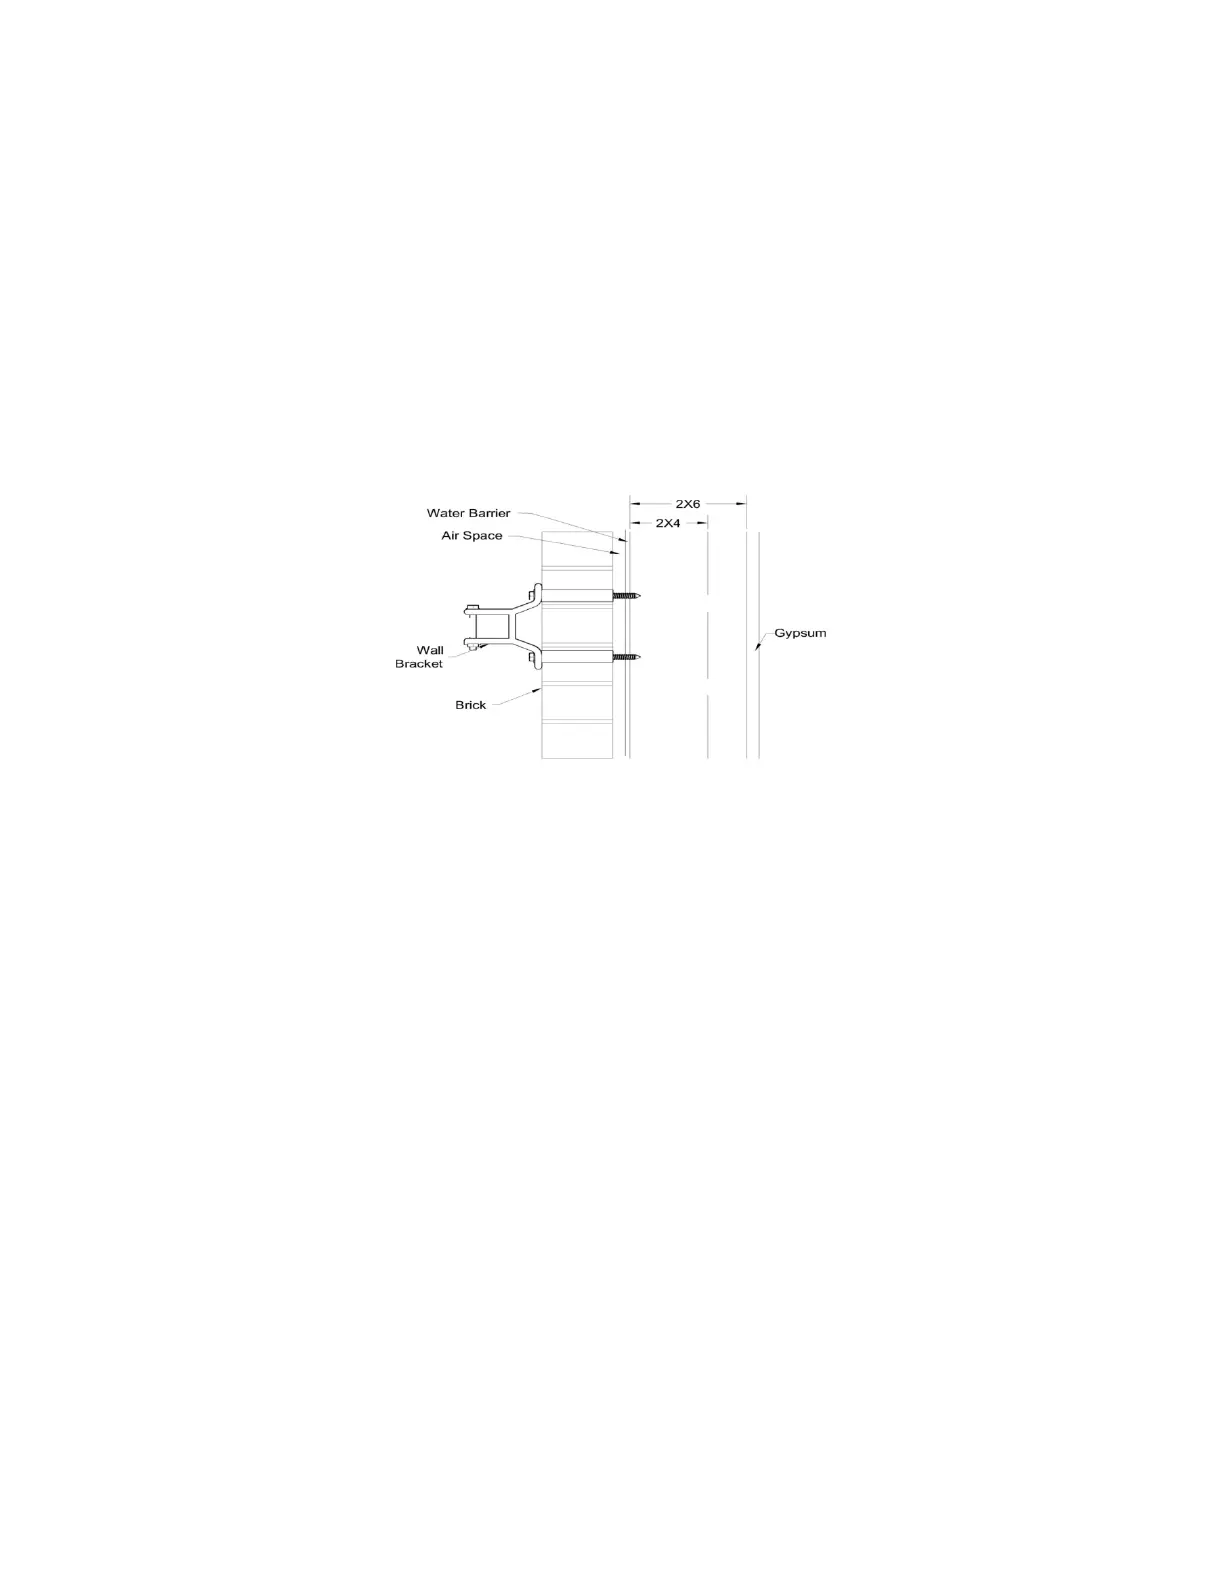
The structural supports are typically vertical, so you will need to mount a piece of 2X6 treated lumber (4” longer than the
awning) onto the surface. The bottom corner of the lumber should be on the chalk-line. Mount it temporarily with 3” Self-
Tapping sheet metal screws. Mount another 2X6 (same length) one on the inside of the metal, again with 3” self-tapping
sheet metal screws.
There should be one bracket within one feet of each and or close to the lateral arms and there should be one bracket within
one feet of each end or close to the lateral arms and then distributes the rest of the bracket(s) evenly spaced across the
awning torsion bar. Use the chalk-line to mark another line on the 2x6 lumber, 1” up from the bottom ends, using the
bracket as a template, mark the holes, place the bottom of the bracket on the chalk line.
Drill holes through the front board with a 5/16” wood/metal bit.
Use a ratchet, install (2) 5/16”x5” lag screws (9/16” socket and (2) 5/16” washers to secure the bracket through the front
board and into the back board.
Repeat the process for the remaining brackets.
Seal the top of the board where it meets the metal siding with clear paint-able silicone.
 Loading...