EasyManua.ls Logo

Awntech Houstonian User Manual

Awntech Houstonian
21 pages
To Next Page IconTo Next Page
Page #1 background imageLoading...
Page #1 background image
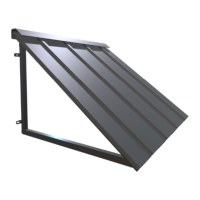
HOUSTONIAN STANDING SEAM METAL AWNING
OWNER’S MANUAL & INSTALLATION INSTRUCTIONS
3’ & 4’ Sizes (Exact width 44” & 56”)
Contents
ATTENTION: Warning Statement ............................................................................................. 2
Hardware for different surface applications ........................................................................... 2
Measuring Guide ....................................................................................................................... 2
Parts List (Mounting Hardware not included) ............................................................................... 4
Assembly for 3ft and 4ft Wide Houstonian Awnings .................................................................... 6
Step 1: Ensure all parts are included ..................................................................................... 6
Step 2: Frame Assembly for 3ft & 4ft Houstonians: ................................................................ 7
Step 3: Insert the Spines onto the Front Bar and Top Bar ....................................................... 8
Step 4: Laying out the Right, Middle, and Left Panels onto the Assembled Frame .................. 9
Step 5: Input the Sheet Screws for the Panels ...................................................................... 10
Step 6: Attaching the Back Bars to the Top Bar .................................................................... 12
Step 7: Attaching the Projection Bars to the Back Bars ......................................................... 13
Step 8: Installing the Shroud (Hood Cover) to the Surface .................................................... 14
Step 9: Assembling the (p) Top Bar Bracket onto the Inside of the (c) Top Bar ..................... 16
Step 10: Mounting the Back Bars of the Assembled Awning to the Surface .......................... 17
Step 11: Mount the (p) Top Bar Bracket to the surface ......................................................... 18
Step 12: Your Houstonian is complete! ................................................................................. 19
WARRANTY ............................................................................................................................. 20
Question and Answer IconNeed help?

Do you have a question about the Awntech Houstonian and is the answer not in the manual?

Awntech Houstonian Specifications

General IconGeneral
BrandAwntech
ModelHoustonian
CategoryAccessories
LanguageEnglish

Summary

Product Information & Safety

ATTENTION: Warning Statement

Critical safety warnings regarding assembly, sharp edges, choking hazards, and plastic bag suffocation.

Hardware for Different Surface Applications

Recommendations for mounting hardware selection based on wall material types for awning installation.

Measuring Guide

Instructions for measuring awning dimensions, including total and inside widths for proper mounting.

Parts List

Parts List (Mounting Hardware not included)

An inventory of all awning components, parts, and their quantities for 3ft and 4ft models.

Houstonian Awning Assembly & Installation

Step 1: Ensure all parts are included

Verify package contents against the parts list before commencing assembly.

Step 2: Frame Assembly

Assemble the main frame components: left/right frames, front/top bars, and connectors.

Step 3: Insert Spines onto Bars

Secure awning spines onto the front bar and top bar using specified sheet screws.

Step 4: Lay out Panels

Position the left, middle, and right awning panels onto the assembled frame.

Step 5: Input Sheet Screws for Panels

Fasten awning panels to the frame using sheet screws along the perimeter.

Step 6: Attaching Back Bars to Top Bar

Connect the left and right back bars to the top bar assembly using bolts and nuts.

Step 7: Attaching Projection Bars

Install projection bars onto the back bars and front bar hinges.

Step 8: Installing Shroud (Hood Cover)

Mount the shroud (hood cover) to the installation surface after preparing pilot holes.

Step 9: Assembling Top Bar Bracket

Secure the top bar bracket onto the top bar of the awning assembly.

Step 10: Mounting Back Bars to Surface

Attach the awning's back bars to the mounting surface using appropriate hardware.

Step 11: Mount Top Bar Bracket to Surface

Secure the top bar bracket to the mounting surface.

Step 12: Your Houstonian is complete!

Final confirmation that the awning installation is successfully completed.

Warranty & Returns

WARRANTY

Details the 5-year limited manufacturer's warranty, including coverage and purchaser responsibilities.

RETURNS & DAMAGES

Outlines the process for returning products and reporting shipping damages.

GENERAL PROVISIONS AND LIMITATIONS

Explains general warranty terms, liability limitations, and legal disclaimers.

Related product manuals