AXIS 200+ Users Manual Section 2: Installing the AXIS 200+
15
Control Button
The Control button is used for multiple purposes, e.g. restoring the
factory default settings, adjusting the white balance, triggering CRON
scripts. Refer to the appropriate sections of the manual.
Stage 3. Installing the Hardware
To connect your AXIS 200+ to the network, follow these instructions:
1. Note the serial number of your AXIS 200+ for future reference
during the installation procedure. This is located on the underside
label of the AXIS 200+.
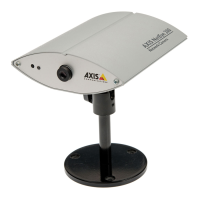
2. Fasten the AXIS 200+ to the mounting assembly and position it
appropriately for your application.
Note:
❏ The intermediate part of the
mounting assembly is
detachable. If more convenient,
you can take the mounting
assembly apart and attach the
camera holder directly to the
foot. See the picture.
Caution!
❏ Please note that the CCD (charged coupled device) within the
AXIS 200+ can become permanently damaged if the camera lens
is exposed to too much direct sunlight!
If you operate the AXIS 200+ in very bright light, we recommend
that you use a lens with adjustable iris (auto or manual). If your
application demands prolonged exposure to sunlight, you should
consider the purchase of a visor. Refer to this link for further
information:
http://www.axis.com/products/camera_servers/applic/housing.
htm