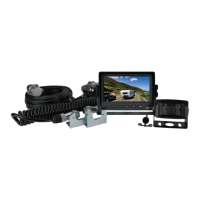
CAR REARVIEW CAMERA
CAMERA ASSEMBLY OPTIONS:
b) Insert Type - Carefully drill hole (hole saw supplied) in bumper & insert camera
16.5mm
CAR REARVIEW CAMERA
CAMERA ASSEMBLY OPTIONS:
See diagram below:
CABLE CONNECTIONS:
See wiring diagram below:
Camera
GND
+12/24V (Red Cable connect to rear lamp positive)
F
F
M
M
Monitor
+
One-Button
Control
ONE-BUTTON CONTROLLER OPERATION GUIDE:
1-click, enter with / without Guide Line switching mode;
THE FOLLOWING MODES MUST BE OPERATED UNDER THE MODE WITH GUIDE
LINE, operate to enter any mode you want 3 seconds after the previous mode.
2-quick-continuous click, enter Mirror / Non-mirror switching mode;
3-quick-continuous click, enter PAL / NTSC switching mode;
4-quick-continuous click, enter Guide Line Type selecting mode;
5-quick-continuous click, enter the Guide Line Width adjusting mode;
6-quick-continuous click, enter the Guide Line Height adjusting mode.
- 12/24 Volt DC
- Dimensions: 16.5mm x 23mm (D)
b) Insert Type - Carefully drill hole (hole saw supplied) in bumper & insert camera
16.5mm
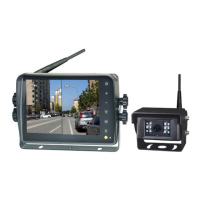
CAR REARVIEW CAMERA
CAMERA ASSEMBLY OPTIONS:
See diagram below:
CABLE CONNECTIONS:
See wiring diagram below:
b) Bumper Fit Assembly
Camera
GND
+12/24V (Red Cable connect to rear lamp positive)
F
F
M
M
Monitor
+
One-Button
Control
ONE-BUTTON CONTROLLER OPERATION GUIDE:
1-click, enter with / without Guide Line switching mode;
THE FOLLOWING MODES MUST BE OPERATED UNDER THE MODE WITH GUIDE
LINE, operate to enter any mode you want 3 seconds after the previous mode.
2-quick-continuous click, enter Mirror / Non-mirror switching mode;
3-quick-continuous click, enter PAL / NTSC switching mode;
4-quick-continuous click, enter Guide Line Type selecting mode;
5-quick-continuous click, enter the Guide Line Width adjusting mode;
6-quick-continuous click, enter the Guide Line Height adjusting mode.
See wiring diagram below:
Camera
GND
+12/24V
(Red Cable connect to rear lamp positive)
F
F
M
M
Monitor
+
One-Button
Control
Monitor Trigger Wire
4-Pin
Male
(Please insulate if not used)
Selectable - Guidelines, PAL/NTSC & Normal/Mirror Image
b) Insert Type - Carefully drill hole (hole saw supplied) in bumper & insert camera
16.5mm
CAR REARVIEW CAMERA
CAMERA ASSEMBLY OPTIONS:
See diagram below:
CABLE CONNECTIONS:
See wiring diagram below:
b) Bumper Fit Assembly
Camera
GND
+12/24V (Red Cable connect to rear lamp positive)
F
F
M
M
Monitor
+
One-Button
Control
ONE-BUTTON CONTROLLER OPERATION GUIDE:
1-click, enter with / without Guide Line switching mode;
THE FOLLOWING MODES MUST BE OPERATED UNDER THE MODE WITH GUIDE
LINE, operate to enter any mode you want 3 seconds after the previous mode.
2-quick-continuous click, enter Mirror / Non-mirror switching mode;
3-quick-continuous click, enter PAL / NTSC switching mode;
4-quick-continuous click, enter Guide Line Type selecting mode;
5-quick-continuous click, enter the Guide Line Width adjusting mode;
6-quick-continuous click, enter the Guide Line Height adjusting mode.
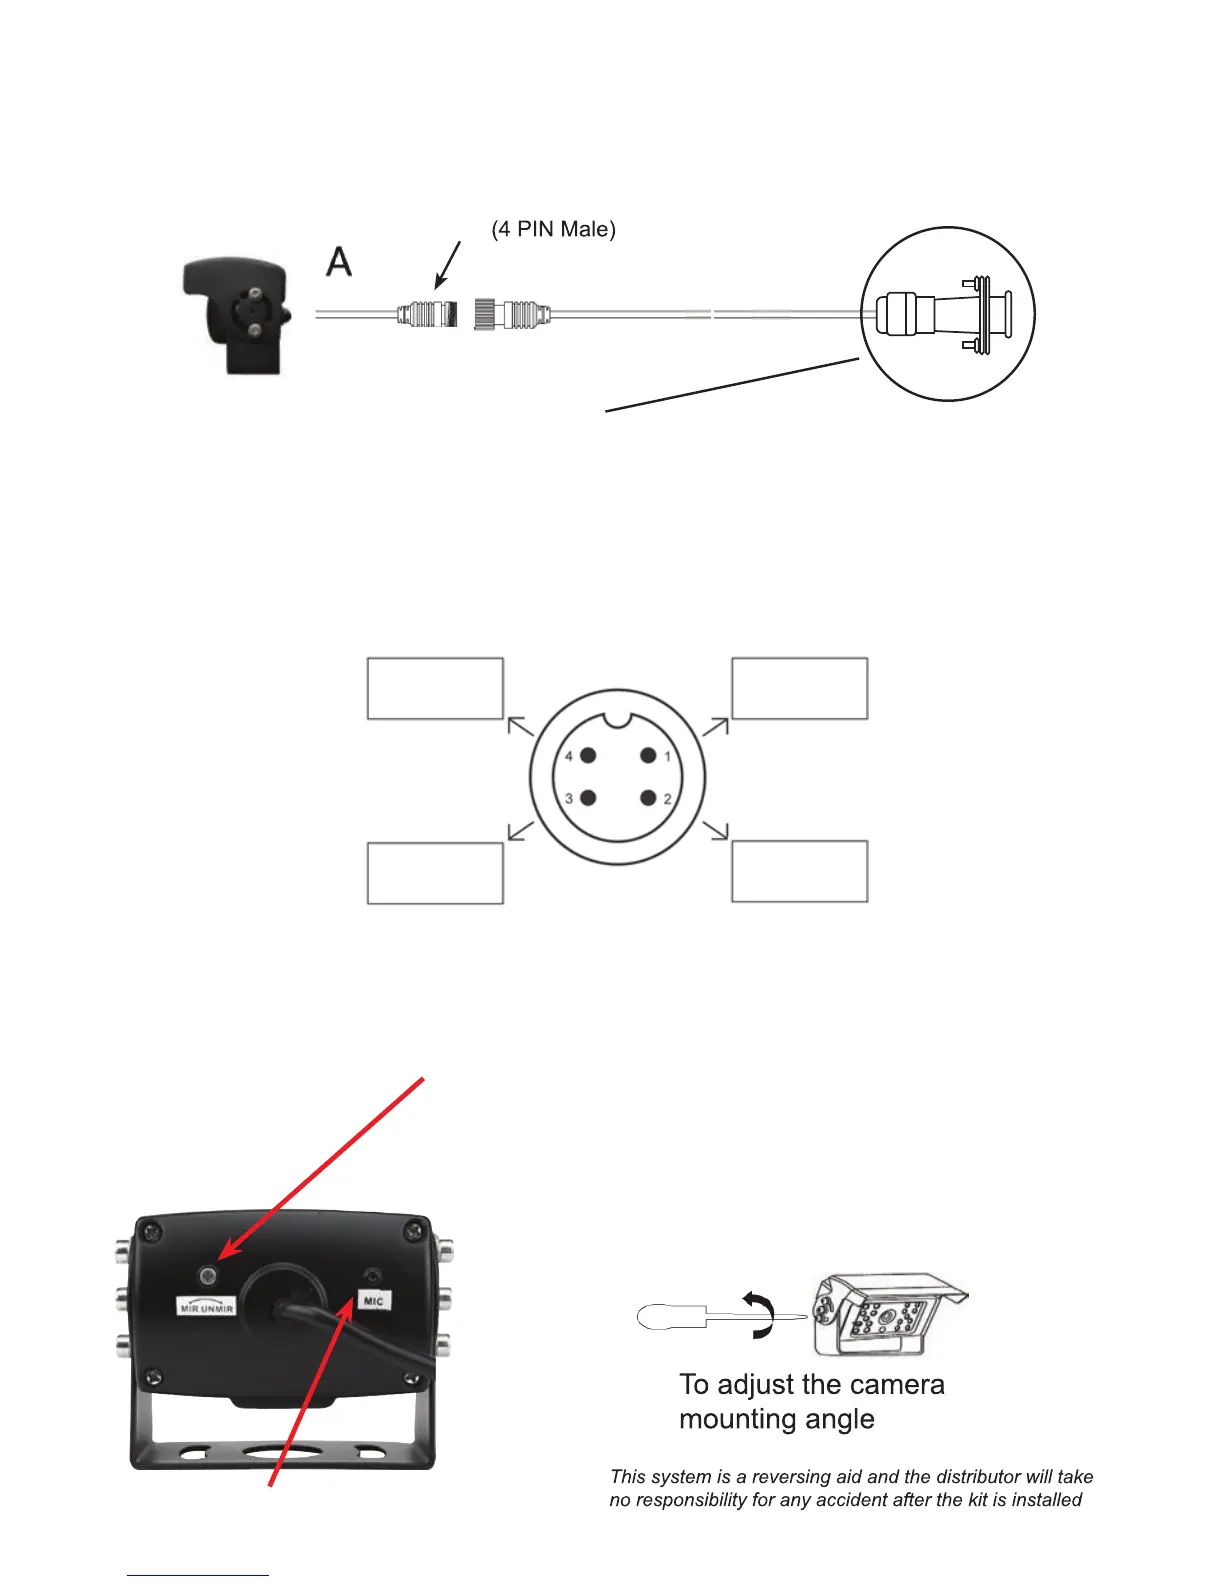
CARAVAN CAMERA (CC10)
CABLE CONNECTIONS
A (40cm hook up cable)
Camera [Termination to 4-Pin (M)]
B (15 metre cable)
Camera Extension Cable [(4-Pin (F) to 5 Pin (M)]
MIRROR/NORMAL ADJUSTMENT
B
Connect to Trailer Quick Connect
Mirror Image (Default Setting)
(Tighten Screw)
Microphone
Normal Image
(Loosen Screw)
CCD Camera [Termination to 4-Pin (M)]
B
to 5 Pin (F)
Connect to Trailer Quick Connect
P
 Loading...