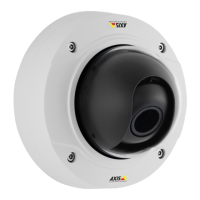
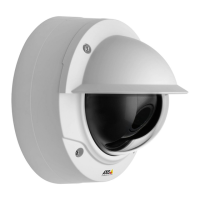
AXISP1365-EMkIINetworkCamera
SystemOptions
CAcerticates-Toauthenticatepeercerticates,forexamplethecerticateofanauthenticationserverincasetheAxisproductis
connectedtoanIEEE802.1Xprotectednetwork.
Note
Installedcerticates,exceptpreinstalledCAcerticates,willbedeletediftheproductisresettofactorydefault.Preinstalled
CAcerticatesthathavebeendeletedwillbereinstalled.
AServer/Clientcerticatecanbeself-signedorissuedbyaCerticateAuthority(CA).Aself-signedcerticateofferslimited
protectionandcanbeusedbeforeaCA-issuedcerticatehasbeenobtained.
Toinstallaself-signedcerticate:
1.GotoSetup>SystemOptions>Security>Certicates.
2.ClickCreateself-signedcerticateandprovidetherequestedinformation.
TocreateandinstallaCA-signedcerticate:
1.Createaself-signedcerticateasdescribedabove.
2.GotoSetup>SystemOptions>Security>Certicates.
3.ClickCreatecerticatesigningrequestandprovidetherequestedinformation.
4.CopythePEM-formattedrequestandsendtotheCAofyourchoice.
5.Whenthesignedcerticateisreturned,clickInstallcerticateanduploadthecerticate.
Server/ClientcerticatescanbeinstalledasCerticatefromsigningrequestorasCerticateandprivatekey.SelectCerticate
andprivatekeyiftheprivatekeyistobeuploadasaseparateleorifthecerticateisinPKCS#12format.
TheAxisproductisshippedwithseveralpreinstalledCAcerticates.Ifrequired,additionalCAcerticatescanbeinstalled:
1.GotoSetup>SystemOptions>Security>Certicates.
2.ClickInstallcerticateanduploadthecerticate.
AudioSupport
SelectEnableaudiosupporttoallowclientstoretrieveaudiostreamsfromtheAxisproduct.Forinformationonhowtocongure
audiosettings,seeSetUpAudioonpage30.
Note
DeselectingthisoptionwilldisableaudiogloballyintheAxisproduct,forconguredeventsandproleswithaudioaswell.
Date&Time
TheAxisproduct’sdateandtimesettingsareconguredunderSystemOptions>Date&Time.
CurrentServerTimedisplaysthecurrentdateandtime(24hclock).Thetimecanbedisplayedin12hclockinthetextoverlay(see
below).
Tochangethedateandtimesettings,selectthepreferredTimemodeunderNewServerTime:
•Synchronizewithcomputertime–Setsdateandtimeaccordingtothecomputer’sclock.Withthisoption,dateand
timearesetonceandwillnotbeupdatedautomatically.
•SynchronizewithNTPServer–ObtainsdateandtimefromanNTPserver.Withthisoption,dateandtimesettingsare
updatedcontinuously.ForinformationonNTPsettings,seeNTPCongurationonpage56.
IfusingahostnamefortheNTPserver,aDNSservermustbecongured.SeeDNSCongurationonpage56.
53