AXISQ86–ESeries
WARNING
24 V AC
Power
Net wor
k
2
7 8
9
6
5
2
3
4
1
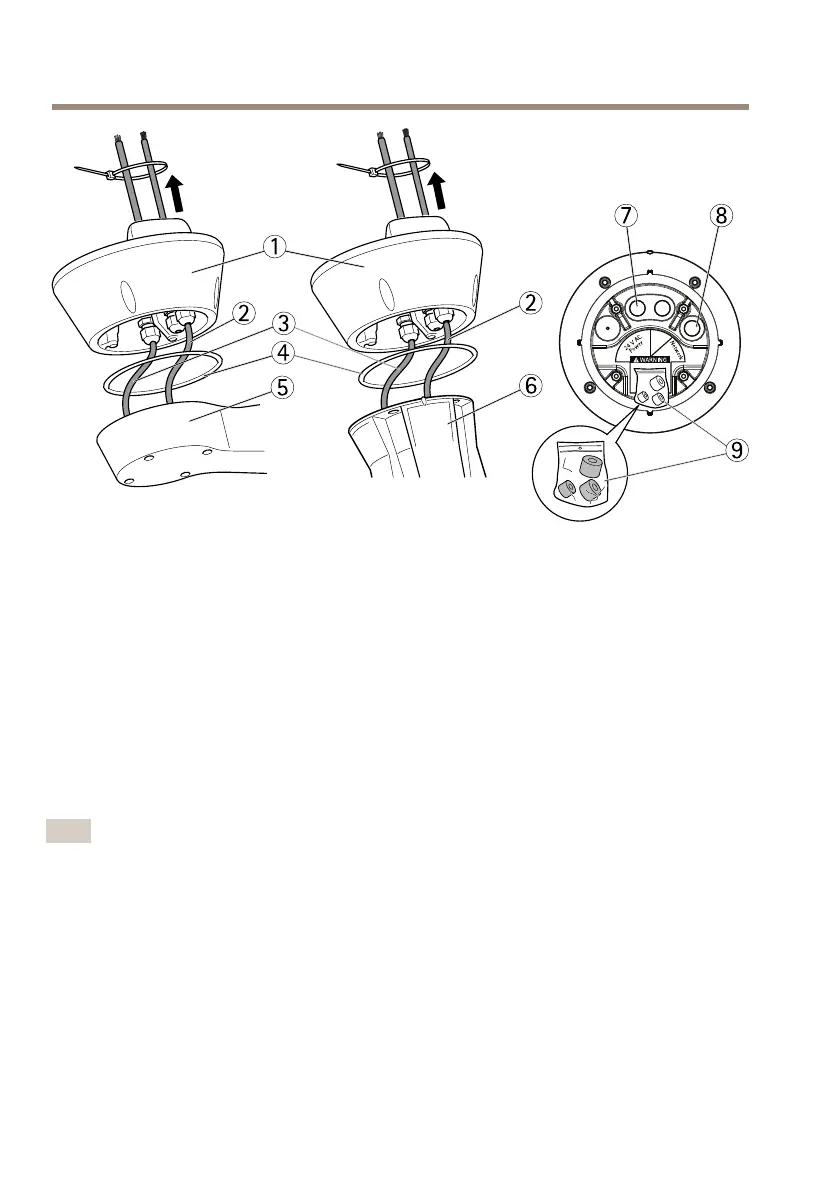
1
Baseunit
2
Networkcable
3
Powercable
4
Seal
5
Wallbracket
6
Columnbracket
7
Powercable
8
Networkcable
9
Gaskets
6.UsingaRJ45crimptool,stripandcrimpthenetworkcableaccordingtothe
manufacturer’sinstructions.
7.Connectthenetworkcabletothenetworkconnectoronthebaseunit.
Note
Tomaketheinstallationeasier,itispossibletoremovethepowerconnectorblockfromthe
circuitboardandmountitwhenthecablesarecorrectlyconnected.
8.Connectthepowercabletothepowerconnectoronthebaseunit.Makesurethe
green/yellowgroundwireisconnectedtothemiddlepin.
16

 Loading...