13
Continues Over....
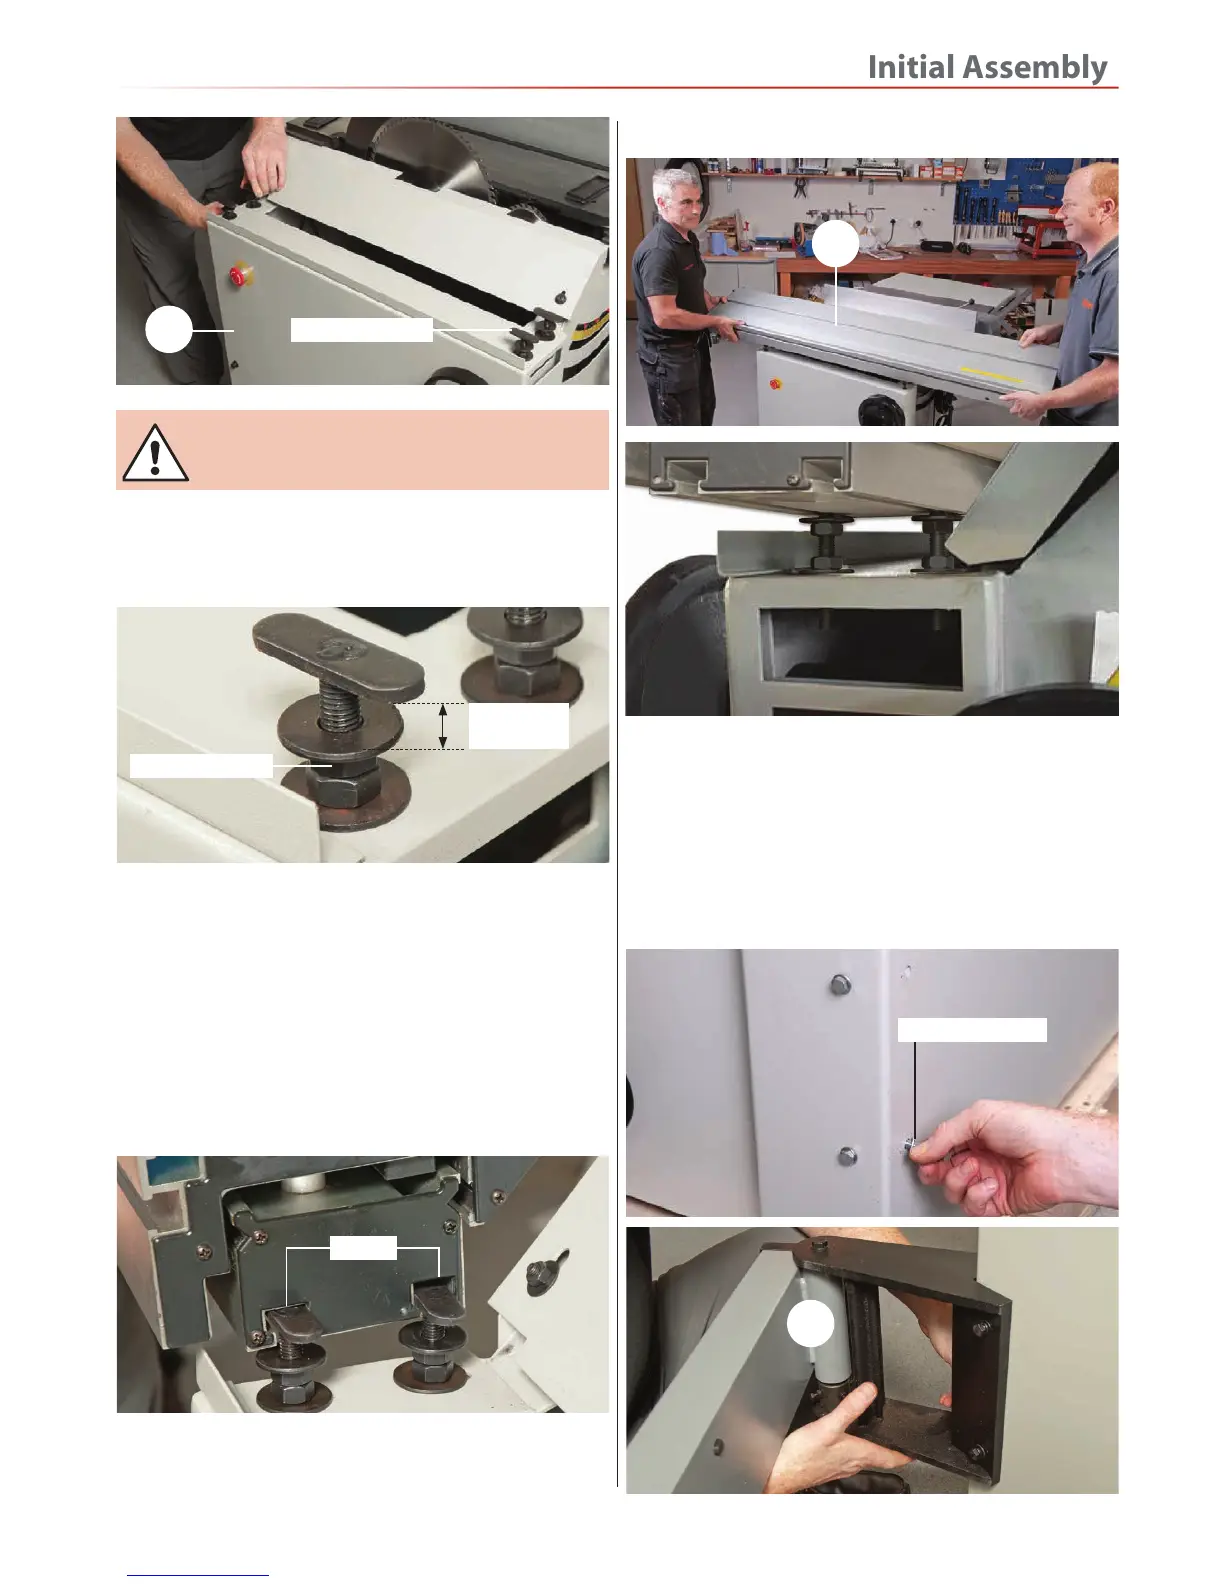
0
NOTE: YOU WILL REQUIRE HELP FOR THIS
NEXT STEP!
2. Loosen the upper locking nuts to each bolt to give
adequate clearance when mounting the sliding table,
see picture below.
Fig 37
Fig 38-39
19
‘T’ slots
Fig 40-41
1. Remove the four bolts and washers from the bottom
corner of the main saw tables frame, see fig 40. Locate
the extension support arm (1), line up the holes in the
support bracket with the holes in the saw frame and
secure with the bolts/washers you just removed, see fig
41.
Bolts and washers
1
‘T’ Mounting bolt
Upper locking nut
Adequate
clearance
3. With assistance, insert the first two ‘T’ mounting bolt
heads into the two ‘T’ slots to the end of the sliding table
assembly (19), see fig 37. Slide the table on and repeat
the process to the opposite end of the main saw table (0).
4. Position the sliding table (19) so its over hangs equally
to both end of the main table (0), see fig 38-39. Tighten
the upper locking nuts to secure the table (19) in place.
Sliding Table Extension
 Loading...