Using a 90˚ square, place it against the fence and the
blade (not on the teeth), check that the angle is correct, if
not, adjust the 90˚ stop cam by turning the Phillips screw
until the fence is square to the blade, see fig 56-57.
15
Continues Over....
Fig 49-50
Turn to lock
I
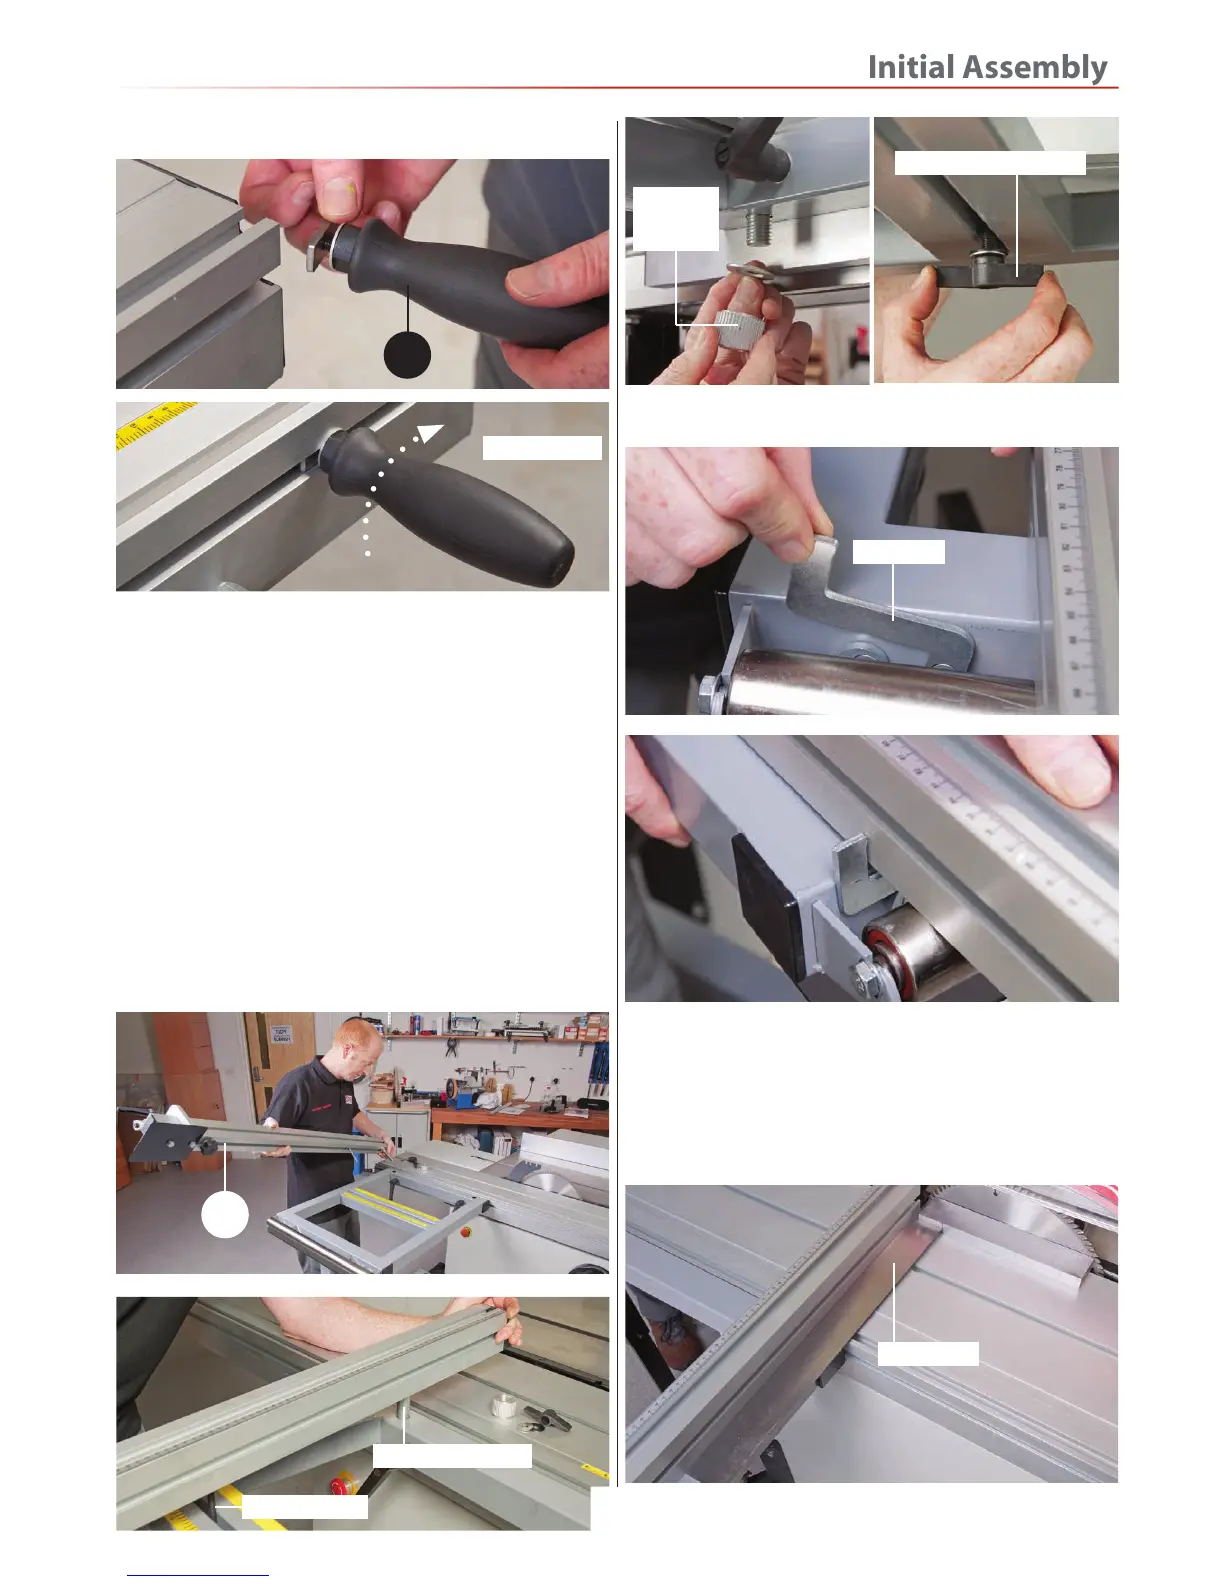
7. Locate the fence assembly (23) for the sliding table
(19), remove both the clamping knob and lift and shift
handle from the fence and place to one side. Lower the
fence on top of the table extension (13), insert the larger
threaded pin into one of the pre-drilled holes to the
corners of the table extension (13). Insert the other
between the centre column of the table then replace
the clamping knob and handle, see fig 51-52-53. Don’t
tighten at this point.
8. Lift-up the 90˚ stop located to the corners of the
extension table, push the fence up against the stop, see
fig 54-55.
Fig 51-52-53
Fig 54-55
23
Large threaded pin
Threaded pin
Clamping
knob &
washer
Butterfly clamp & washer
90˚ Stop
Fig 56-57
90˚ Square