17
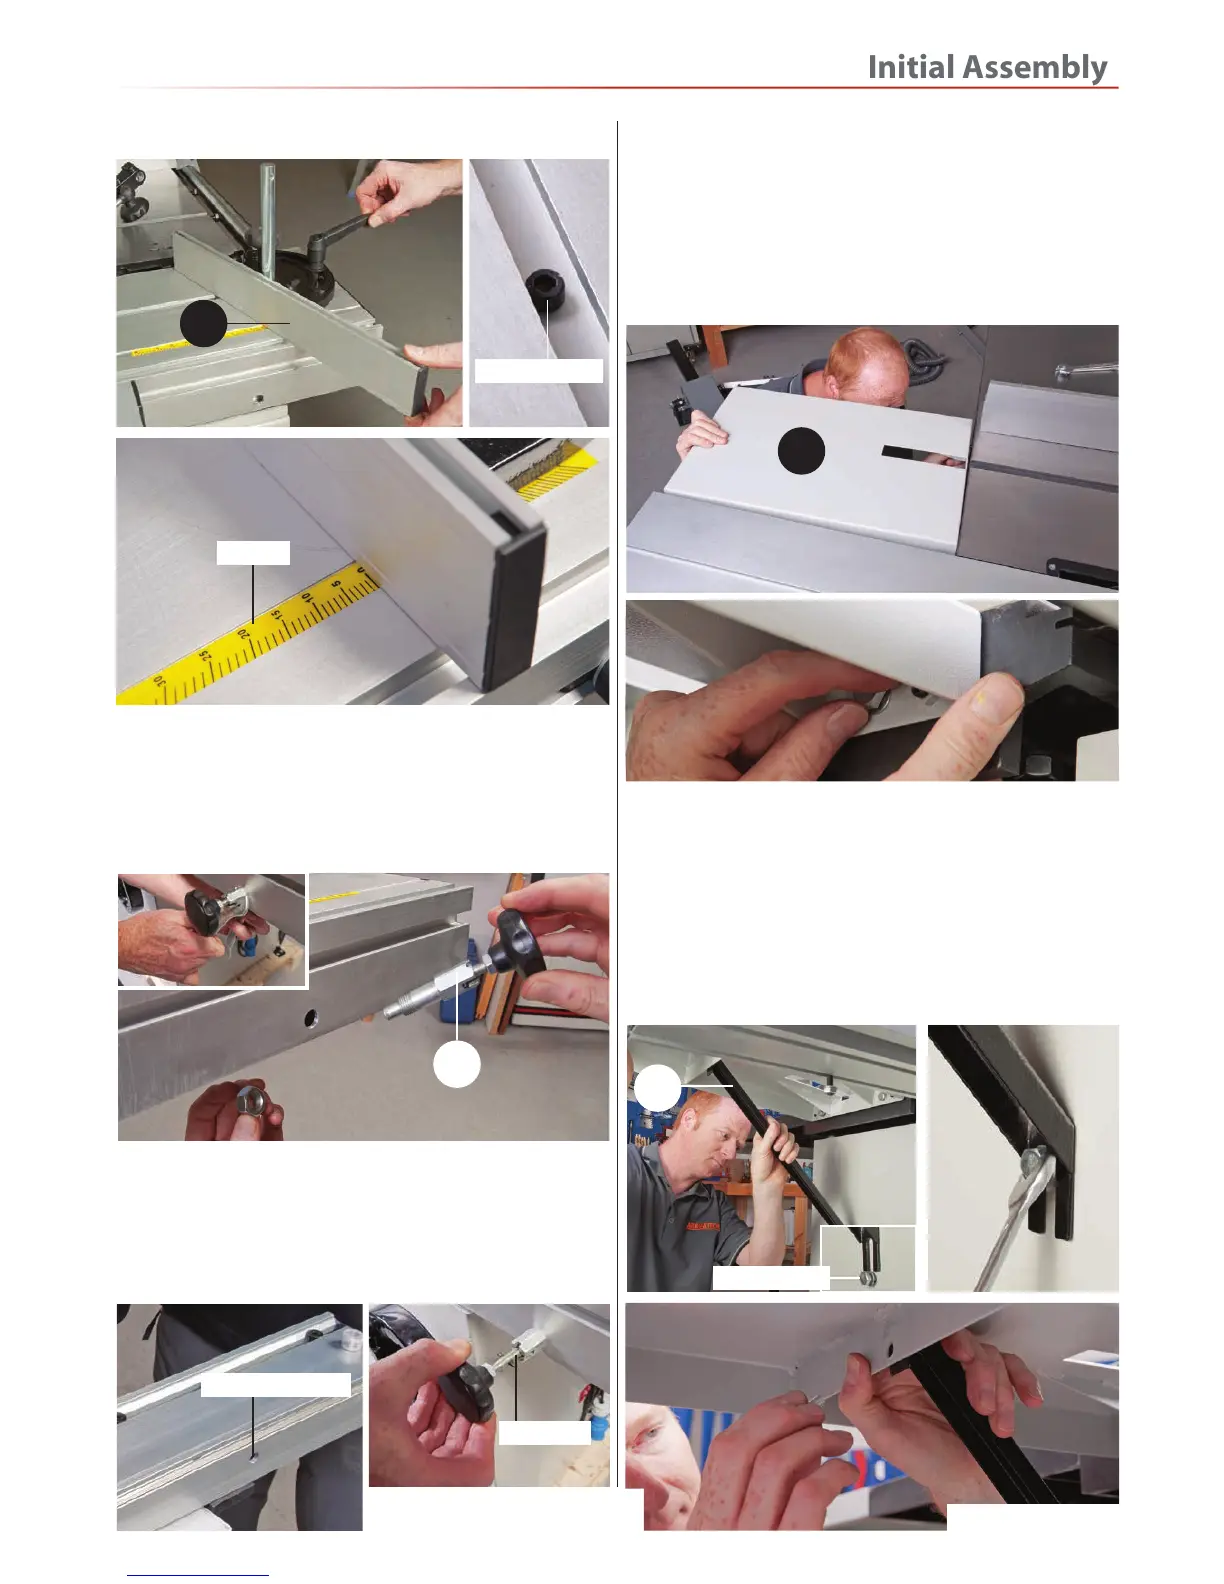
14. Put to hand the sliding table locking knob (G),
remove the nut from the thread and insert the assembly
into the pre-drilled hole to the front of the sliding table
(19). Replace the nut and tighten, see fig 68-69.
Fig 68-69
G
Scale
Fig 65-66-67
Mitre fence stop
3
Fig 70-71
Inner locking hole
locking pin
Rear Extension Table
1. Locate the rear extension table (12) and supporting
bracket (6). Remove the two bolts, washers and nuts, line
up the holes in the table (12) with the holes to the rear of
main table (0) and replace fixings. Finger tighten at this
point, see fig 72-73.
Fig 72-73
12
15. Pull out and twist the locking knob into the outer
position, move the table and lower the pin until it
engages into the inner hole, thus locking the table in
position, see figs 70-71.
2. Slot the machined cutout to the end of the angled
bracket (6) over the threaded bolt beneath the table to
the side of the machine, see fig 74-75 and lightly tighten.
Remove the bolt, washer/nut from beneath the table
(12), line up the hole to the opposite end of the bracket
(6) with hole in the table and replace the bolt, washer/
nut and securely tighten, see fig 76.
Fig 74-75-76
6
Threaded bolt
Continues Over....
 Loading...