2 Locate the 10’ (3 m) power wiring harness and appropriately route the wires
from the mount and the wires from the vehicle to the location of the power unit.
Notes:
• It is not necessary to affix the power unit at this point. Depending on
mounting location, affixing the unit prematurely may make it difficult to
attach wires.
• Vehicle power sources should be accessed as determined by the vehicle
manufacturer.
After the wiring harness is tied into the vehicles electrical system, proceed to
step 3, using the opposite end of the harness.
3 Once the appropriate power wires have been run to the power unit mounting
location strip no more than 0.25″ (6.35 mm) of insulation from each of the wires.
4 On the Axon Fleet power unit end, remove the male end of the connector.
5 Unscrew the small set screws.
6 Strip no more than 0.25″ (6.35 mm) of insulation from each of the wires.
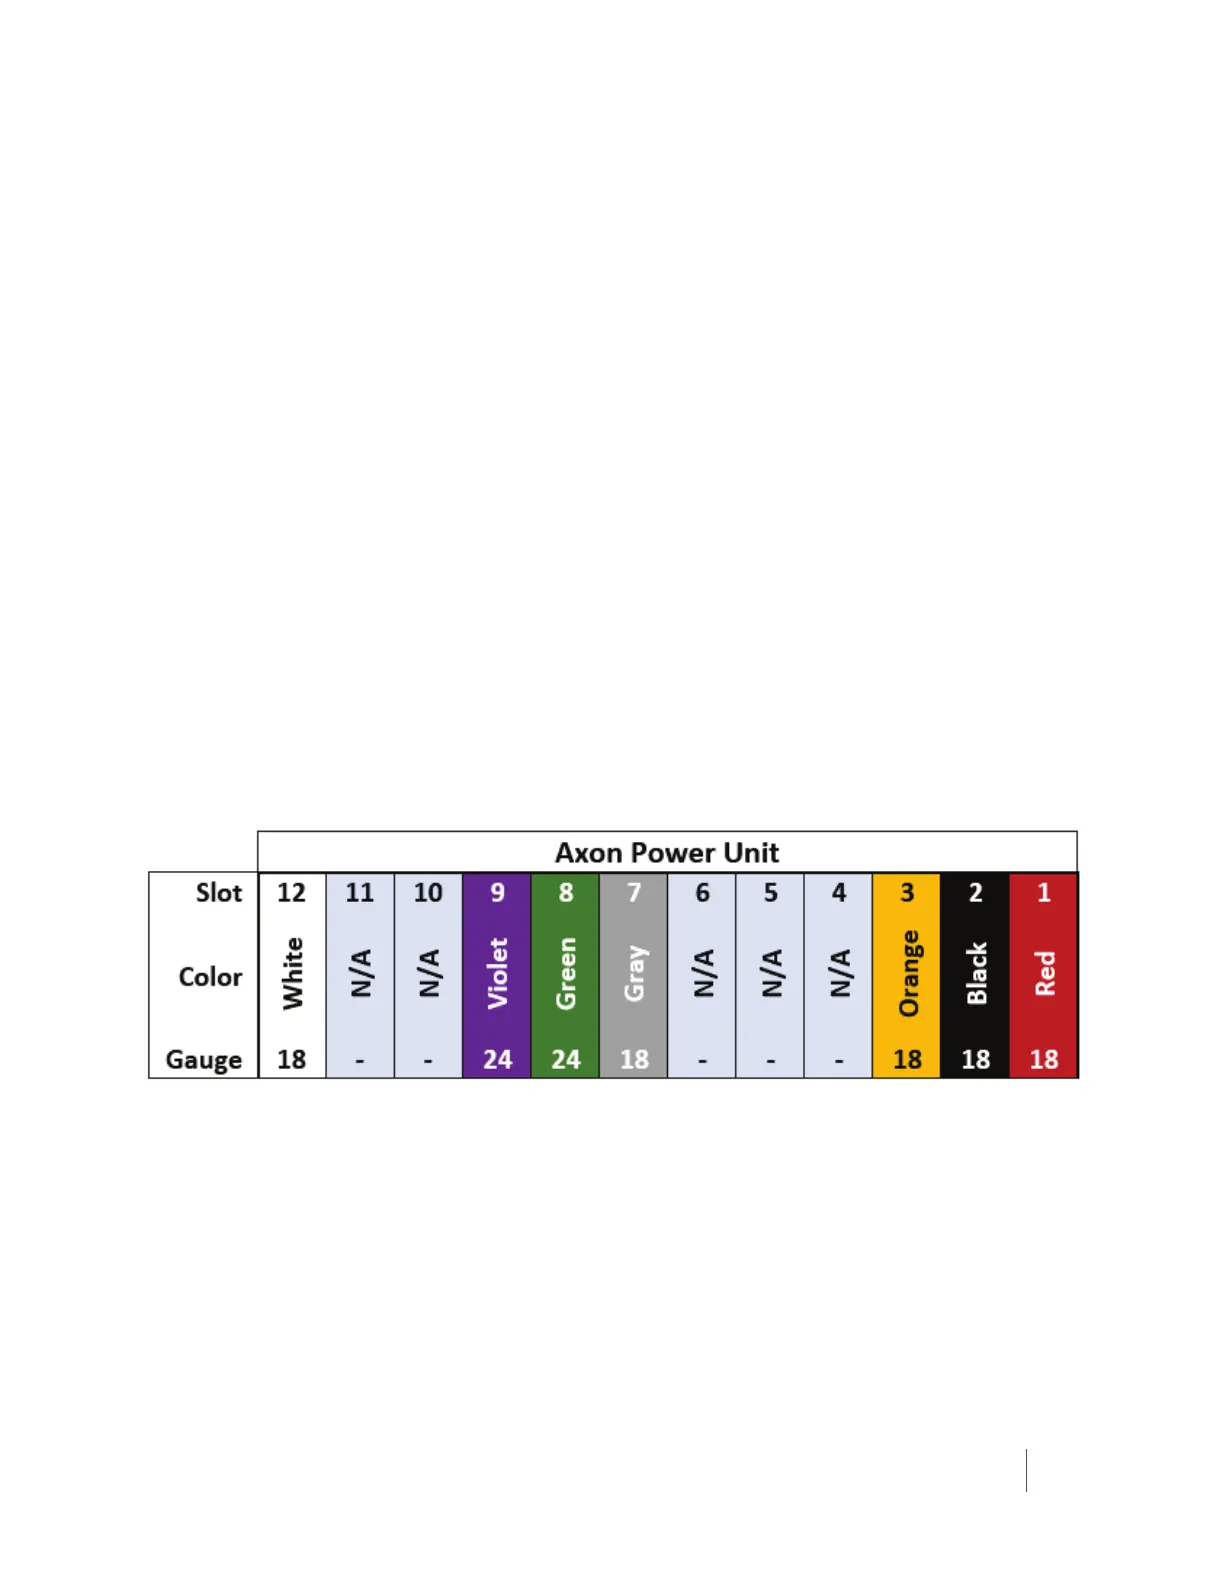
7 Insert the stripped wires into the appropriate slot on the power unit.
• Orange – 3
• Black – 2
• Red - 1
8 Tighten down the set screws.
Axon Fleet Power Unit to Camera Mount
1 Once the Wiring harness has been run to the desired location of the power unit,
strip no more than 0.25″ (6.35 mm) of insulation from each of the wires.
2 Unscrew the small set screws.
 Loading...