Don’t put the machine on a place with water or other
liquid.
If the supply cord is damaged, it must be replaced by
the manufacturer or its service agent, or similarly
qualified person, in order to avoid a hazard.
Don’t spatter water or oil into machine.
Don’t put hard objects between fan blades.
Don’t repair the machine by yourself. Dealing with
problems by non-professional person may cause
danger, even power cord replacement must be done
by professional electrician.
Only use accessories from suppliers, otherwise
danger and damages of the machine may be caused.
Place the machine on flat ground, and keep it far
from around things at least 50cm.
Make sure the socket can be reached from machine
location.
Keep the machine stand upright so that compressor
can work well.
Don’t run the machine near to gasoline or any other
flammable liquids.
Make sure free access of air-inlet and air - outlet.
Don’t use spraying agent (such as pesticides, paint)
or other flammable materials, otherwise plastic
deformation, or even electric damage of the machine
may be caused.
Make sure no damage in plug.
Don’t use connector instead of plug.
Insert plug into socket first, press key “POWER” to
run machine.
Warning: before using the portable air conditioner,
keep it upright for at least two hours.
After the air conditioning is installed, ensure that the
power plug is intact and firmly plugged into the
power outlet, and place the power cord orderly to
prevent someone from being tripped or pulling out
the plug.
Be aware that refrigerants may not contain an odour.
Warning: Appliance shall be installed, operated and
stored in a room with a floor area larger than 11 m².
Any person who is involved with working on or
breaking into a refrigerant circuit should hold a
current valid certificate from an industry-accredited
assessment authority, which authorises their
competence to handle refrigerants safely in
accordance with an industry recognised assessment
specification.
Servicing shall only be performed as recommended
by the equipment manufacturer. Maintenance and
repair requiring the assistance of other skilled
personnel shall be carried out under the supervision
of the person competent in the use of flammable
refrigerants.
All working procedure that affects safety means
shall only be carried by competent persons.
This machine just for domestic use, please don’t use
it in any other places.
Please use this machine indoor not outdoor, and
place it in a dry environment.
This appliance can be used by children aged from 8
years and above and persons with reduced physical,
sensory or mental capabilities or lack of experience
and knowledge if they have been given supervision or
instruction concerning use of the appliance in a safe
way and understand the hazards involved. Children
shall not play with the appliance. Cleaning and user
maintenance shall not be made by children without
supervision
The appliance shall be installed in accordance with
national wiring regulations.
Please make the machine far from heat sources and
avoid direct sunlight.
Please turn - off the machine first before pull out the
plug.
Please pull out the plug when the machine is under
cleaning, parts-replacement or leaving unused.
Please clean the machine based on the instruction in
user’s manual.
Please make sure using voltage meet requirements,
the damages caused by connection error is out of the
scope of warranty.
Don’t let little children touch the machine.
Don’t run the machine when no one there, even if a
short leave, please turn - off it.
Don’t tug power cord when pulling out plug or moving
the machine.
GB
78 | 79
1.
2.
3.
4.
5.
6.
7.
8.
When the machine is powered on for the first time, the buzzer will make a
sound “di”, and then the machine will get into standby status.
POWER
Press this key to turn on / off machine.
MODE
After machine turns on, press this key to select cooling, fan and dehumidifying
mode.
TEMPERATURE / TIME ADJUSTING “UP” and “DOWN”
Press these two keys to change the set temperature or timing setting value.
While setting temperature, press “UP” or “DOWN” to select the necessary
temperature (not available in fan and dehumidifying mode).
While setting timing value, press “UP” or “DOWN” to select the required timing
value
Simultaneously press both keys to switch between Celsius (°C) and Fahrenheit
(°F).
FAN SPEED
After machine turns on, press this key to select fan speed (High / Mid / low),
and can be adjust to the fan speed only under “cool” and “fan” mode.
TIMER
When pressing “TIMER” button, the user can be setup the switch ON or OFF
time once the indicate light of “TIMER” lights up.
Under standby state, press “UP” or “DOWN” to setup the time to switch on
from “1hour to 24 hours”.
Under power-on state, press “UP” or “DOWN” to setup the time to switch off
from “1hour to 24 hours”.
SWING
Press this key at any time after turning on the machine to swing the Swing
louver automatically.
Note:
1) The Swing louver will automatically turn on once switch on the appliance.
2) The Swing louver will automatically turn off once switch off the appliance.
3) Can only use the remote control to set the swing direction, cannot set on
the LCD Type Soft - Touch Control Panel.
SLEEP
In the cooling mode, press "UP" and "Fan" on control panel or press the button
“ ” on remote control to turn on the sleep mode, then the unit will work on
Energy-Saving and quiet type.
Note: Cannot select the sleep mode in the dehumidifying or Fan mode.
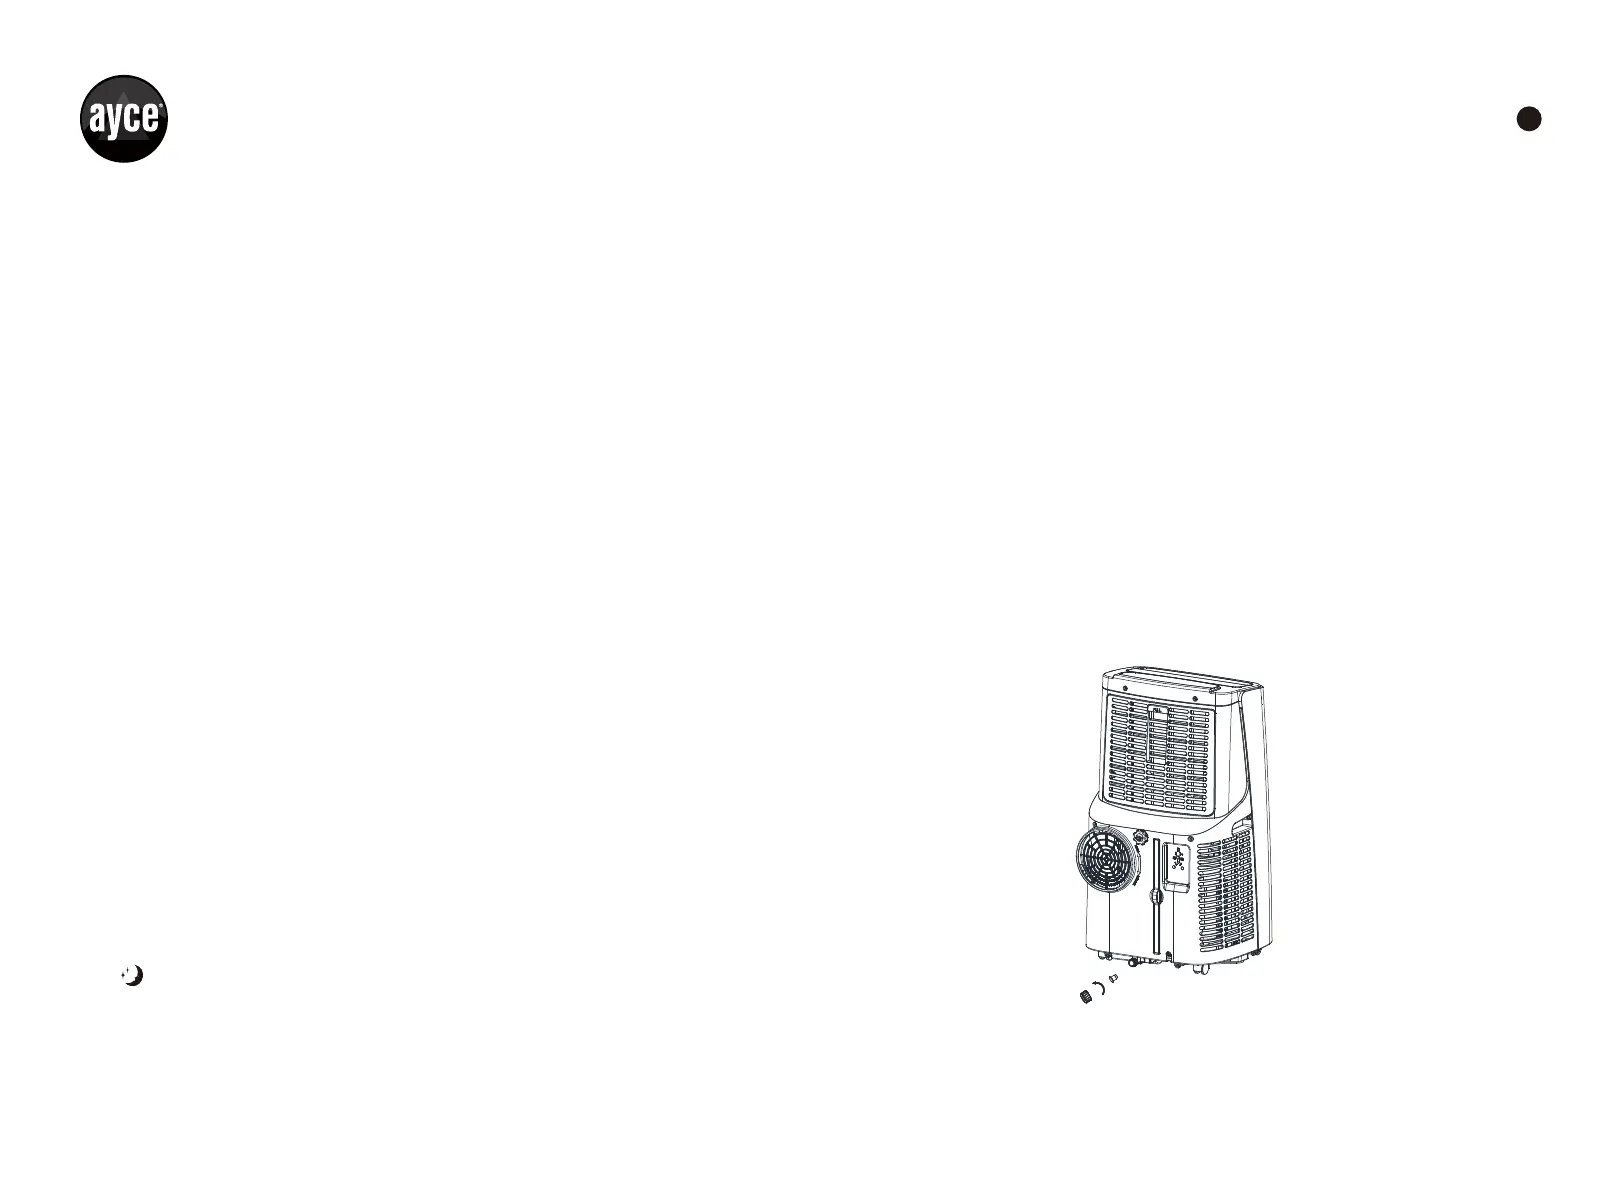
Fig.7
WATER DRAINAGE
Manual drainage
1.
2.
3.
4.
When the machine stops after the water tank is full, turn off the machine
power and unplug the power plug.
Notes: Please move the machine carefully, so as not to spill the water in the
water pan at the bottom of the body.
Place the water container below the side water outlet behind the body.
Unscrew the drainage cover and unplug the drainage plug, the water will
automatically flow into the water container.
Notes:
1) Keep the drainage cover and the drainage plug properly.
2) During drainage, the body can be tilted slightly backwards.
3) If the water container cannot hold all the water, before the water container
is full, stuff the water outlet with the drainage plug as soon as possible to
prevent water from flowing to the floor or the carpet.
When the water is discharged, stuff the drainage plug, and tighten the drainage
cover. (as shown in Fig.7)
Note: Restart the machine after the drainage plug and drainage cover are
installed, otherwise condensate water of the machine will flow to the floor or
the carpet.
1.
2.
3.
Continuous drainage (as shown in Fig 8)
Note: Only applicable to cooling and dehumidifying mode.
Unscrew the drainage cover, and unplug the drainage plug.
Set the drainage pipe (not include) into the water outlet.
Connect the drainage pipe to the bucket.
 Loading...