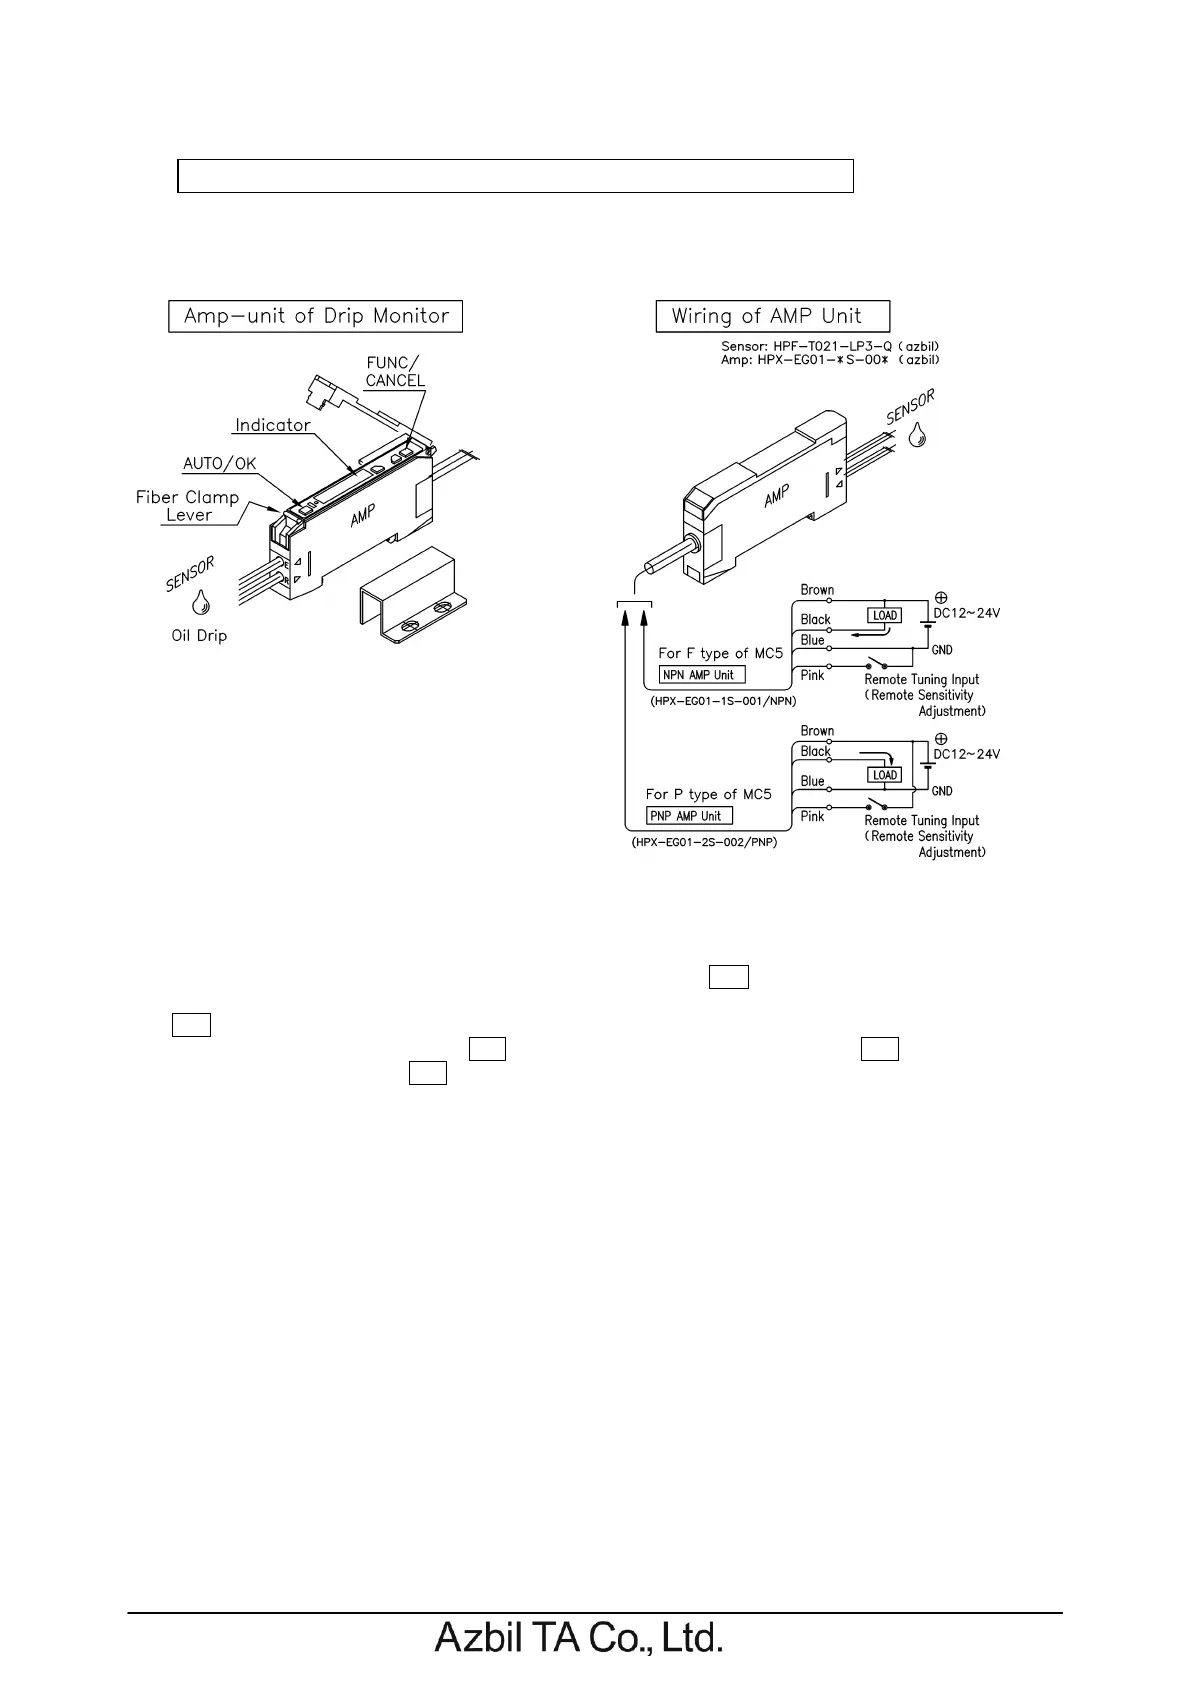
Adjustment and Wiring of Oil Drip Monitor Amp-unit: For Reference
MC9-01L3/01B3-xx2x/xx3x /xx5x /xx7x /xx9x types are equipped with oil drip monitor.
Electrical wiring and adjustment of the oil drip monitor are as follows.
(Manual Sensitivity Adjustment)
1. Make CPL lubrication unit into operating condition,
2. Push the (Auto/OK) button one time in the time there is no oil drip.
3. At time of the sensitivity adjustment, input level indicates G first. IN the case input level
indicates
15 hereafter, adjustment is completed.
4. In the case input level is under 4 , repeat above adjustment up to level 5 or more.
5. In the case input level is E , amount of light at the sensors is shortage. Cancel this by
pushing the (FUNC/CANCEL) button, and make adjustment again after the installation of
sensors is corrected.
(Input of Remote Sensitivity Adjustment)
・Sensitivity adjustment function provides suitable light intensity to the sensor section in
accordance with the change of transparency around the object detected.
・Make input of remote sensitivity adjustment (for 0.1~0.5 sec.) at the time of starting lubrication
operation, or at every few hours, with taking care not to synchronize with the timing of oil dripping.
Remote sensitivity adjustment function can adjust sensitivity to cope against change of
transparency light amount by dirtiness of the sight dome.
・Sensitivity adjustment input should be carried out in the time there is no oil dripping.
・Following electrical circuit composition is recommended for the warning of abnormal oil drip.
Output in the condition that abnormal detection occurs again within the given time, or within the
given number of drips, in the period after making remote sensitivity adjustment to the abnormal
drip, is utilized as output for abnormality warning.
(OUTPUT:100mA max./30V DC)
 Loading...