3
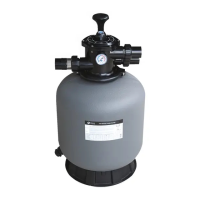
You have just become the owner of a sand filter unit with a base and a top multi-way valve.
Note: The illustrations and specifications shown in this Guide are not binding and may differ from the product
supplied. The manufacturer reserves the right to make changes without prior notice.
OPERATING PRINCIPLE
Your filtration unit uses special filter sand for removing impurities from flowing water. The filter sand fills the
filter vessel and works as a permanent trap for impurities. Swimming pool water containing impurities is
supplied by a pump via a coarse pre-filter and fed into the multi-way valve (hereinafter the valve) and then to
the top area of the filter vessel. The water is then forced through the sand, which removes fine impurities from
it, to the bottom part of the vessel. The water goes back into the swimming pool via the valve. The whole
process is continuous, automatic and ensures complete circulation of the water in the swimming pool.
INSTALLATION
The installation merely requires simple tools such as a screwdriver and some wrenches, and Teflon sealing
tape for sealing joints between the plastic components.
1. Place the filtration unit on a solid level substrate, such as a concrete slab, so that its position meets the
requirements for connecting it to the power grid, the shortest position pipeline connection to the swimming
pool, valve accessibility and winterizing. The tip of the filtration vessel can be located up to 1.5 m above
the water level.
2. Mount the pump and the pump base (if supplied).
3. Fill the vessel with filter sand via the vessel flange, as described below:
a) Insert the centre tube (10) in the vessel and install the drain tubes (11), if not factory-installed. Place the
centre tube in the centre of the vessel bottom. Close the top hole in the tube with the lid (14) or a suitable
end cap to prevent sand entering it. Before filling the vessel with sand, make sure all the drain tubes
(11) are firmly installed.
b) For better distribution of the filter sand, first fill about a third of the vessel with water. That will prevent
excessive strain on the drain tubes when filling with sand. Before that, make sure the drain plug (13) is in
place.
c) Carefully pour the recommended amount of sand with the recommended grain size (see the table) into
the vessel. The sand, when spread flat, should reach up to the middle of the vessel. Do not put more than
the recommended amount of sand in the vessel. Check that the centre tube has remained upright.
d) Remove the lid (14) or end cap from the top opening.
4. Install the valve on the filtration unit:
a) Clean the vessel flange. Take the valve (1), mount the gasket (8) on it, smear the gasket lightly with
grease, and mount it on the vessel flange. Turn the valve so that the valve hole marked “PUMP” (P) faces
the pump.
b) Put the clamp (6) on the flange-valve joint. Make sure the clamp sits properly all around the joint and then
tighten it with the pair of bolts (7) and nuts (5). Tighten both threaded joints symmetrically.
c) Remove the plastic bolt from the side of the valve body and screw the pressure gauge (4) into the hole.
Tighten the pressure gauge carefully by hand, without forcing it.
5. Connect the pump to the valve opening marked “PUMP” (P); connect the return nozzle that sends water
back into the swimming pool to the valve opening marked “RETURN” (R); connect the pump suction end
with the swimming pool skimmer (S); and connect the waste pipeline to the valve opening marked
“WASTE” (W). See Figures 2 and 3. When installing the threaded joints, seal them with a sufficient
quantity of Teflon tape.
GB
 Loading...