ADJUSTABLE TAPER LEVER
The taper lever is positioned at your thumb. You
can hold the clipper in your hand and adjust the
lever at the same time – while you are clipping.
The taper lever adjusts the closeness of the cut
from a close cut with the taper lever in the up
position to a longer length cut with the taper lever
in the down position. To increase cutting length,
slowly push the lever down. To cut closer, push the lever up. As different cutting edges
are used in each setting, using the taper lever lengthens the life of the clipper blades.
Too much hair can slow down the hair clipper. Keep the clipper on remove hair. Then
push the taper lever back and forth quickly for several times. If you do this every time,
especially after frequent hair cutting, the clipper blades should remain free of cut hair.
Oil the blades after the above procedures.
Close Cut
Longer Cut
IMPORTANT NOTE:
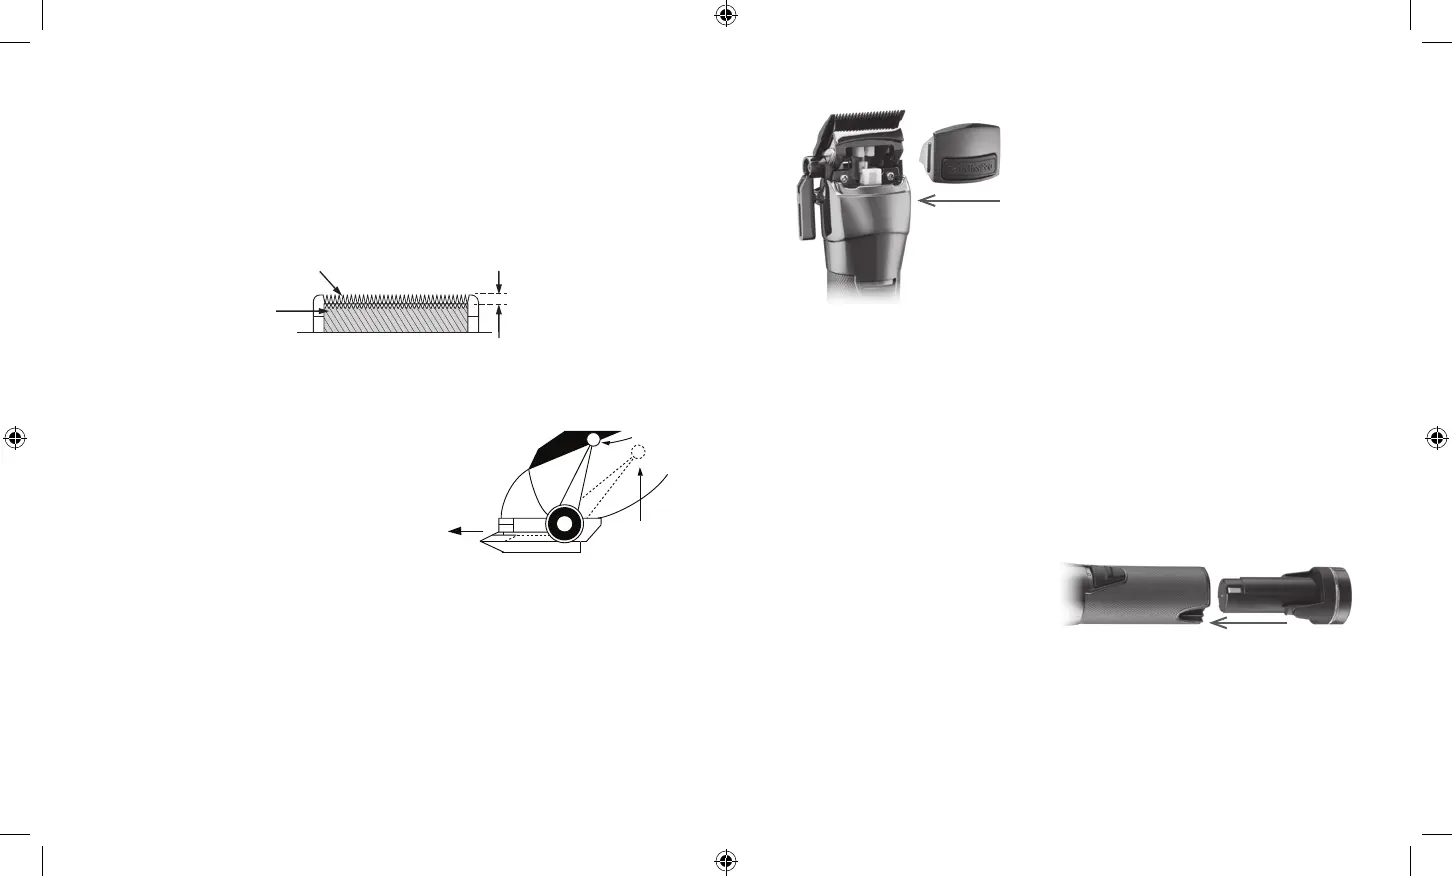
The top edge of the fixed blade must be a minimum of 1/32" (1 mm) higher than the
top edge of the moving blade and as centered as possible. This is important so that the
moving blade does not come in contact with the skin.
Be sure to add a few drops of BaBylissPRO lubricating oil to the blades before running.
Don’t forget to tighten the screws after the blades have been aligned.
C.
Fixed Blade 1/32" to 1/16"
Small
Moving
Blade
HAIR POCKET DOOR
The top housing of the FX890 clipper has a
removable magnetic door integrated into the
top housing – allowing for easy access to and
cleaning of critical moving parts.
To remove the magnetic door, place fingers on the
side tabs of the magnetic door and pull straight
away from the unit.
To clean internal moving parts, use compressed
air or included small cleaning brush to clear out
hair from the housing after the magnetic door has been removed.
Once finished with cleaning the moving parts of the clipper unit, carefully place the
magnetic door back in its proper position. The magnets should pull the door back into
place.
BATTERY REMOVAL AND INSTALLATION
The FX890 clipper features removable and rechargeable batteries, so you can cut and style
for extended amounts of time with minimal interruption.
Make sure the switch is in the OFF position before remove or install batteries.
To remove the battery, press on the two tabs towards the bottom of the unit and pull the
battery out of the bottom of the unit.
To install a new battery, line up the tabs
of the charged battery with the sides of
the unit and slide up into the housing,
pressing firmly until battery clicks into
place.
BATTERY INDICATORS
Extra Low Battery - Red Flashing Light
Low Battery - Blue Flashing Light
Unit On - Blue Light
Error - Red Flashing Light (More than 4 Flashes/Second)
FX890 IB-17257.indd 9-10FX890 IB-17257.indd 9-10 2021/12/20 12:23 PM2021/12/20 12:23 PM