EasyManua.ls Logo

Backyard Products MODERN 12 x 6 - User Manual

Backyard Products MODERN 12 x 6
71 pages
Print Icon
To Next Page IconTo Next Page
Loading...
!
24/7 Support
help.backyardproducts.com
Business Hours
(734) 242-6900
Answers to frequently
asked questions
Monday - Friday ........... 8:00am - 6:00pm EST
Saturday - Sunday .................................Closed
Technical assistance and
how-to videos
Submit a help request
Request replacement parts
Did you enjoy building your shed?
JOIN OUR TEAM
AND MAKE UP TO $1,500/WEEK*
o
r
v
i
s
i
t
b
a
c
k
y
a
r
d
i
n
s
t
a
l
l
e
r
.
c
o
m
Flexible schedule No selling,
just building
Bonus incentives
available
S
c
a
n
t
h
e
o
w
c
o
d
e
t
o
a
p
p
l
y
t
o
d
a
y
.
INSTALLERS
WANTED
*based on number of completed installations
Call a Recruiter Today! 734-365-7000
STOP
DO NOT RETURN
TO THE STORE!
If you discover missing or damaged parts,
or if you have questions about the building process,
please reach out to us directly for the fastest service.
16252
Question and Answer IconNeed help?

Do you have a question about the Backyard Products MODERN 12 x 6 and is the answer not in the manual?

Overview

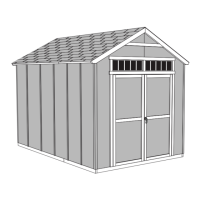
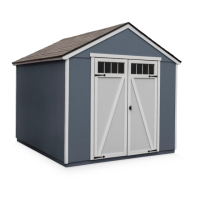
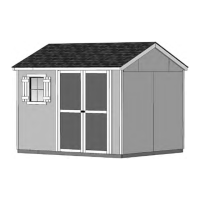
This document is an assembly manual for a Modern 12' x 7'-6" (365.8 x 228.6 cm) shed, manufactured by Backyard Products, LLC. The actual floor size is 144" x 90" (365.8 x 228.6 cm). The manual provides comprehensive instructions for assembling the shed, including parts lists, tools required, and step-by-step procedures.

Function Description:

This manual serves as a guide for consumers to self-assemble a modern-style outdoor storage shed. The shed is designed to provide additional storage space for various items, offering protection from the elements. It includes features like windows, doors, and a sloped roof for water drainage. The manual also outlines options for a reinforced wood floor frame and concrete foundation, allowing for customization based on user needs and local building requirements.

Important Technical Specifications:

  • Shed Dimensions: 12' x 7'-6" (365.8 x 228.6 cm)
  • Actual Floor Size: 144" x 90" (365.8 x 228.6 cm)
  • Floor Panels: 5/8" (1.6 cm) thick.
  • Roof Panels: 7/16" (1.1 cm) thick.
  • Wall Panels: Varying thicknesses, typically 3/8" (1 cm).
  • Framing Lumber: Graded for structural strength, not appearance. Dimensions include 2x4, 1x4, 2x3, and 1x3, with actual sizes provided (e.g., 2x4 is 1-1/2" x 3-1/2").
  • Exterior Trim: Graded for one good side.
  • Fasteners: Includes 3" (7.6 cm) screws/nails, 2" (5.1 cm) screws/nails, 1-1/2" (3.8 cm) screws/nails, 1-1/4" (3.2 cm) screws, and 3/4" (1.9 cm) screws/nails. Specific quantities are listed for each section.
  • Hardware: Includes H 2.5 Tie Plates, windows (8" x 16" / 20.3 x 35.6 cm), spring bolts, and a metal threshold (64").
  • Additional Materials (Not Included):
    • Shingles: 5 bundles of 3-tab shingles.
    • Paint for Siding: 2 gallons of 100% acrylic latex exterior paint.
    • Caulk: 2 tubes of 100% acrylic latex exterior caulk.
    • Drip Edge: 50 feet.
    • Paint for Trim: 1 quart of 100% acrylic latex exterior paint.
    • Roofing Nails: 1/4 lb of 1" galvanized roofing nails.
    • Roofing Felt: #15 roofing felt to cover 134 sq. ft. of roof area.
    • Caulk for Windows: 1 tube of 100% acrylic latex exterior caulk.
  • Reinforced Wood Floor Frame (Optional): Requires 2x4x87" (5.1 x 10.2 x 221 cm) treated lumber (x3) and 2x4x48" (5.1 x 10.2 x 121.9 cm) hot dipped galvanized nails (x12).
  • Concrete Foundation (Optional): Requires 2x4x12'-0" (5.1 x 10.2 x 365.8 cm) treated lumber (x2), 2x4x8'-0" (5.1 x 10.2 x 229.6 cm) treated lumber (x2), and caulk (x1). Fasteners for concrete anchors are not included.

Usage Features:

  • DIY Assembly: The manual is designed for self-assembly, with clear, step-by-step instructions and illustrations.
  • Helpful Reminder Symbols: Symbols are used throughout the manual to indicate assistance required, need to ensure squareness, important steps, helpful hints, beginning of steps, and completion of steps.
  • Part Identification: Parts are identified by stamped letters and sizes, with a wood size conversion chart provided. Treated lumber is specifically marked.
  • Pre-Assembly Sorting: Users are advised to inventory and sort parts by category before beginning assembly.
  • Leveling Options: Detailed instructions for floor leveling using 4x4 treated runners, gravel, masonry blocks, 2x4 treated lumber, and asphalt shingles are provided. A concrete foundation option is also detailed.
  • Component Section Index: A table of contents lists all major shed components (Floor, Walls, Rafters, Roof Panels, Trim, Windows, Doors, etc.) and their corresponding page numbers for easy navigation.
  • Warranty Information: The manual includes a "Limited Conditional Warranty" section, outlining coverage for defects in material and workmanship, hardware, treated lumber, and other components for varying durations (e.g., 1 year for material/workmanship, 15 years for treated lumber). It specifies conditions for warranty validation, such as proper assembly, maintenance, and use of approved materials for paint and caulk.
  • Customer Service: Contact information (phone, email) is provided for assistance with missing/damaged parts, questions about the building process, or engineered drawings for local permits.
  • Installer Program: An invitation to "Join Our Team" for shed installers, offering flexible schedules, no selling, and bonus incentives, is included, with a recruiter phone number and flowcode for application.

Maintenance Features:

  • Painting and Caulking: The manual emphasizes the importance of painting and caulking for validation of the warranty. It recommends using acrylic latex caulk at all horizontal and vertical seams, between trim and walls, and around door trim. High-quality exterior acrylic latex paint is recommended for all siding and trim, including the inside of doors and all four edges.
  • Priming: Users are instructed to prime all un-primed exterior wood before painting.
  • Drip Edge and Roofing Felt Installation: Detailed instructions are provided for installing drip edge and roofing felt to ensure proper water drainage and protection.
  • Shingle Installation: Comprehensive instructions for installing shingles, including nail patterns, staggering, and cutting, are provided to ensure a weather-tight roof.
  • Regular Inspection: The warranty section implies the need for regular inspection and maintenance to ensure the shed remains in good condition, as failures due to improper assembly or maintenance may void the warranty.

Backyard Products MODERN 12 x 6 Specifications

General IconGeneral
BrandBackyard Products
ModelMODERN 12 x 6
CategoryGarden Houses
LanguageEnglish

Related product manuals