bajaj electricals limited Page 7 of 8
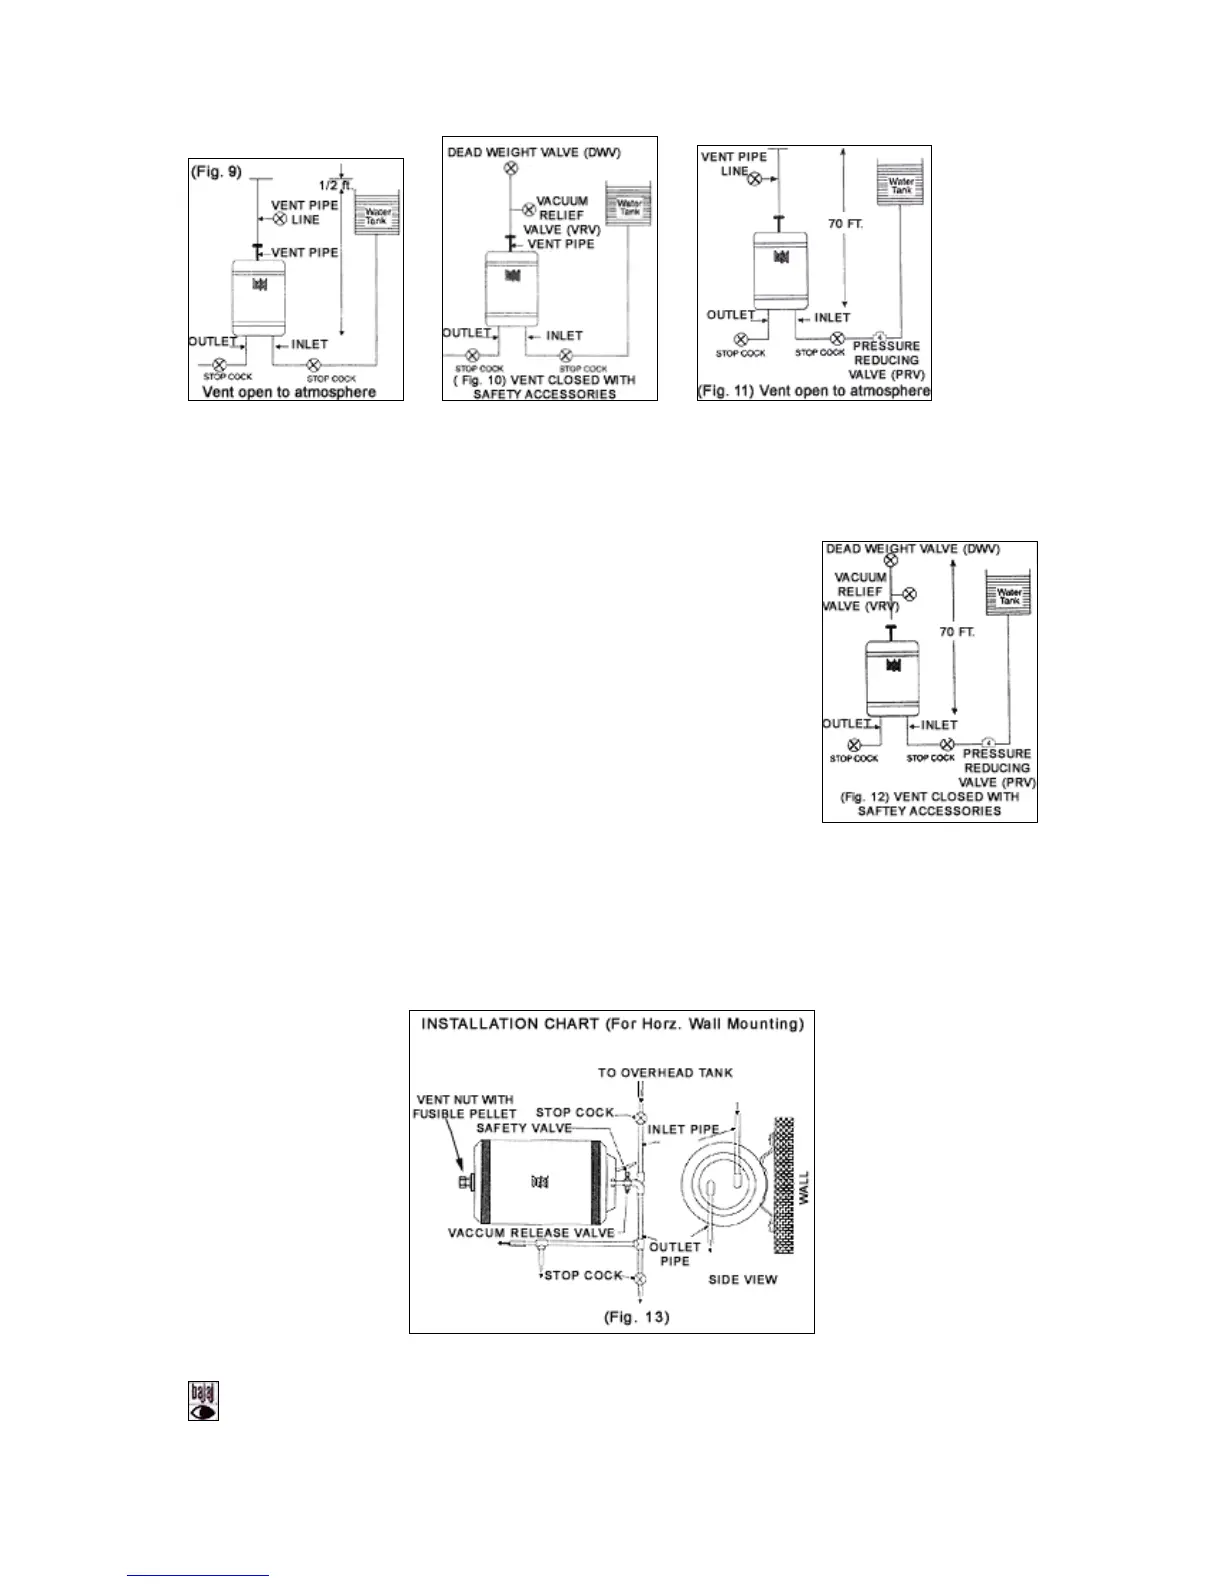
INSTALLATION CHART (FIG. 9)
i. Inlet water pressure is less than 30 P.S.I. OR
ii. Height of water tank is less than 70 ft. from the water heater OR
iii. Water tank is situated less than 5 floors from the water heater. In such a case if possible remove the vent
nut and extend the vent pipe up to the top level of overhead water supply
tank.
INSTALLATION CHART (Fig. 10)
i. Inlet water pressure is less than 30 P.S.I. OR
ii. Height of water-tank is less than 70 ft. from the water heater OR
iii. Water tank is situated less than 5 floors from the water heater. In such a
case remove the vent plug and fix the accessories like Dead weight valve
(DWV) and / or Vacuum relief valve (VRV) on the vent nut through union.
INSTALLATION CHART (Fig. 11)
i. Inlet water pressure is more than 30 P.S.I. OR
ii. Height of water-tank is more than 70 ft. from the water heater OR
iii. Water tank is situated more than 5 floors from the water heater. In such a
case if possible remove the vent nut and extend the vent pipe up to the top
level of overhead water supply tank.
INSTALLATION CHART (Fig. 12)
i. Inlet water pressure is more than 30 P.S.I. OR
ii. Height of water-tank is more than 70 ft. from the water heater OR
iii. Water tank is situated more than 5 floors from the water heater. In such a
case remove the vent plug and fix the accessories like Dead weight valve
(DWV) and / or Vacuum relief valve (VRV) on the vent nut through union.
Bajaj Horizontal water heaters in 15L and 25L capacity are now available with easy conversion facility. These models
can be converted easily from wall mounting to floor mounting and vice versa.
CONVERSION OF WALL MOUNTING TO FLOOR MOUNTING: Remove the mounting brackets by unscrewing the
bolts. With spanner. Now fix the brackets to the six holes meant for floor mounting by tightening the six bolts with the
help of plane and spring washers.
For changing the mounting arrangement from floor to wall. Repeat the above procedure. The position of holes for wall
mounting and floor mounting are clearly marked on the water heater. Floor and wall mounting positions are shown in
Fig. 4 and Fig. 5 respectively.
Pre and Post operative care
 Loading...