*Runddif=[imagename]of=/dev/sdxcommandtowriteimagefiletoSDcard.Waitpatiently
tosuccessfullycompletewriting.
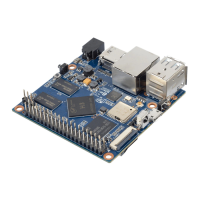
Step4:SetupyourBananaPiM2+
Accordingtothesetupdiagrambelow,youcaneasilysetupyourBananaPi.
1. Insertthewritten-imageSDcardthattotheSDcardspotontheleftsideedgeofthe
undersideoftheboard.
2. 2.Onthebottom"edge"inthemiddleoftheboardistheHDMITypeA(Fullsized)
port.JustconnectanyHDMIcablefromtheboardtoyourTVorHDMIMonitor.
3. PlugaUSBkeyboardandmouseintotheUSBslotslocatedontherightedge.
4. JustundertheUSBportsontherightedgeistheEthernetconnectorforanyonewho
wantstoplugtheBananaPiintoawirednetwork.
5. 5.Finally,attheveryleftofthebottomedgeistheUSBpowerconnector.Plugina
regulatedpowersupplythatisratedat5V±5%/2000mA(or2A).Anynumberbigger
than700mAwillalsowork.AvoidusingthesmallerchargersusedforsmallGSM
phones,astheseareoftenunregulated,eveniftheyclaim"5V1A",theymaydo"5V"
andmaydo"1A",butnotatthesametime!
Ifallgoeswell,theBananaPiwillbootinafewminutes.ThescreenwilldisplaytheOSGUI.
Step5:ShutdownyourBananaPi
YoucanusetheGUItoshutdowntheBananaPisafely.
Alsoyoucanrunthecommandintheterminal:
sudohaltor sudoshutdown–h
ThiswillshutdownthePIsafely,(justusethepowerkeytoturnoffmightdamagetheSD-
cardsfilesystem).Afterthatyoucanpressthepowerkeyfor5secondstoturnitoff.
Ifalliswell,soyoucanusebananapiM2+now.