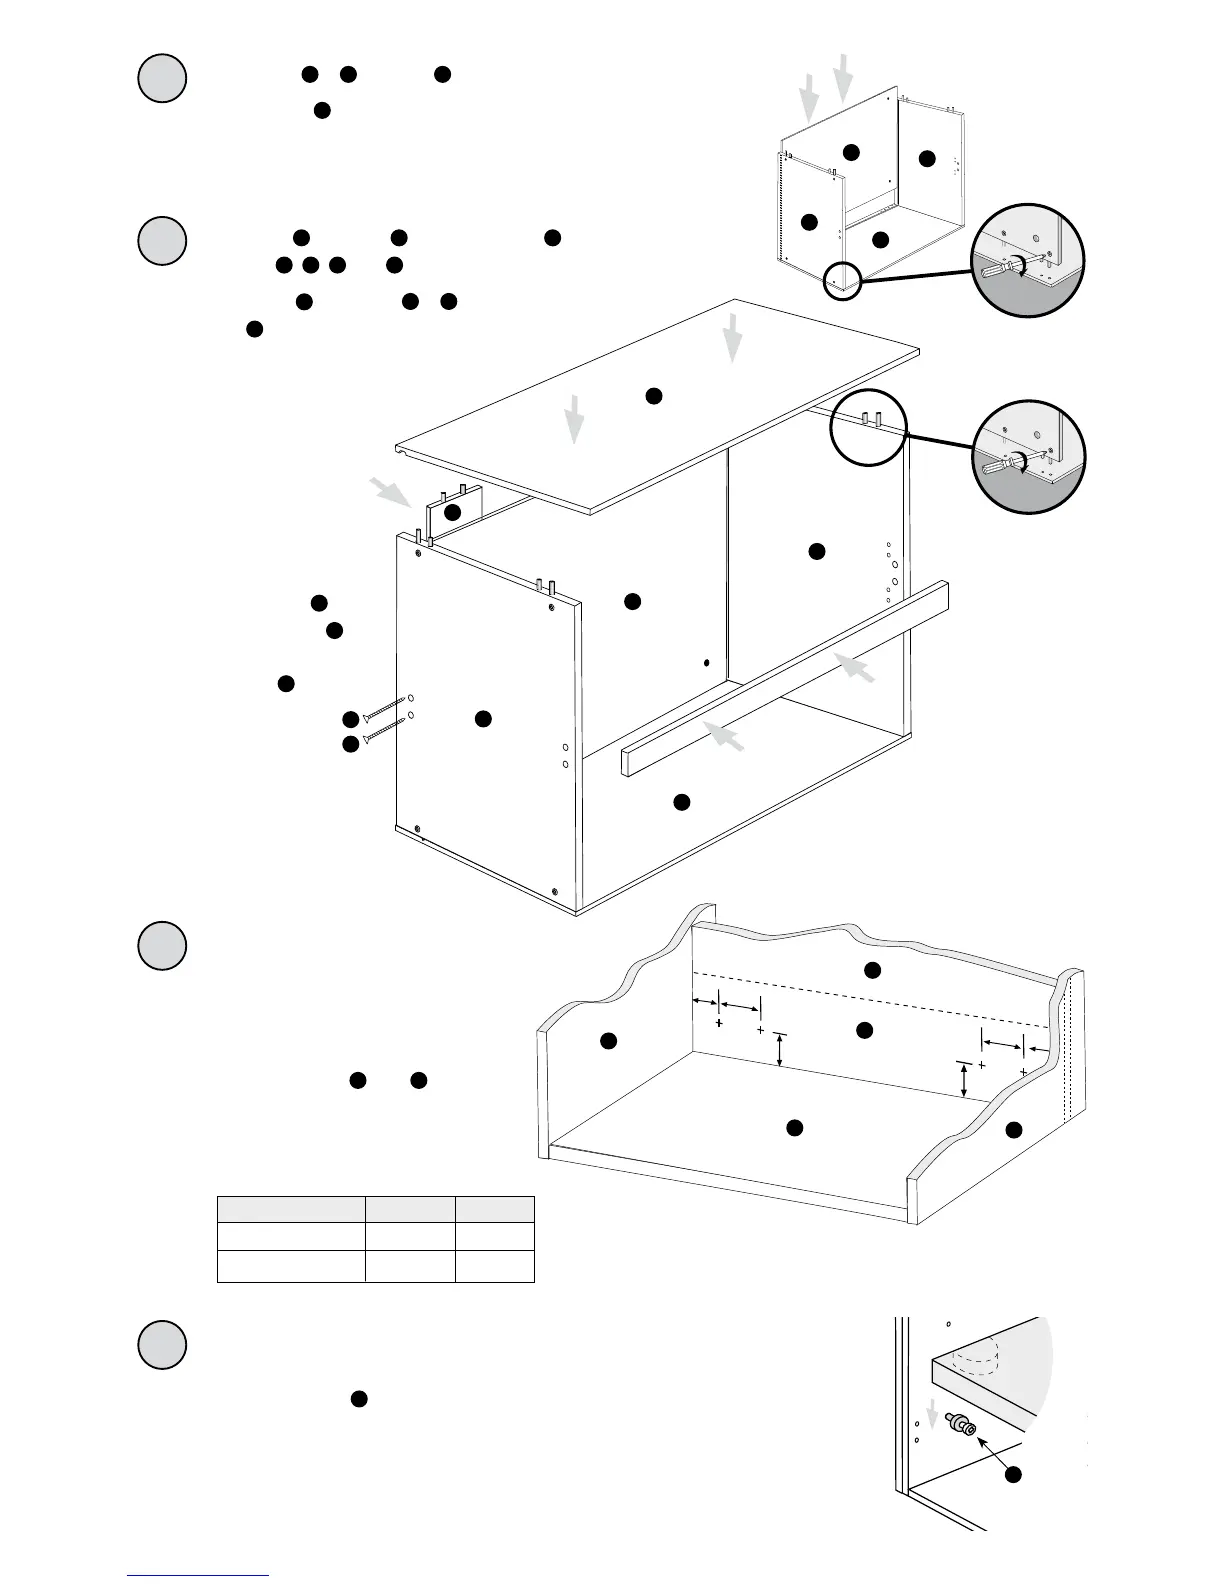
Fit panels & to panel , tightening metal cams as you go.
Slide panel into position.
3
5
4 1
1
3
4
5
2
3
4
5
7
17
A (mm) B (mm)
800mm Wall 60 100
1000mm Wall 60 150
5
7
1
2
4
A
B
1
2
3
Fully insert the shelf pegs , at required position, (the back of the plastic collar must
finish flush with the face of the side panel). Rest the shelf on the pegs, and line up with
the plastic inserts. Now tap down firmly to secure.
NOTE: To remove the shelf, gently tap up and take out, push shelf peg in turn anticlockwise
with a screwdriver and pull out.
B
B
Shelf Fitting
4
8
1
4
3
5
2
7
Fit panel to panel . Then, fit panel to
panels , , and .
Fit panel to panels & using
4 x screws.
Tighten metal cams.
8
3
4
H
Now secure the
base panel to
the back rail ,
using 2 x
screws .
4
7
H
H
H
It is recommended, when hanging this unit,
that additional fixings (not supplied)
are used at the bottom of the unit.
Using an appropriate drill bit,
four holes should be drilled
through panels and ,
in the suggested positions
indicated (refer to table below),
in order to achieve this.
5 7
CSS1110 01/12