®
January 2023 (v1.0)
10
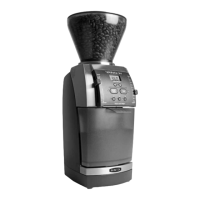
ENCORE ESP™ OPERATIONS MANUAL
CLEANING THE GROUNDS BIN, HOPPER AND BURRS
The grounds bin, hopper, hopper lid, and hopper gasket can be washed with warm, soapy water. Rinse and let air dry. Do not allow the burrs to get wet,
otherwise they will rust.
If the grinder is used daily, the burrs should be brushed o regularly (about once a month) with the included brush. The burrs do not need to be removed
from the grinder for cleaning, but it will allow for a more thorough cleaning. If dark, oily, or lavored coee is used often, grinder cleaning tablets may need
to be used in order to absorb the oils left behind by the coee. Is oil is left to build up in the grinder, it may become clogged, resulting in damage to the
grinder. Please follow grinder cleaning tablet manufacturer instructions for use. If a clog may have formed, see the following section for more information.
Do not grind any substance other than grinder cleaning tablets to clean the internals of the grinder.
A CLOGGED GRINDER
If coee is not falling into the grounds bin while grinding, and all parts are properly installed and functioning, a clog may be preventing the coee from
moving through the grinder. This can happen if coee is allowed to mound up past the maximum ill line on the grounds bin, or if dark, oily coee or
lavored coee is used often without periodically cleaning the grinder. Ground coee can stick to built-up coee oils in the grinder and cause a clog to
form. Regular cleaning and proper use can prevent a clogged grinder.
IN THE EVENT THAT A CLOG DOES FORM:
• Follow the steps on the previous page to remove the cone burr and parts underneath. This will allow for direct access to where the clog has formed.
• Empty out as much coee as possible in the grind chamber. The sides and bottom of the grind chamber are white plastic, and should be visible when
the coee has been cleaned out. Compacted coee can become very hard, so it is recommended that a sti tool, like a small hex wrench or the handle
of the provided cleaning brush, be used to chip away at the compacted coee.
• The center of the exit chute, where ground coee exits the grind chamber and falls into the grounds bin, is found directly underneath the red marker
on the grind adjustment ring when it is rotated fully counterclockwise. This chute must be completely clear for coee to exit into the grounds bin.
• If the unclogging attempt is unsuccessful, do not hesitate to contact Baratza support. Check the warranty section on the next page to ind out how to
contact Baratza support in your region.
SHIM KIT USE AND INSTALLATION
As the grinder is used, parts will settle into place, and the grind settings used may slowly shift so that a iner grind setting must be used. This is a normal
part of the wear process and will eventually stop as the parts are settled. However, in some cases, the inest grind settings may not be ine enough to
achieve the grind necessary. In this case, the shims provided in the original packaging may be used to shift the overall grind settings of the grinder. By
inserting one shim, the grind will shift by about ive settings. For example, if setting 10 was used before shim installation, setting 15 will be the rough
equivalent after shim installation.
TO INSTALL A SHIM:
1. Follow the instructions on previous pages to remove the hopper, ring burr, and cone burr.
2. After removing the cone burr, remove parts D and E as shown on the previous page.
3. Place one or two shims (as needed) on top of the other washer shims (Part F).
4. Reassemble.
If even after shim installation the grinder is not able to grind inely enough for espresso, there may be an issue with assembly or a part of the unit. See the
warranty page for information on how to contact Baratza support in your region for assistance.
 Loading...