EasyManua.ls Logo

Baratza Vario+ - User Manual

Baratza Vario+
13 pages
Print Icon
To Next Page IconTo Next Page
Loading...
®
January 2022 (v1.5)
VARIO+ OPERATIONS MANUAL
INTRODUCTION
Thank you for choosing the Vario+ coffee grinder! The
Vario+ makes it easier than ever to make professional
quality coffee at home.
The Vario+ is a compact, time-based grinder that is capable of grinding for
a wide range of brew methods. The Vario+ has a small footprint, an intuitive
control panel, and macro/micro adjustment levers for accurate grind adjustment.
The grinder is tted with 54mm at ceramic burrs. The replaceable ceramic burrs
generally last around 10 years of standard home use.
The included PortaHolder allows for convenient grinding directly into a
portalter. It can be adjusted to t various sizes of portalters.
Vario+

Other manuals for Baratza Vario+

Question and Answer IconNeed help?

Do you have a question about the Baratza Vario+ and is the answer not in the manual?

Summary

Introduction

Safety Information

General Safety Guidelines

Essential safety instructions for operating the Vario+ grinder, covering electrical safety, cleaning, and supervision.

Parts Identification

Grinder Setup

Initial Grinder Setup Steps

Instructions for placing the grinder, cleaning parts, installing the hopper, and connecting power.

Grinding Operation

Adjusting Grind Settings

Guidance on using the micro and macro adjustment levers for grind size control.

Grind Settings for Brew Methods

Table providing suggested grind settings for various coffee brewing methods.

Time Preset Programming

How to program and customize the three time presets for grinding.

Manual Grinding Mode

Instructions for continuous grinding without using presets.

Sleep Mode Functionality

Explanation of the automatic sleep mode and how to wake the grinder.

Burr Calibration

Recalibrating to Factory Settings

Step-by-step guide for recalibrating the grinder's burr settings.

Cleaning the Grinder

Removing the Hopper

Instructions on how to safely detach the bean hopper from the grinder.

Cleaning Hopper and Grounds Bin

Procedure for washing the hopper and grounds bin with warm soapy water.

Cleaning Burrs and Grind Chamber

Instructions for cleaning the burrs and grind chamber components.

Reinstalling Upper Burr Carrier

Procedure for correctly reattaching the upper burr carrier after cleaning.

Using Cleaning Tablets

Steps for cleaning the grinder internals using specialized cleaning tablets.

Warranty & Service

US & Canadian Warranty Information

Details on the 1-year warranty, coverage, and contact information for US and Canada.

International Warranty Information

Information on warranty and service provided by international retailers.

Product Registration & Proof of Purchase

Guidance on registering the grinder and the importance of sales receipts.

Repairs and Questions Contact

Contact details for support, repairs, and general inquiries.

Overview

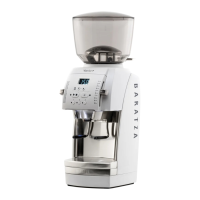
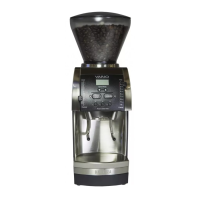
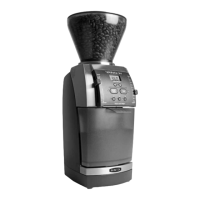
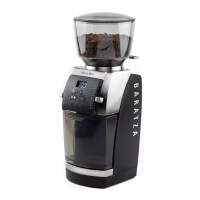
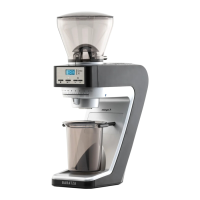
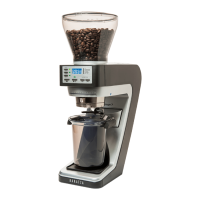
The Baratza Vario+ is a sophisticated and compact coffee grinder designed to deliver professional-quality grinding at home. It is a time-based grinder, meaning it operates for a set duration to produce a consistent amount of ground coffee. The Vario+ is equipped with 54mm flat ceramic burrs, which are known for their durability and ability to produce a wide range of grind sizes. These ceramic burrs are replaceable and are generally expected to last around 10 years with standard home use.

Function Description:

The primary function of the Baratza Vario+ is to grind roasted whole coffee beans for various brew methods. It offers precise control over grind size and duration, allowing users to achieve optimal extraction for their preferred coffee preparation. The grinder is designed to be intuitive and user-friendly, making it accessible for both novice and experienced home baristas.

Usage Features:

The Vario+ boasts several features that enhance its usability and versatility:

  • Intuitive Control Panel: The grinder features an easy-to-understand control panel that simplifies operation.
  • Macro/Micro Adjustment Levers: For accurate grind adjustment, the Vario+ incorporates both macro and micro adjustment levers. The micro adjustment lever knob, located to the left of the display, allows for smaller, fine-tuning changes to the grind size. The macro adjustment lever knob, situated to the right, is used for larger changes in grind size. Moving a lever arm up results in a finer grind, while moving it down produces a coarser grind. Twelve micro adjustment clicks are equivalent to one macro adjustment click, providing a granular level of control. When adjusting to a finer setting with coffee in the hopper, the motor must be running to prevent resistance from beans between the burrs.
  • Wide Range of Grind Settings: The Vario+ is capable of grinding for a diverse array of brew methods. It comes factory-calibrated to accommodate most brew methods, but users can recalibrate it if finer or coarser grinding is needed beyond the standard range. At finer settings (specifically 2Q and finer), the burrs may audibly contact each other, which is normal and will not damage the burrs if coffee is being ground. However, running the grinder without coffee while the burrs are touching for extended periods should be avoided to preserve burr lifespan.
  • Time-Based Grinding: The grinder operates based on time presets, ensuring consistent dosing.
  • Programmable Time Presets: The Vario+ includes three programmable buttons (labeled 1, 2, and 3) that come with standard time presets (10s, 15s, and 30s, respectively). Users can easily adjust these presets to their desired grind times. To program a preset, select the desired button, use the up or down arrow buttons to adjust the time, and then press and hold the numbered preset button for 3 seconds until the display blinks, indicating the new setting is stored. These settings are retained even if the grinder is unplugged.
  • Manual Mode: For continuous grinding without using a preset, users can select the "MANUAL" button and then "START/STOP." The grinder will run, counting up the seconds, until "START/STOP" is pressed again or a maximum run time of 60.0 seconds is reached.
  • PortaHolder: The grinder comes with an included PortaHolder, which allows for convenient grinding directly into a portafilter. The PortaHolder arms are adjustable to fit various sizes of portafilters. To adjust, pull the PortaHolder out, loosen the two screws in the back with a Phillips head screwdriver, move the arms to fit the portafilter, and then tighten the screws.
  • Grounds Bin: Alternatively, the PortaHolder can be removed and replaced with the included grounds bin for grinding into a container.
  • Bean Shut-off Knob: The hopper features a bean shut-off knob, allowing users to close off the bean flow, which is useful for removing the hopper with beans still inside.
  • Sleep Mode: To conserve energy, the Vario+ automatically enters "sleep mode" after 3 minutes of inactivity, indicated by a blank screen. Any button press will "wake up" the grinder.
  • Hopper Installation: The hopper must be properly locked into place to engage a microswitch, allowing the grinder to operate. This involves placing the hopper on top of the grinder with the shut-off knob pointing toward the back left, pushing down, and rotating clockwise until it locks.

Maintenance Features:

Regular cleaning is crucial for maintaining the grinder's performance, especially with darkly roasted, oily, or flavored coffees.

  • Routine Cleaning: For standard home use, the grinder should be cleaned at least once per month. More frequent cleaning may be necessary for certain types of coffee.
  • Hopper and Grounds Bin Cleaning: The hopper, hopper lid, and grounds bin should be hand-washed with warm soapy water and a soft sponge or cloth, then air-dried or dried with a clean cloth. These parts should not be put in a dishwasher.
  • Grinder Housing Cleaning: The grinder housing should only be cleaned with a dry or slightly damp cloth. The grinder, plug, or cord should never be immersed in water or any other liquid.
  • Burr and Grind Chamber Cleaning: To manually clean the burrs and grind chamber, the upper burr carrier needs to be removed. This is done by placing the included burr removal tool on the upper burr carrier, interlocking the notches with the wings, and rotating clockwise to unscrew it. Once unscrewed, the upper burr carrier can be lifted off.
  • Upper Burr Carrier and Upper Burr Cleaning: A non-metal, bristle brush (like a toothbrush) can be used to clean around the burr carrier and the surface of the top burr. For a deeper clean, the burr can be removed from the carrier by loosening screws with a small flat-head screwdriver. After cleaning, reinstall the burr and screws, taking care not to overtighten.
  • Grind Chamber, Lower Burr Carrier, and Lower Burr Cleaning: The lower burr carrier is generally not recommended for removal. A non-metal, stiff bristle brush can be used to clean the area around the lower burr and its surface. For a deeper clean of the lower burr, the burr can be removed from its carrier by loosening screws with a small flat-head screwdriver. After cleaning the burr, carrier, and coffee exit chute, reinstall the burr and screws, avoiding overtightening.
  • Cleaning Tablets: Grinder cleaning tablets are a supplementary cleaning method designed to absorb odors and coffee oil residue. They should be used with an empty hopper, with the grind setting adjusted to 10. After grinding the tablets, it is recommended to grind approximately 30g of coffee to remove any tablet residue before discarding the ground tablets/coffee. Cleaning tablets do not replace manual cleaning steps or clear clogs.
  • Burr Calibration: If the grinder is not achieving the desired fineness or coarseness, it can be recalibrated to factory settings. This involves emptying beans, lowering both adjustment levers, running the grinder to expel residual coffee, inserting a calibration tool into the calibration port, running the motor, and then adjusting the macro and micro arms while listening for burr contact. If burr contact is not heard at setting 2Q, the calibration screw can be turned with the tool towards the finer direction until a change in motor pitch is heard. If burr contact occurs before 2Q, the calibration screw can be loosened. The calibration point can be set anywhere between 1A and 3Q based on user preference.

Baratza Vario+ Specifications

General IconGeneral
Grind Settings230
Burr Size54mm
Hopper Capacity8oz (230g)
MotorHigh torque DC motor
Motor Speed1350 RPM
Warranty1 year
Burr TypeFlat ceramic burrs
Grind AdjustmentMacro/Micro
Voltage120 V

Related product manuals