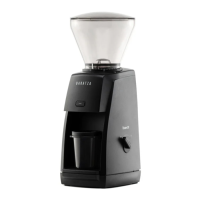
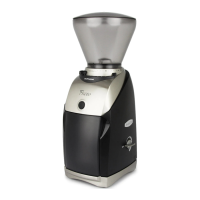
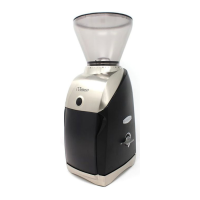
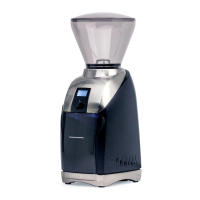
The Baratza Encore ESP is a coffee grinder designed to provide barista-quality coffee with ease, offering a range of grind settings suitable for various brewing methods, from fine espresso to coarse cold brew. Its user-friendly design and thoughtful features make it accessible for both novice and experienced coffee enthusiasts.
Function Description
The primary function of the Encore ESP is to grind roasted whole coffee beans to a desired consistency. It features a conical burr grinding mechanism, which is known for producing a consistent grind, crucial for optimal coffee extraction. The grinder is equipped with a unique adjustment system that allows for precise control over grind size. This system is divided into two main ranges: an espresso range (settings 1-20) and a filter coffee range (settings 21-40). The espresso range offers very small, incremental changes in grind size, essential for dialing in the perfect espresso shot. The filter coffee range, while still precise, provides larger changes between settings to accommodate the broader requirements of brewing methods like AeroPress, Hario V60, automatic brewers, Chemex, and French Press.
The grinder operates using either an on/off switch or a pulse button. The on/off switch allows for continuous grinding, while the pulse button provides more precise control for grinding small amounts of coffee or for specific timing needs. The design ensures that the grinder will not start without the bean hopper properly installed, enhancing safety during operation.
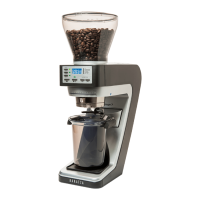
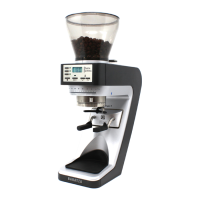
For espresso preparation, the Encore ESP includes an espresso dosing cup and a 58mm adapter ring. These accessories facilitate the direct transfer of ground coffee into a 54mm or 58mm portafilter, streamlining the workflow for espresso users. When grinding for other filter brewing methods, a grounds bin with a maximum fill line is provided to collect the ground coffee.
Usage Features
The Encore ESP emphasizes ease of use from initial setup to daily operation.
Initial Setup:
- Unpacking and Cleaning: Upon unboxing, users are instructed to hand-wash the hopper lid, bean hopper, dosing cup, and grounds bin with warm, soapy water and allow them to air dry. It's crucial not to wash the ring burr with water to prevent rust.
- Hopper Installation: The bean hopper is installed by aligning the silver grind setting indicator with a triangle near grind setting 40, then pressing down and twisting clockwise until it clicks into place. A key safety feature is that the grinder will not operate if the hopper is not correctly installed. If difficulty arises, users are advised to ensure the ring burr is fully seated and the grind adjustment ring is rotated fully counterclockwise.
- Collection Bin Selection: Depending on the brewing method, users insert either the dosing cup base and dosing cup for espresso or the grounds bin for filter brewing.
- On/Off Knob Installation: The on/off knob is aligned with the switch stem on the right side of the unit and pressed into place.
Grinding Operation:
- Grind Setting Selection: Users rotate the hopper to align the grind setting indicator with their desired grind setting.
- Grind Adjustment: When adjusting the grind setting, it is recommended that the grinder be either running or completely empty of beans to prevent damage.
- Espresso Dosing: For espresso, the included dosing cup and 58mm adapter ring simplify the process. Users can grind directly into the dosing cup, then invert a portafilter on top of the cup and flip both over to seamlessly transfer the grounds into the portafilter basket. If using a 54mm portafilter, the adapter ring should be removed.
- Starting the Grinder: Grinding can be initiated by rotating the on/off switch to the "I" position for continuous operation or by pressing and holding the pulse button for controlled, short bursts of grinding. Users are cautioned not to leave the grinder unattended while grinding and to empty the grounds bin before the coffee reaches the maximum fill line to prevent clogging.
Recommended Grind Settings:
The manual provides a table of suggested starting grind settings for common brew methods:
- Espresso: 15
- AeroPress: 22
- Hario V60: 25
- Automatic Brewer: 28
- Chemex: 30
- French Press: 32
These settings are based on a medium roast and an 18g dose for espresso, with adjustments recommended for darker/lighter roasts or larger/smaller doses.
Maintenance Features
Regular care and cleaning are essential for maintaining the performance and longevity of the Encore ESP. The design allows for easy removal of key components for cleaning.
Removing and Reinstalling the Hopper:
- Removal: All coffee beans must be removed from the hopper, and any remaining beans ground through. The grinder must be unplugged. The hopper is then rotated fully counterclockwise to align with grind setting 40 and lifted off. Users are advised to ensure the hopper gasket is not lost during this process.
- Reinstallation: After cleaning, ensure the hopper gasket, ring burr, and cone burr are properly installed. The grind adjustment ring should be rotated fully counterclockwise using its tabs. The hopper is then aligned with the grind setting indicator at 40, pushed down, and rotated clockwise until it clicks.
Removing and Reinstalling the Ring Burr:
- Removal: With the grind adjustment ring rotated fully counterclockwise, the ring burr can be lifted straight up using its lifting tabs.
- Reinstallation: Ensure the cone burr is in place. Rotate the grind adjustment ring fully counterclockwise. Align the red burr lifting tab with the red mark on the grind adjustment ring, ensuring the three tabs on the ring burr align with the slots in the adjustment ring. Press the ring burr into place and verify the hopper gasket is correctly seated.
Removing and Reinstalling the Cone Burr:
The Encore ESP features a quick-release knob on the cone burr for easy removal.
- Removal: Twist the quick-release knob clockwise until it is removed, along with a small washer underneath. The cone burr can then be lifted out. If the knob is difficult to remove, a thick cloth, glove, or pliers can be used for grip.
- Reinstallation: If parts below the cone burr were removed, they should be placed back on the drive shaft in the correct order. When placing the cone burr, ensure its protrusions fit into the holes on the paddle wheel and its divots align with the drive shaft. The quick-release knob is then twisted counter-clockwise onto the threaded part of the drive shaft until the cone burr starts to rotate when the knob is turned, indicating it's tightened.
Cleaning the Grounds Bin, Hopper, and Burrs:
- Washable Components: The grounds bin, hopper, hopper lid, and hopper gasket can be hand-washed with warm, soapy water and air-dried. These components should not be placed in a dishwasher.
- Burr Cleaning: The burrs should be brushed off regularly (about once a month) using the included brush. It is crucial not to wash the burrs with water, as they will rust. For more thorough cleaning, the burrs can be removed.
- Addressing Oily Coffee: If dark, oily, or flavored coffees are used frequently, grinder cleaning tablets may be necessary to absorb oils that can build up and cause clogging. Users should follow the cleaning tablet manufacturer's instructions and never grind any substance other than cleaning tablets to clean the grinder's internals.
Troubleshooting Clogs:
If coffee is not falling into the grounds bin, a clog may be present. This can occur if the grounds bin overflows or if oily coffee residues build up.
- Remove the cone burr and underlying parts as described.
- Empty as much coffee as possible from the grind chamber. Compacted coffee can be hard, so a stiff tool (like the cleaning brush handle or a small hex wrench) can be used to chip it away.
- Ensure the exit chute, located directly underneath the red marker on the grind adjustment ring when rotated fully counterclockwise, is completely clear.
- If unclogging is unsuccessful, Baratza support should be contacted.
Shim Kit Use and Installation:
Over time, grind settings may shift. A shim kit is provided to adjust the overall grind settings if the grinder is no longer able to achieve fine enough grinds for espresso.
- Installation: Remove the hopper, ring burr, and cone burr.
- Remove the paddle wheel and drive shim.
- Place one or two shims (as needed) on top of the existing washer shims.
- Reassemble the grinder. If the grinder still cannot grind finely enough after shim installation, it may indicate an assembly issue or a faulty part, and Baratza support should be contacted.
The manual emphasizes several safety precautions:
- Use only with AC current and the correct voltage.
- Clean the grinder housing with a dry or slightly damp cloth; do not immerse the grinder, plug, or cord in water.
- Baratza is not liable for damage if the grinder is used for purposes other than grinding roasted whole coffee beans or is improperly operated/repaired.
- Keep the appliance and cord out of reach of children under 8 years.
- Do not operate with a damaged cord or plug; replacement must be done by the manufacturer or qualified persons.
- Do not leave the grinder unattended when ON.
- Children aged 8 and above, and persons with reduced capabilities, can use the appliance with supervision and instruction.
- Cleaning and user maintenance should not be done by children without supervision.
- Always unplug the grinder before assembly, disassembly, or cleaning. Grasp the plug, not the cord, to unplug.
The Baratza Encore ESP is a comprehensive coffee grinder designed for precision, versatility, and ease of maintenance, ensuring a high-quality grinding experience for a wide range of coffee preparations.