Do you have a question about the Baratza Starbucks Barista and is the answer not in the manual?
Ensure the grinder is unplugged from the power supply before starting.
Observe the cone burr's spinning direction under power to determine motor polarity.
Lift safety interlock and remove screws to detach the gearbox/motor assembly.
Unplug the motor and lift the gearbox/motor assembly from the chassis.
Reinstall spade clips ensuring correct wire-to-terminal connection for polarity.
Place gearbox/motor assembly back, plug in motor, and secure with screws.
Return safety interlock switch to its posts with the actuator facing inward.
Re-install the grinder case and return the unit to operation.
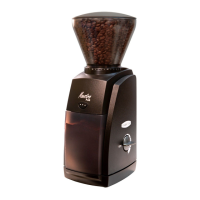
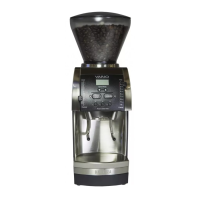
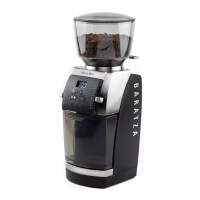
This manual outlines the process for checking and changing the motor polarity of various Baratza grinders, including the Starbucks Barista (Baratza Version), Maestro, Maestro Plus, Virtuoso, Preciso, Encore, and Virtuoso+. The procedure is designed to be completed in approximately 10 minutes and is rated as "Easy" in difficulty.
The primary function of this guide is to ensure that the cone burr of the grinder spins in the correct direction, which is clockwise. Incorrect motor polarity can lead to the cone burr spinning counter-clockwise, potentially affecting grinding performance and consistency. The guide provides clear instructions on how to identify the current spinning direction and how to rectify it if it's incorrect.
Before beginning any maintenance, a crucial safety step is emphasized: always unplug the grinder from its power supply. This prevents accidental activation and potential injury during the repair process. The first step in the procedure involves removing the grinder's outer case, for which a separate "Case Removal" guide is referenced, indicating that this is a prerequisite for accessing the internal components.
To check the motor polarity, users are instructed to observe the cone burr spinning under power. The guide visually distinguishes between "CORRECT POLARITY," where the cone burr spins clockwise, and "REVERSE POLARITY," where it spins counter-clockwise. This visual check is the diagnostic step that determines whether further action is needed.
If reverse polarity is detected, the guide details the steps to correct it. The necessary tools for this task include a flat head screwdriver, a T10 driver, and a Phillips driver. The process begins by lifting the safety interlock switch off its posts. This switch is a safety mechanism that prevents the grinder from operating when certain parts are not correctly assembled.
Next, the user must remove three screws that secure the gearbox/motor assembly to the chassis. The manual notes that these screws could be either Phillips head or Torx size 10, requiring the user to have both types of drivers available. After removing these screws, the motor needs to be unplugged from its connection point, and then the entire gearbox/motor assembly can be lifted from the chassis. A specific connection point for unplugging the motor is highlighted in the illustrations.
The core of the polarity correction involves re-wiring the motor. The guide instructs the user to remove the spade clips from the bottom of the motor. When re-installing these clips, it is critical to ensure that the red wire connects to the terminal marked with a red indicator or excess white material. Conversely, the black wire connects to the other terminal. This specific wiring configuration dictates the direction of the motor's rotation.
Once the wiring is corrected, the gearbox housing/motor assembly is set back into the chassis, and the motor is plugged back in. The three screws that mount the parts together are then re-secured, ensuring the assembly is firmly in place.
The final steps involve reassembling the grinder. The safety interlock switch is returned to its posts, with an important note to ensure the actuator faces inward for proper function. After these internal components are secured, the outer case of the grinder is re-installed. Once the case is back on, the unit is ready to be returned to operation.
The guide also provides contact information for support, encouraging users to reach out to support@baratza.com if they have any questions or encounter issues during the process. This emphasizes Baratza's commitment to customer assistance and ensures that users can successfully complete the maintenance task. The document includes version control information, indicating it is version 1.0 and was revised on August 6, 2019, suggesting ongoing updates and improvements to their documentation.
| Manufacturer | Baratza |
|---|---|
| Grinder Type | Burr |
| Burr Type | Conical |
| Grind Settings | 40 |
| Hopper Capacity | 8 oz |
| Material | Plastic |