4
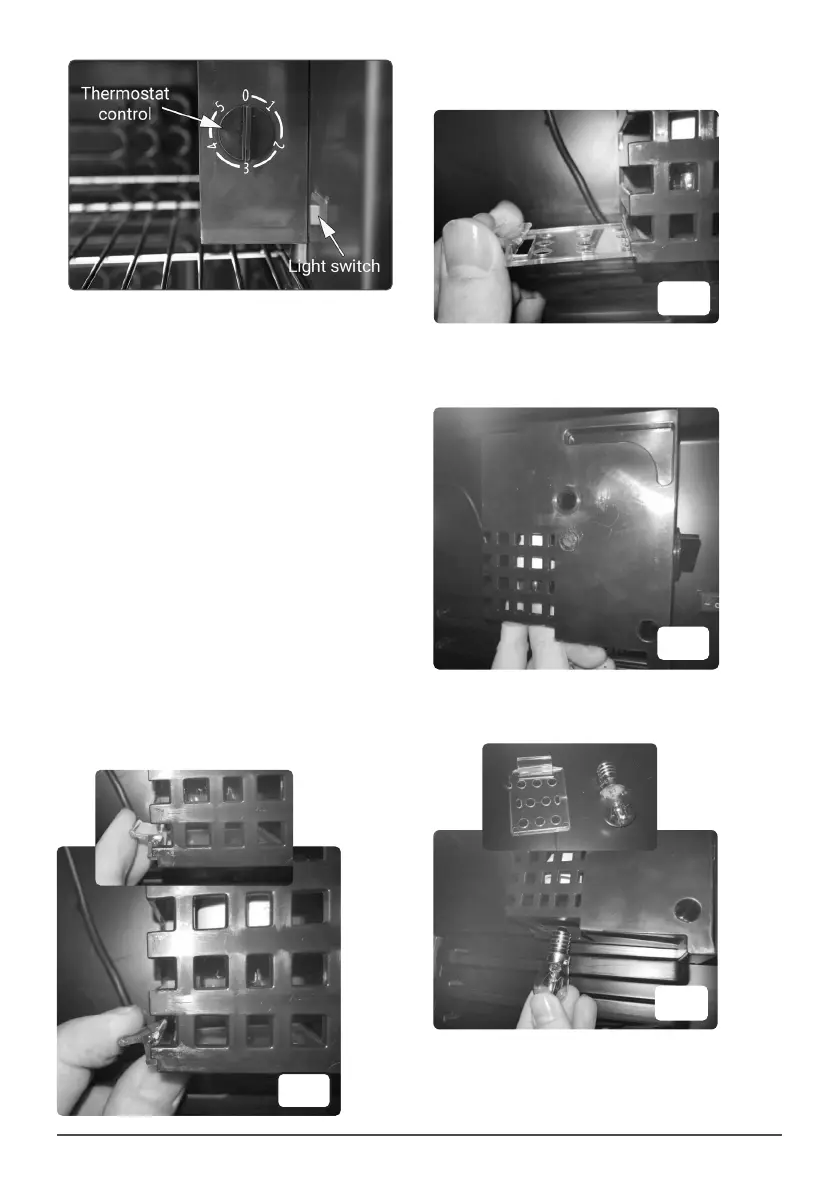
• Slide out the bulb cover and put it somewhere
safe. (Fig. 2).
• Carefully unscrew the bulb (anti clockwise)
until it comes away from the unit (Fig. 3).
• Screw in the replacement bulb rmly (do not
over tighten. Fig. 4).
• MAINTENANCE
• Remove the power plug from the supply when
performing cleaning or maintenance.
• DO NOT use abrasive or chemical cleaning
materials on any surface of the unit.
• Wipe interior and exterior surfaces with a
damp cloth and dry thoroughly with a clean
dry cloth.
• For more soiled surfaces use a neutral
detergent, wipe down with a clean damp cloth
and dry thoroughly with a clean dry cloth.
• CHANGING THE BULB
• WARNING! Switch off and disconnect the
fridge/chiller from the power source prior to
attempting any maintenance.
• The bulb housing is positioned at the back of
the thermostatic control unit inside the chiller.
• Remove any product from that area of the
chiller cabinet to give good access and
visibility.
• Pull down on the clear bulb cover tab locking it
into the housing (Fig. 1).
Fig. 1
Fig. 2
Fig. 3
Fig. 4
 Loading...