5
• NOTE: Ensure a rm leak proof location within
the tap body. Relocate centre section back to
original position.
• MOUNTING A UNIVERSAL KEG
• NOTE: Allow beer to fully settle before
attempting to t dispensing unit.
• NOTE: DO NOT leave keg standing in direct
sunlight or near a heat source.
• NOTE: It is recommended that you allow the
keg to cool for some time before use.
• NOTE: Carefully read any information
provided by the beer manufacturer that
relates to the keg and its operation.
• If tted, remove keg safety clasp according to
keg manufacturers instructions.
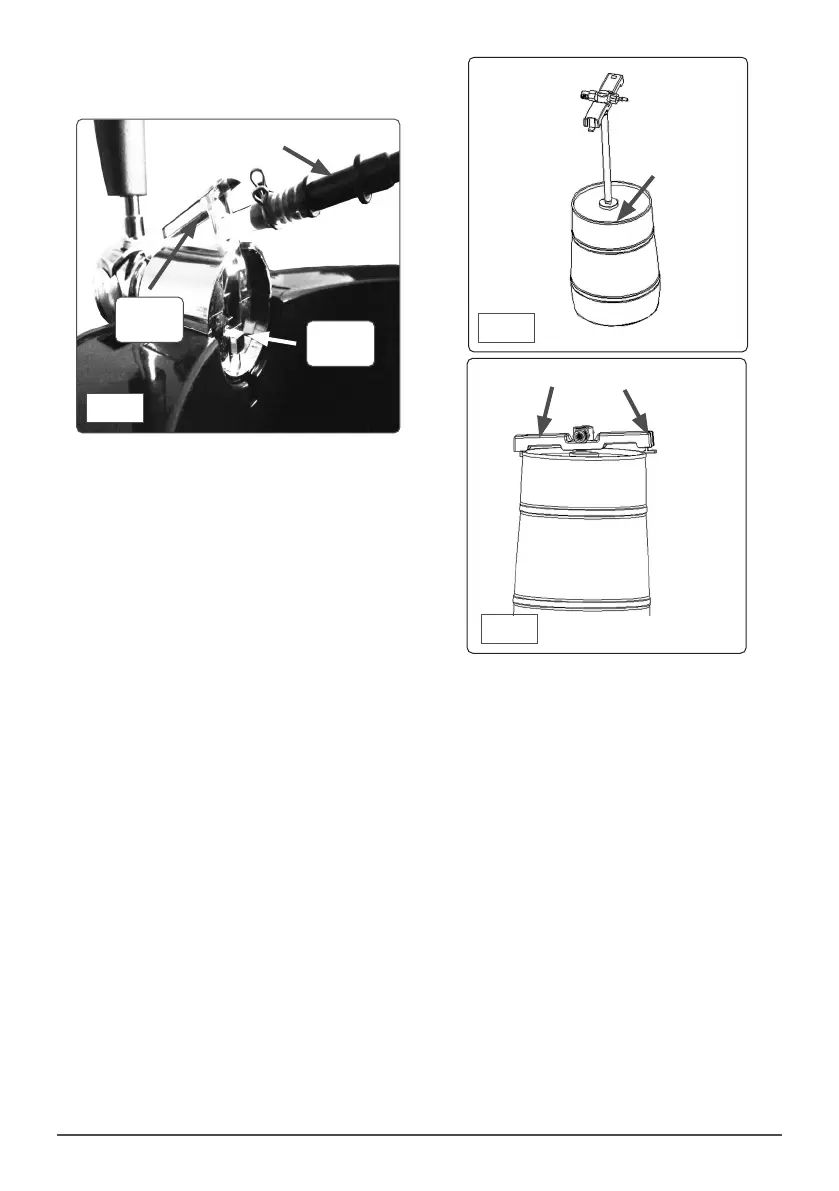
• Pierce keg seal with beer dispensing unit
probe (g.6).
• Push the tube down as far as it will go in
order to be able to t dispenser unit onto keg
rim.
• If the keg seal is of the type that is fully
removable, use the supplied tapered seal
(g.11) to make a leak proof seal.
• NOTE: The dispensing unit has a directional
arrow that indicates the direction of CO
2
ow
through it.
• Ensuring directional ow as described above,
x dispensing unit into keg rim using the rim
of the keg to provide grip (g.7).
• Clip left side to keg rim and close opposite
side of clip under keg rim.
• Connect CO
2
feed pipe and beer delivery tube
to either side of the unit by depressing white
tabs to allow full and leak proof engagement.
• MOUNTING A HEINEKEN KEG
• NOTE: Heineken kegs are pre-charged
with CO
2
and DO NOT need the use of the
regulator.
• NOTE: Before connecting the keg ensure that
the tap is in the fully closed position.
• Remove the plastic cap from the keg using a
at head screwdriver.
• Using the Heineken adaptor (g.9) and before
tting it to the keg, attach the clear beer tube
to the Heineken adaptor and the other end to
the tap unit (g.8).
• Mount the adaptor into the keg by pressing it
into keg hole and clipping it in place.
• Carefully close the top cover.
• To remove the adaptor squeeze side tabs to
avoid damaging the adaptor (g.9).
Release
Button
Connection direct
To dispensing unit
Pierce keg seal
And push down
Clip unit under keg rim
Fig.5
Fig.7
Fig.6
Centre
section
 Loading...