Do you have a question about the Barn Owl RangeCam and is the answer not in the manual?
Instructions for charging standard and premium solar panels via power adapter or USB.
Steps for activating the camera via quick setup (QR code) or manual setup (IMEI/SIM).
Procedure for testing camera functionality and deploying it, including expected results.
Configuration of motion and periodic triggers, including types, examples, and tips.
Information on help resources, return policy, warranty, optional care service, and contact details.
This document serves as a user guide for the Barn Owl RangeCam, a device designed for remote monitoring and image capture, likely for security, wildlife observation, or property surveillance. It details setup, operation, and maintenance procedures.
The Barn Owl RangeCam is a remote camera system that captures images based on various trigger settings and transmits them for viewing via a web application. It is designed for outdoor use, powered by a solar panel, and communicates wirelessly using a SIM card. The system allows users to monitor remote locations, receive test images, and manage camera settings through a smartphone or computer. Key functionalities include motion-triggered image capture, periodic image capture, and on-demand image capture.
1. Charging the Solar Panel: * Standard Solar Panels: Charge for 3-4 hours using a power adapter connected to the 12V IN Port. Then, connect the solar panel to the camera via the 12V OUT Port. * Premium Solar Panels: Charge for 3-4 hours using a USB connector connected to the 5V IN Port. Then, connect the solar panel to the camera via the 12V OUT Port. * A "CHARGE INDICATOR" light and "TEST BUTTON" are present on the solar panel for operational checks.
2. Account Creation and Camera Activation:
* Quick Setup:
* Scan the camera's QR Code with a smartphone camera app.
* Click the link that appears to register an account and automatically add the camera.
* Enter billing details.
* Note: Not all cameras have QR codes; check the box front or enclosure door.
* Manual Setup (if no QR code):
* Unlatch and open the camera.
* Identify the IMEI and SIM numbers.
* Register by typing app.barnowl.tech in a web browser or scanning the QR code on the camera box.
* Type in the IMEI/SIM numbers.
* Enter billing details.
* Required Information: IMEI number and SIM number are crucial for activation.
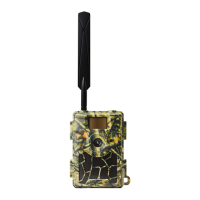
3. Test and Deploy: * Steps: * Attach antenna(s). * Insert SIM and SD Cards:
*   **Test & Deploy Details:**
    *   Flip the camera switch to "Setup."
    *   Wait for the "Searching" message to disappear.
    *   Press "OK" to send a Test Image.
*   **Expectation:**
    *   "Send FTP" appears on the screen.
    *   "Send Succeed" appears on the screen.
    *   Test Image is received (viewable in the WebApp Gallery).
    *   If the image is received, turn the camera to "On" to begin field use.
    *   *Note:* When the camera is "On," the screen will turn off.
4. Camera Settings (via Barn Owl HQ web app): * Accessing Settings: Select the three dots below an image in the gallery to access camera options, then choose "camera settings." * Trigger Settings: Determine how and when photos are taken. * Motion Trigger: When "ON," the camera automatically triggers on motion. * Trigger Delay: Time delay between motion triggers, displayed as HH:MM:SS. * Periodic Trigger: Time delay between automatically-recurring triggers, regardless of motion, displayed as HH:MM. * Trigger Window: Time window during which the camera operates, displayed as HH:MM-HH:MM.
BarnOwl.tech/Faq.BarnOwl.tech/instructions.Support@BarnOwl.tech.| Brand | Barn Owl |
|---|---|
| Model | RangeCam |
| Category | Scouting Camera |
| Language | English |