6
Pre-tension cable on guide A and B by pulling as much
slack through the locker by hand (Fig. 17). Make sure
the cable is rounding the last turn of the guide by
looking down the post (Fig. 16). This step is crucial to
attain proper nished tension. Wearing a glove may
help while pre-tensioning. Ensure that the cable is
centered in the cable guide while pulling tight (Fig. 16).
Use an impact driver or power drill tighten the
socket to tighten the bolt at
the end of the locker (Fig. 18a). Do this for both
lockers at each post until spring is no longer visible
(Fig. 18b) (Initial tensioning complete). Complete
this step for all sections.
Final tensioning. Push down on top row of cable
rmly. The spring near cable guide A should be
visible once again. Using your drill and
tension the bolt until spring is no longer visible
(Fig 18c). Complete same procedure for cable
guide B, but instead, push on bottom row of cable
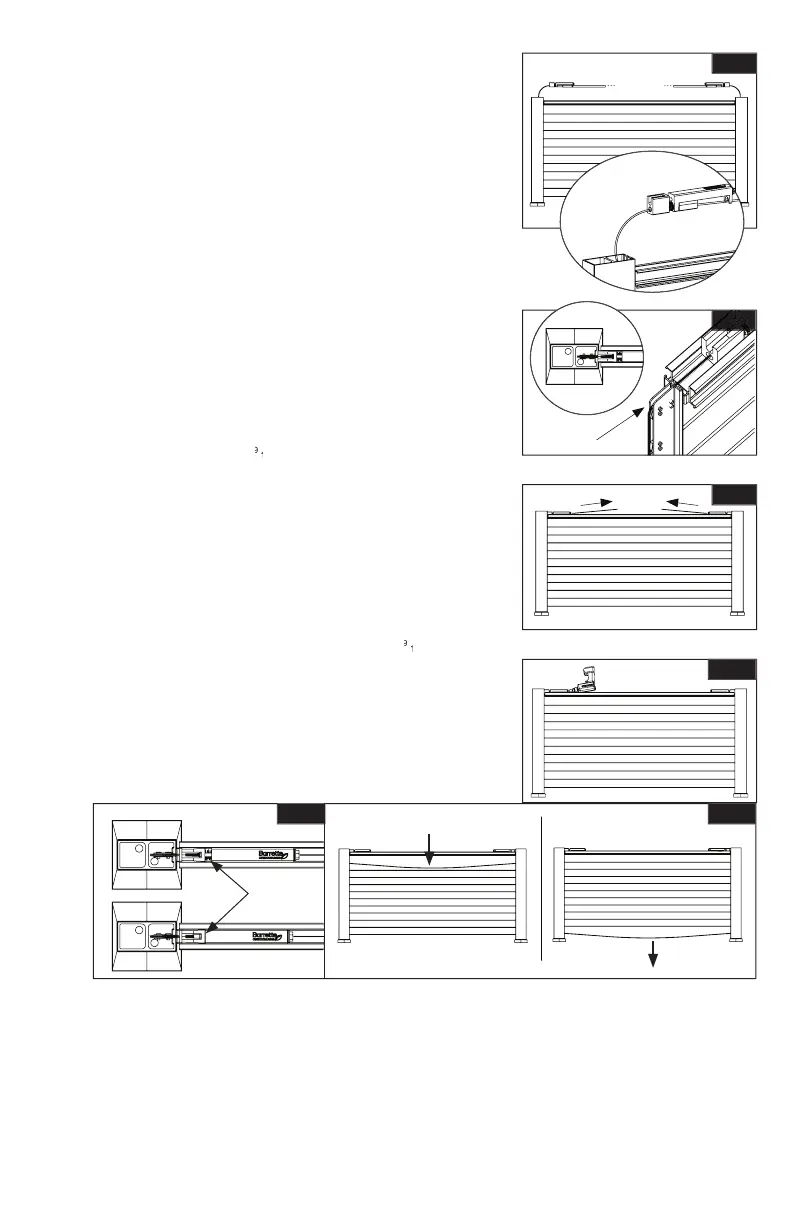
Feed the excess cable from each post into the locker
mechanisms (Fig. 15). Make sure the cable is rounding
the last turn of the guide by looking down the post
(Fig. 16). Place locker mechanism into the channel of
the top beam as close to the post as possible.
Fig. 15
Fig. 16
Fig. 17
Fig. 18a
Fig. 18b Fig. 18c
Cut excess cable leaving approximately 12"
remaining from each guide. This excess will remain