9
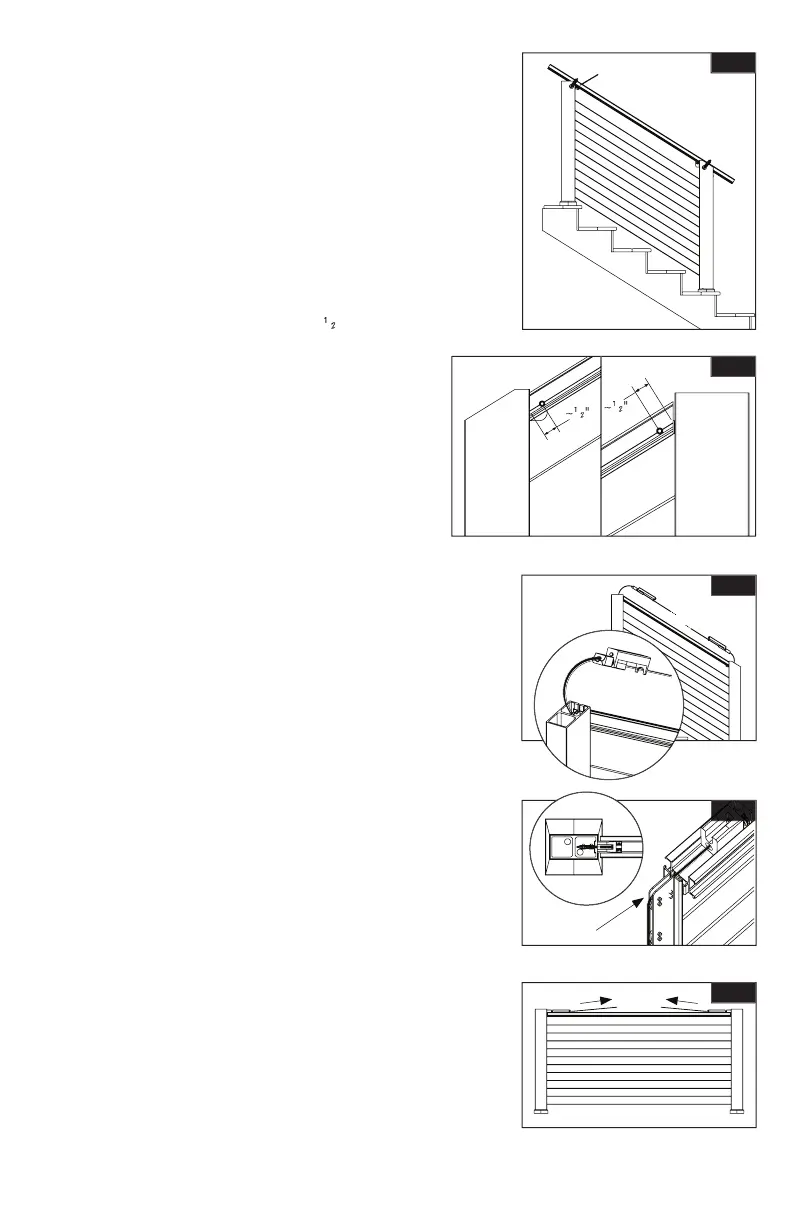
a. Clamp top beam on the side of the stair posts aligning
it with the brackets. Mark the beam at the posts
(Fig. 29). Cut the top beam on that mark and on
Top of the beam has the larger open channel. Be
sure the beam is oriented the correct way before
b. Place beam between posts and press onto brackets.
Use provided hex head screws and attach one screw
at the end of the beam at each post (one at upper
post and one at lower post). Use the line etched into
the beam as a guide for your screw. Screw should be
on the line and approximately
Fig. 29
Fig. 30
Fig. 31
a. Feed cable through tension spring B and tensioner.
Place tension spring B and tensioner into top beam at
b. Make sure the cable is rounding the last turn of the
guide by looking down the post (Fig. 32). Pull all
slack through the tensioner. Also ensure the tension
spring stays in place in the beam at the post before
c. Locate tension spring A and repeat step 5 at top of
Fig. 32
Pre-tension cable on guide A and B by pulling as much
slack through the locker by hand (Fig. 33). Make sure the
cable is rounding the last turn of the guide by looking
down the post (Fig. 32). This step is crucial to attain
proper nished tension. Wearing a glove may help while
pre-tensioning. Ensure the cable is centered in the cable
guide while pulling tight (Fig. 32).
Fig. 33